♥ Welcome ♥

♥ My Blinkie ♥

♥How Does Your Garden Grow?♥

Supplies Needed
Scrapkit by Ali called Hot Summer Shades this is FTU you can download kit from
Here
Tube of choice im using ©Keith Garvey he is no longer selling at MPT this is where i brought hes art work & my license
But you can find all hes tubes PSPTubes Emporium i have the link on the right hand side of my blog under Please Read
Mask WSL_Mask38 at weescotslass Here
Font of choice or the one im using is Lamplighter Script
Lets Get Started
Open new image 650x550
Open DBA PAPER 6 copy paste as new layer apply mask merge group
Open DBA GLITTER SWIRL 1 copy paste as new layer resize 65 percent effects Enhance add drop shadow
Open DBA GREEN PLANT 3 copy paste as new layer resize 60 percent image rotate by 20 left add drop shadow
Open DBA COLOURED PLANT 1 copy paste as new layer resize 55 percent add drop shadow
Open DBA FLOWER 1 copy paste as new layer resize 45 percent duplicate mirror add drop shadow
Open DBA BUTTERFLY 1 copy paste as new layer resize 25 percent add drop shadow
Open tube copy paste as new layer add drop shadow
Add your name & the words How Does Your Garden Grow? Font Lamplighter Script forground #e63d05 background #ea8d19 add drop shadow
Add your copyright info
resize & save your tag
Love to see your results please email to me so i can put in my show off blog
Thankyou ♥
Written by ©Lyn(akaAngel) 26th Febraury 2011, any similarity to any other tutorial is purely coincidental!

♥ Cute & Adorable ♥

Supplies Needed
Scrapkit by Treasures by Terry called Love My Lipstick this is FTU you can download kit from
Here
Cookie of choice im using ©Lisa K this is FTU Here
Mask WSL_Mask 84 at weescotslass Here
Font of choice or the one im using is BickhamScriptFancy2 BickhamScriptFancy2
Lets Get Started
Open new image 650x550
Open Paper 8 - TbT copy paste as new layer apply mask merge group duplicate merge down
Open Frame 5- TbT copy paste as new layer with magic wand click in frame modify expand by 2
open Paper 20 - TbT copy paste as new layer invert delete on keyboard select none drag paper under frame add drop shadow to frame
Open Flower 9 - TbT copy paste as new layer add gradient glow & add drop shadow
Open Ribbon 1 - TbT copy paste as new layer resize 75 percent then again at 80 percent
Open Rose 3 - TbT copy paste as new layer image rotate 90 percent flip add drop shadow
Open Butterfly 1 - TbT copy paste as new layer add drop shadow
Open cookie copy paste as new layer add drop shadow
Add the words Cute & Adorable Font Lamplighter Script forground #d71c67 background #ffffff add drop shadow then add gradient glow
Add your name Font BickhamScriptFancy2 forground #d71c67 background #ffffff add drop shadow then add gradient glow
Add your copyright info
resize & save your tag
Love to see your results please email to me so i can put in my show off blog
Thankyou ♥
Written by ©Lyn(akaAngel) 25th February 2011, any similarity to any other tutorial is purely coincidental!
♥ Whisper ♥

Supplies Needed
Scrapkit by Treasures by Terry called Dreams In Blue this is FTU you can download kit from
Here
Cookie of choice im using ©Lisa K this is FTU Here
Mask WSL_Mask 84 at weescotslass Here
Font of choice or the one im using is MC Sweetie Hearts
Lets Get Started
Open new image 650x550
Open Paper1 - TbT copy paste as new layer apply mask merge group duplicate merge down
Open Doodle 3 - TbT copy paste as new layer add drop shadow
Open Frame 3 - TbT copy paste as new layer with magic wand click in frames modify expand by 4
open Paper3 - TbT copy paste as new layer invert delete on keyboard dont deselect Open Doodle 2 - TbT copy paste as new layer delete on keyboard select none drag paper & doodle under frame add drop shadow to frame & doodle
Open Ribbon Wrap - TbT copy paste as new layer with pick tool bring in little on sides add drop shadow
Open Butterfly 1 - TbT copy paste as new layer add drop shadow
Open Cookie copy paste as new layer resize add drop shadow
Add your Name & the words Whisper Font MC Sweetie Hearts forground #5161b8 background #fffff add gradient glow & add drop shadow
Add your copyright info
resize & save your tag
Love to see your results please email to me so i can put in my show off blog
Thankyou ♥
Written by ©Lyn(akaAngel) 24th February 2011, any similarity to any other tutorial is purely coincidental!
♥ I give you my Heart ♥

Supplies Needed
Scrapkit by Treasures by Terry called Chocolate Delight this is FTU you can download kit from
Here
Tube of choice im using ©Ismael Rac Here
Wordart By me this is FTU can be downloaded Here
Font of choice or the one im using is Inspiration
Lets Get Started
Open new image 650x550
Open CD Fancy Frame _ TbT copy paste as new layer with magic wand click in frame modify expand by 4
open Paper 7 copy paste as new layer invert delete on keyboard select none drag paper under frame add drop shadow to frame
Open CD Flower Cluster - TbT copy paste as new layer add drop shadow
Open CD Buttonedribbondark - TbT copy paste as new layer add drop shadow
Open CD Flower 2 - TbT copy paste as new layer add drop shadow
Open CD tied up heart charm - TbT copy merged paste as new layer resize 60 percent add drop shadow
Merge all layers visible duplicate on bottom one adjust blur guassian blur 35 texture effects weave 2 8 5 black in both boxes fill gaps checked
Open tube copy paste as new layer add drop shadow
Open CD Buttonedribbondark - TbT copy paste as new layer add drop shadow
Open CD Flower 2 - TbT copy paste as new layer add drop shadow
Open my word art close © layer & white background layer copy merge paste as new layer resize 60 percent select all float defloat Open Paper 9 paste as new layer invert delete on keyboard select none add drop shadow
Add your name Font Inspiration forground #644324 background #fffff add drop shadow
Add your copyright info
resize & save your tag
Love to see your results please email to me so i can put in my show off blog
Thankyou ♥
Written by ©Lyn(akaAngel) 24th February 2011, any similarity to any other tutorial is purely coincidental!
♥ Black & White ♥

Supplies Needed
Scrapkit by Treasures by Terry called Black and white this is FTU you can download kit from
Here
Tube of choice im using ©Keith Garvey he is no longer selling at MPT this is where i brought hes art work & my license
But you can find all hes tubes PSPTubes Emporium i have the link on the right hand side of my blog under Please Read
Mask WSL_Mask 178 at weescotslass Here
Font of choice or the one im using is Inspiration
Lets Get Started
Open new image 650x550
Open paper2 copy paste as new layer apply mask merge group
Open Round diamond frame copy paste as new layer with magic wand click in frame modify expand by 4
open paper1 copy paste as new layer invert delete on keyboard select none drag paper under frame open tube copy paste as new layer delete on keyboard select none duplicate on bottom tube effects distotion wind from left 100 go to top tube lower opacity 65 add gradient glow & add drop shadow to frame while tube is in memory paste as new layer mirror
Open Black and white swirly copy paste as new layer add drop shadow drag under frame duplicate flip mirror
Open Black butterfly copy paste as new layer resize 65 percent image rotate 35 right add drop shadow
Open wildflowers copy paste as new layer image rotate 25 right add drop shadow drag under main tube
Open White butterfly copy paste as new layer resize 55 percent image rotate 35 right mirror add drop shadow
Open white daisy copy paste as new layer resize 55 percent duplicate resize 54 percent duplicate arrange on tag merge flowers add drop shadow duplicate mirror flip drag this set under wild flowers
Add your name & the words Black & White Font Inspiration forground #000000 background #ffffff add drop shadow
Add your copyright info
resize & save your tag
Love to see your results please email to me so i can put in my show off blog
Thankyou ♥
Written by ©Lyn(akaAngel) 23rd February 2011, any similarity to any other tutorial is purely coincidental!
♥ Moments ♥

Supplies Needed
Scrapkit by scraps dimensions called Moments this is FTU you can download kit from
Here
Tube of choice im using ©Jennifer Janesko there is no longer Cilm this is where i brought my license
But you can find all the tubes at CDO link on the right hand side of my blog under Tube Store
Mask WSL_Mask 38 at weescotslass Here
Font of choice or the one im using is Miss Le Gatees
Lets Get Started
Open new image 650x550
Open SD MOMENTS PAPER 1 copy paste as new layer apply mask merge group duplicate merge down image rotate 90 percent left
Open SD MOMENTS FRAME 1 copy paste as new layer resize 71 percent with magic wand click in frame modify expand by 2
open SD MOMENTS PAPER 3 copy paste as new layer invert delete on keyboard drag paper under frame keep selected open tube copy paste as new layer delete on keyboard drag tube under frame add drop shadow to frame
Open SD MOMENTS BRANCHES copy paste as new layer resize 70 percent drag under frame add drop shadow
Open SD MOMENTS BOW 1 copy paste as new layer resize 49 percent add drop shadow
Open SD MOMENTS BUTTERFLY 2 copy paste as new layer resize 20 percednt add drop shadow
Open SD MOMENTS LEAVES 2 copy paste as new layer above mask add drop shadow
Open SD MOMENTS WA copy paste as new layer resize 75 percent Effects Enhance add drop shadow
Add your name Font Miss Le Gatees forground #ffffff background #000000 add drop shadow
Add your copyright info
resize & save your tag
Love to see your results please email to me so i can put in my show off blog
Thankyou ♥
Written by ©Lyn(akaAngel) 23 February 2011, any similarity to any other tutorial is purely coincidental!
♥ Im To Sexy For My Pants ♥

Supplies Needed
Scrapkit by Breezy called melissazcreationz this is FTU you can download kit from
Here
Tube of choice im using ©Half Pints From MPT Here
Mask WSL_Mask 38 at weescotslass Here
Font of choice or the one im using is MrBlaketon
Lets Get Started
Open new image 650x550
Open MC_BreezyPaper6 copy paste as new layer apply mask merge group duplicate merge down
Open MC_BreezyElement14 copy paste as new layer with magic wand click in frame modify expand by 2
open MC_BreezyPaper4 copy paste as new layer invert delete on keyboard select none drag paper under frame add gradient glow & add drop shadow to frame
Open MC_BreezyElement13 copy paste as new layer resize 67 percent add drop shadow
Open MC_BreezyElement5 copy paste as new layer add drop shadow duplicate mirror flip
Open MC_BreezyElement2 with freehand tool go around the butterfly copy paste as new layer add drop shadow
Add your name & the words Im To Sexy For My Pants Font MrBlaketon forground #f57ebb background #ffffff add drop shadow
Add your copyright info
resize & save your tag
Love to see your results please email to me so i can put in my show off blog
Thankyou ♥
Written by ©Lyn(akaAngel) 22nd February 2011, any similarity to any other tutorial is purely coincidental!
♥ Pretty Kitty ♥

Supplies Needed
Scrapkit by Melissaz Creationz called Pretty Kitty this is FTU Can be downloaded Here
Template Is Included with ScrapKit
Tube of choice im using ©Elias Chatzoudis he is no longer selling at MPT this is where i brought hes art work & my license
But you can find all hes tubes PSPTubes Emporium i have the link on the right hand side of my blog under Please Read
Mask WSL_Mask 145 at weescotslass Here
Font of choice or the one im using is MrBlaketon
Lets Get Started
Open Template Duplicate close original delete raster 1
Open MC_PrettyKitty_paper7 copy paste as new layer apply mask merge send to bottom
Go to strip 1 layer selection select all float defloat Open MC_PrettyKitty_paper8 copy paste as new layer invert delete on keyboard select none add gradient glow add drop shadow
Go to strip 2 layer selection select all float defloat Open MC_PrettyKitty_paper8 copy paste as new layer invert delete on keyboard select none add gradient glow add drop shadow
Go to lg oval layer selection select all float defloat Open MC_PrettyKitty_paper10 copy paste as new layer invert delete on keyboard select none
Go to paw prints Layer close this off
Go to puuurfection Layer add gradient glow #dc6283
Go to sm oval layer selection select all float defloat Open MC_PrettyKitty_paper1 copy paste as new layer invert delete on keyboard select none
Go to lg oval frame layer selection select all float defloat Open MC_PrettyKitty_paper7 copy paste as new layer invert delete on keyboard select none add gradient glow add drop shadow
Go to squares layer selection select all float defloat Open MC_PrettyKitty_paper10 copy paste as new layer invert delete on keyboard open tube copy paste as new layer delete on keyboard
Go to sm oval frame layer selection select all float defloat Open MC_PrettyKitty_paper7 copy paste as new layer invert delete on keyboard select none add gradient glow add drop shadow
Go to square frames layer selection select all float defloat Open MC_PrettyKitty_paper7 copy paste as new layer invert delete on keyboard select none add gradient glow add drop shadow
Open MC_PrettyKitty_elements4 copy paste as new layer image rotate 90 percent add gradient glow & add drop shadow duplicate mirror flip drag this one above mask layer
Open MC_PrettyKitty_elements1 with freehand tool go around the hearts copy paste as new layer add gradient glow & drop shadow duplicate resize 76 percent
select none on the MC_PrettyKitty_elements1 with the freehand tool again on go around the paw copy paste as new layer add drop shadow duplicate resize 76 percent
Open MC_PrettyKitty_wordart with freehand tool go around the words pretty kitty copy paste as new layer add drop shadow
Open your tube copy paste as new layer duplicate drag this one under the word art go back to top tube erase little of the leg that over lapps the word art go back to bottom tube add drop shadow
Add your name Font MrBlaketon forground #000000 background #000000 add gradient glow colour #ef6666 with this setting

then add drop shadow
Add your copyright info
resize & save your tag
Love to see your results please email to me so i can put in my show off blog
Thankyou ♥
Written by ©Lyn(akaAngel) 21st February 2011, any similarity to any other tutorial is purely coincidental!
♥ Winter Bliss ♥

Supplies Needed
Scrapkit by pinkprincessscraps called Winter Freebie this is FTU you can download kit from
Here
Tube of choice im using ©Suzanne Woolcott Here
Mask WSL_Mask26 at weescotslass Here
Font of choice or the one im using is ThimbaSSK & Mr Lackboughs
Lets Get Started
Open new image 650x550
Open pp5 copy paste as new layer apply mask merge group duplicate merge down
Open ele8 copy paste as new layer resize 85 percent add drop shadow
Open ele3 copy paste as new layer add drop shadow
Open ele27 copy paste as new layer resize 60 percent add drop shadow
Open ele28 copy paste as new layer resize 55 percent mirror add drop shadow
Open ele7 copy paste as new layer resize 35 percent add drop shadow
Open tube copy paste as new layer add drop shadow
Add the words Winter Bliss Font ThimbaSSK forground #ffffff background #7c8a92 add drop shadow
Add your name Font Mr Lackboughs forground #ffffff background #7c8a92 add drop shadow
Add your copyright info
resize & save your tag
Love to see your results please email to me so i can put in my show off blog
Thankyou ♥
Written by ©Lyn(akaAngel) 20th February 2011, any similarity to any other tutorial is purely coincidental!
♥ Cherry Shake ♥

Supplies Needed
Scrapkit by pinkprincessscraps called Pop My Cherry this is FTU you can download kit from
Here
Tube of choice im using ©Elias Chatzoudis he is no longer selling at MPT this is where i brought hes art work & my license
But you can find all hes tubes PSPTubes Emporium i have the link on the right hand side of my blog under Please Read
Mask WSL_Mask 38 at weescotslass Here
Font of choice or the one im using is Scriptina & Lake Wobegon NF
Lets Get Started
Open new image 650x550
Open PMC_pp5_PPS copy paste as new layer apply mask merge group
Open PMC_ele50_PPS copy paste as new layer add drop shadow
Open PMC_ele41_PPS copy paste as new layer add drop shadow
Open PMC_ele40_PPS copy paste as new layer add drop shadow
Open PMC_ele48_PPS copy paste as new layer resize 49 percent add drop shadow
Open PMC_ele46_PPS copy paste as new layer add drop shadow duplicate image rotate 20 left
Open PMC_ele73_PPS copy paste as new layer add drop shadow
Open tube copy paste as new layer add drop shadow
Add the words Cherry Shake Font Lake Wobegon NF forground #c5212d background #ff59b1 add drop shadow & add gradient glow
Add your name Font Scriptina forground #c5212d background #ff59b1 add drop shadow & add gradient glow
Add your copyright info
resize & save your tag
Love to see your results please email to me so i can put in my show off blog
Thankyou ♥
Written by ©Lyn(akaAngel) 20th February 2011, any similarity to any other tutorial is purely coincidental!
♥ Missing You ♥

Supplies Needed
Scrapkit Broken Destiny is FTU By scraps by Jessica
Here
Tube of choice im using ©Keith Garvey he is no longer selling at MPT this is where i brought hes art work & my license
But you can find all hes tubes PSPTubes Emporium i have the link on the right hand side of my blog under Please Read
Mask WSL_Mask 84 at weescotslass Here
Font of choice or the one im using is LainieDaySH & Landsdowne
Lets Get Started
Open BD_paper 22_JD copy paste as new layer apply mask merge group add remove noise 100 uniform monochrome checked
Open BD_doodle1_JD copy paste as new layer add drop shadow
Open BD_frame2_JD copy paste as new layer click in each part of the frame with magic wand modify expand by 4 Open BD_paper 13_JD copy paste as new layer invert delete on keyboard drag paper under frame
Open BD_bow1_JD copy paste as new layer resize 70 percent image rotate 20 left add drop shadow
Open BD_floralbow2_JD copy paste as new layer resize 65 percent add drop shadow
Open BD_tag1_JD copy paste as new layer image rotate 20 right add drop shadow
Open BD_ribbon4_JD copy paste as new layer resize 60 percent add drop shadow
Add the words Missing You Font Landsdowne Forground #2c475b Background #9ebed5 add gradient glow & drop shadow
Open BD_caligraphypen_JD copy paste as new layer resize add drop shadow
Open tube copy paste as new layer add drop shadow
Add your name Font LainieDaySH Forground #2c475b Background #9ebed5 add gradient glow & drop shadow
Add your copyright info
resize & save your tag
Love to see your results please email to me so i can put in my show off blog
Thankyou ♥
Written by ©Lyn(akaAngel) 20th February 2011, any similarity to any other tutorial is purely coincidental!
♥ Stormy Love ♥

Supplies Needed
Scrapkit by Lainey called Stormy Love this is FTU Can be downloaded
Here
Tube of choice im using ©Keith Garvey he is no longer selling at MPT this is where i brought hes art work & my license
But you can find all hes tubes PSPTubes Emporium i have the link on the right hand side of my blog under Please Read
Mask WSL_Mask 38 at weescotslass Here
BP_template56 by Becky this is FTU you will find this Here
Font of choice or the one im using is LainieDaySH
Lets Get Started
Open Template Duplicate delete preview & tou & white background
Open BGround5 copy paste as new layer apply mask merge send to bottom
Go to large curly flowers layer selection select all float defloat Open BGround2 copy paste as new layer invert delete on keyboard select none add gradient glow & add drop shadow
Go to large circle background layer selection select all float defloat Open BGround4 copy paste as new layer invert delete on keyboard select none add gradient glow & add drop shadow
Go to large circle layer selection select all float defloat Open BGround6 copy paste as new layer invert delete on keyboard select none add drop shadow
Go to rectangle background layer selection select all float defloat Open BGround6 copy paste as new layer invert delete on keyboard select none add gradient glow & drop shadow
Go to rectangle layer selection select all float defloat Open BGround5 copy paste as new layer invert delete on keyboard dont deselect open tube copy paste as new layer delete on keyboard select none duplicate tube on bottom tube effect distotion wind 100 from left add drop shadow go to top tube lower opacity 47
Go to BPcurlyWflowers layer selection select all float defloat Open BGround2 copy paste as new layer invert delete on keyboard select none add gradient glow & drop shadow
Go to small circle background layer selection select all float defloat Open BGround4 copy paste as new layer invert delete on keyboard select none add gradient glow add drop shadow
Go to small circle selection select all float defloat Open BGround6 copy paste as new layer invert delete on keyboard open tube copy paste as new layer delete on keyboard select none add drop shadow lower opacity 63
open main tube copy paste as new layer add drop shadow
Open WordArt2 copy paste as new layer add drop shadow
Open Calla Lilies copy paste as new layer drag this under the 2nd tube add drop shadow
Open Pretty Butterfly copy paste as new layer resize 85 duplicate resize 70 percent mirror add drop shadow
Open Leaves copy paste as new layer drag this above the mask layer add drop shadow
Add your name Font LainieDaySH forground #8a3a31 background #ecc2b3 add drop shadow & add gradient glow
Add your copyright info
resize & save your tag
Love to see your results please email to me so i can put in my show off blog
Thankyou ♥
Written by ©Lyn(akaAngel) 20th February 2011, any similarity to any other tutorial is purely coincidental!
♥ Summer ♥

Supplies Needed
Scrapkit by Lainey called Easterl_Lemon_Zing this is FTU Can be downloaded
Here
Tube of choice im using ©Keith Garvey to purchase tubes go Here
All my tubes are a guide if the tubes i select are unavailable please use another tube of your liking thankyou
Mask WSL_Mask 224 at weescotslass Here
TemplateBP_04 by Becky this is FTU you will find this Here
Font of choice or the one im using is Tagettes & Flipside BRK
Lets Get Started
Open Template Duplicate canvas size 650x600 delete preview & tou & white background
Open Lemon4LL copy paste as new layer apply mask merge send to bottom
Go to lg. flower swag layer selection select all float defloat Open ButterflyLL copy paste as new layer invert delete on keyboard select none add drop shadow
Go to lg. black circle layer selection select all float defloat Open ButterflyLL copy paste as new layer invert delete on keyboard select none add gradient glow & add drop shadow
Go to lg. gray circle layer selection select all float defloat Open Lemon4LL copy paste as new layer invert delete on keyboard select none add drop shadow
Go to lg. white circle layer selection select all float defloat Open ButterflyLL copy paste as new layer invert delete on keyboard select none
Go to small dark circle layer selection select all float defloat Open ButterflyLL copy paste as new layer invert delete on keyboard select none add drop shadow
Go to small gray circle layer selection select all float defloat Open Lemon4LL copy paste as new layer invert delete on keyboard select none
Go to small white circle layer selection select all float defloat Open Lemon3LL copy paste as new layer invert delete on keyboard select none add gradient glow add drop shadow
Go to small flower swag selection select all float defloat Open ButterflyL copy paste as new layer invert delete on keyboard select none add drop shadow
Go to flowers layer selection select all float defloat Open LemonZingLL copy paste as new layer invert delete on keyboard select none add drop shadow
Open Orchids 2 copy paste as new layer resize 65 percent image rotate right 20 add drop shadow
Open TulipYellowLL copy paste as new layer resize 20 percent duplicate resize this one 85 percent duplicate move to left add drop shadow
Open Cushion copy paste as new layer resize 55 percent add drop shadow
Copy your tube paste as new layer add drop shadow
Add the word Summer Font Flipside BRK forground #5a812c background #fbda52 add gradient glow & add drop shadow
Add your name Font Tagettes forground #5a812c background #fbda52 add gradient glow & add drop shadow
Close off your name the words & tube merge visible add new raster layer send to bottom go to merge layer resize 120 percent sharpen unclose the other layers
Add your copyright info
resize & save your tag
Love to see your results please email to me so i can put in my show off blog
Thankyou ♥
Written by ©Lyn(akaAngel) 20th February 2011, any similarity to any other tutorial is purely coincidental!
♥ Rockin It ♥

Supplies Needed
Scrapkit by Sinfully Creative Scraps called Rockin It this is FTU you can download kit from
Here
Tube of choice im using ©Keith Garvey he is no longer selling at MPT this is where i brought hes art work & my license
But you can find all hes tubes PSPTubes Emporium i have the link on the right hand side of my blog under Please Read
Mask WSL_Mask38 at weescotslass Here
Font of choice or the one im using is DianaCTT
Lets Get Started
Open new image 650x550
Open paper 4 copy paste as new layer apply mask merge group effects texture effects weave with this 2.8.5 #000000 in both boxes
Open frame 3 copy paste as new layer resize 85 percent with magic wand click in frame modify expand by 4
open paper 13 copy paste as new layer invert delete on keyboard select none drag paper under frame effects texture effects weave with this 2.8.5 #000000 in both boxes add gradient glow & add drop shadow to frame
Open word art 1 copy paste as new layer add drop shadow
Open note card 2 copy paster resize 75 percent add drop shadow
Open guitar copy paste as new layer image rotate 20 right add drop shadow
Open tube copy paste as new layer put this one under the frame erase any over lapping add drop shadow to tube duplicate tube on the bottom tube effects distortion effect wind 100 from left
Open main tube copy paste as new layer add drop shadow
Add your name Font DianaCTT forground #4c7d84 background #000000 add gradient glow & add drop shadow
Add your copyright info
resize & save your tag
Love to see your results please email to me so i can put in my show off blog
Thankyou ♥
Written by ©Lyn(akaAngel) 19th February 2011, any similarity to any other tutorial is purely coincidental!
♥ Expresso ♥

Supplies Needed
Scrapkit by Sinfully Creative Scraps called Hot Tropics Cafe this is FTU you can download kit from
Here
Tube of choice im using ©PinupToons From CDO Here
Mask WSL_Mask327 at weescotslass Here
Font of choice or the one im using is Carpenter Script
Lets Get Started
Open new image 650x550
Open paper 4 copy paste as new layer apply mask merge group effects enhance then enhance more add drop shadow
Open frame 4 copy paste as new layer resize 85 percent with magic wand click in frame modify expand by 4
open paper 3 copy paste as new layer invert delete on keyboard select none drag paper under frame effects texture effects weave with this 2.8.5 #000000 in both boxes add drop shadow to frame
Open esspresso sign copy paste as new layer resize 79 percent drag this under the frame now with magic wand tolerence set on 7 feather 2 antialias checked ouside do each letter with magic wand effects enhance duplicate enhance select none add drop shadow
Open coffee tag copy paster resize 76 percent add drop shadow
Open coffee tray copy paste as new layer resize 60 percent add drop shadow
Open tube copy paste as new layer add drop shadow
Add your name Font Carpenter Script forground #a65732 background #4b220d add gradient glow & add drop shadow
Add your copyright info
resize & save your tag
Love to see your results please email to me so i can put in my show off blog
Thankyou ♥
Written by ©Lyn(akaAngel) 19th February 2011, any similarity to any other tutorial is purely coincidental!
♥ Kiss Me Im Irish ♥

Supplies Needed
Scrapkit by randyssin called Luck Of The Irish this is FTU you can download kit from
Here
Tube of choice im using ©Keith Garvey he is no longer selling at MPT this is where i brought hes art work & my license
But you can find all hes tubes PSPTubes Emporium i have the link on the right hand side of my blog under Please Read
Mask WSL_Mask75 at weescotslass Here
Font of choice or the one im using is Jenice
Lets Get Started
Open new image 650x550
Open rs_paper8 copy paste as new layer apply mask merge group duplicate merge down
with preset tool make circle in middle of image width 9 background null forground #000000 make a circle in middle of tag with magic wand click in frame modify expand by 2
open rs_paper3 copy paste as new layer invert delete on keyboard select none drag paper under frame add gradient glow & add drop shadow to frame
Open rs_glitterz4 copy paste as new layer resize 74 percent
Open rs_bow5 copy paste as new layer resize add drop shadow
Open rs_shamrockbouquet1 copy paste as new layer resize 36 percent add drop shadow
Open tube copy paste as new layer erase little of the tube add drop shadow
Open rs_wa5 copy paste as new layer resize 45 percent then again 85 percent add gradient glow & add drop shadow
Open rs_wa10 copy paste as new layer resize 72 percent add gradient glow & add drop shadow
Open rs_gold1 copy paste as new layer resize 22 percent add gradient glow & add drop shadow
Add your name Font Jenice forground #000000 background #57f46f add drop shadow
Add your copyright info
resize & save your tag
Love to see your results please email to me so i can put in my show off blog
Thankyou ♥
Written by ©Lyn(akaAngel) 17th February 2011, any similarity to any other tutorial is purely coincidental!
♥ Be Mine ♥

Supplies Needed
Scrapkit by melissazcreationz called My Sweet Valentine Kit this is FTU you can download kit from
Here
Tube of choice im using ©Elias Chatzoudis to purchase tubes go Here
All my tubes are a guide if the tubes i select are unavailble please use another tube of your liking thankyou
Mask WSL_Mask 178 at weescotslass Here
Font of choice or the one im using is Licorice
Lets Get Started
Open new image 650x550
Open raster 12 paper copy paste as new layer apply mask merge group duplicate merge down
Open raster 3 frame copy paste as new layer with magic wand click in frame modify expand by 2
open merged paper copy paste as new layer invert delete on keyboard select none drag paper under frame add drop shadow to frame
Open raster35 element copy paste as new layer add drop shadow
Open raster39 element copy paste as new layer mirror add drop shadow
Open raster17 element copy paste as new layer duplicate 2 times add drop shadow
Open tube copy paste as new layer add drop shadow
Open raster5 copy paste as new layer add drop shadow
Add your name Font Licorice forground #9f3468 background #f56ba6 add drop shadow
Add your copyright info
resize & save your tag
Love to see your results please email to me so i can put in my show off blog
Thankyou ♥
Written by ©Lyn(akaAngel) 15th February 2011, any similarity to any other tutorial is purely coincidental!
♥ Fall ♥

Supplies Needed
Scrapkit by Designing Scraps called warn Fall this is PTU you can go to the site to get info how to purchase kit
Here
Tube of choice im using ©Elias Chatzoudis he is no longer selling at MPT this is where i brought hes art work & my license
But you can find all hes tubes PSPTubes Emporium i have the link on the right hand side of my blog under Please Read
Mask WSL_Mask 26 at weescotslass Here
Font of choice or the one im using is LuxuryRoyaleJF
Lets Get Started
Open new image 650x550
Open Fallsplendorpaper copy paste as new layer apply mask merge group duplicate merge down duplicate
Open warmfallframe copy resize 70 percent add drop shadow
Open warmfalltreeframe copy paste as new layer resize 67 percent with magic wand click in frames modify expand by 3
open Fallsplendorpaper11 copy paste as new layer invert delete on keyboard select none drag paper under frame while still selected open tube copy paste as new layer delete on keyboard drag under frame blend mode hard light add drop shadow to frame & tube
Open warmfallhouse copy paste as new layer resize 35 percent then resize again 72 percent add drop shadow
Open warfallfalls copy paste as new layer resize 36 percent add drop shadow
Open tube copy paste as new layer add drop shadow
Open warmfallscarecrow copy paste as new layer resize 60 percent add drop shadow
Add your name & the the word Fall Font LuxuryRoyaleJF forground #000000 background #ab0b0c add drop shadow
Add your copyright info
resize & save your tag
Love to see your results please email to me so i can put in my show off blog
Thankyou ♥
Written by ©Lyn(akaAngel) 12th February 2011, any similarity to any other tutorial is purely coincidental!
♥ Black Rose ♥

Supplies Needed
Scrapkit by Addictive Pleasures called Biker Babe
This is PTU can be purchased
Here
Tube of choice im using ©Keith Garvey he is no longer selling at MPT this is where i brought hes art work & my license
But you can find all hes tubes PSPTubes Emporium i have the link on the right hand side of my blog under Please Read
Mask WSL_Mask 350 at weescotslass Here
Font of choice or the one im using is LainieDaySH
Lets Get Started
Open new image 650x550
with preset tool circle make circle in middle of tag forground #ffffff background #000000 convert to raster add gradient glow & drop shadow
Open glitter2 copy paste as new layer
Open glitter copy paste as new layer
Open butterfly copy paste as new layer resize 46 percent add drop shadow duplicate mirror merge down add drop shadow & add gradient glow
Open rose copy paste as new layer image rotate 20 left duplicate resize 85 percent add drop shadow
Open ribbon6 copy paste as new layer resize 65 percent add drop shadow
Open tube copy paste as new layer add drop shadow
Open p2 copy paste as new layer apply mask merge group duplicate merge down send to bottom
Add your name Font LainieDaySH forground #FFFFFF background #000000 add drop shadow
Add your copyright info
resize & save your tag
Love to see your results please email to me so i can put in my show off blog
Thankyou ♥
Written by ©Lyn(akaAngel) 12th February 2010, any similarity to any other tutorial is purely coincidental!
♥ Country Summer ♥

Supplies Needed
Tube of choice im using ©Elias Chatzoudis he is no longer selling at MPT this is where i brought hes art work & my license
But you can find all hes tubes PSPTubes Emporium i have the link on the right hand side of my blog under Please Read
Scrap kit by scrapsdimensions called Country Summer This is FTU Here
Mask WSL_Mask 82 at weescotslass Here
Kristin - Templates 40 this is FTU you will find this Here
Font of choice or the one im using is AdvertisersGothic
Lets Get Started
Open Template Duplicate canvas size 650x600 delete credit layer & white background layer
Open SD CS PAPER 2 copy paste as new layer apply mask merge send to bottom
Go to circle layer selection select all float defloat Open SD CS PAPER 1 copy paste as new layer invert delete on keyboard select none add gradient glow & add drop shadow
Go to Rectangle 1 layer selection select all float defloat Open SD CS PAPER 6 copy paste as new layer invert delete on keyboard select none add gradient glow & add drop shadow
Go to Rectangle 2 layer selection select all float defloat Open SD CS PAPER 1 copy paste as new layer invert delete on keyboard select none add gradient glow & add drop shadow
Go to Rectangle 3 layer selection select all float defloat Open SD CS PAPER 1 copy paste as new layer invert delete on keyboard select none add gradient glow & add drop shadow
Go to Frame Fill 1 layer selection select all float defloat Open SD CS PAPER 2 copy paste as new layer invert delete on keyboard copy your tube paste as new layer delete on keyboard add drop shadow to tube blend mode Luminance (L)to the tube
Go to Star 1 layer selection select all float defloat Open SD CS PAPER 6 copy paste as new layer invert delete on keyboard select none add gradient glow & add drop shadow
Go to frame 1 layer selection select all float defloat Open SD CS PAPER 4 invert delete on keyboard select none add gradient glow & add drop shadow
Go to Frame Fill 2 layer selection select all float defloat Open SD CS PAPER 2 copy paste as new layer invert delete on keyboard
Go to frame 2 layer selection select all float defloat Open SD CS PAPER 4 invert delete on keyboard select none add gradient glow & add drop shadow
Go to Star 2 layer selection select all float defloat Open SD CS PAPER 6 copy paste as new layer invert delete on keyboard select none add gradient glow & add drop shadow
Open SD CS MIX copy paste as new layer resize 44 percent drag this under the star add drop shadow
Open SD CS WHEEL BARREL copy paste as new layer resize 36 percent add drop shadow
Open SD CS LILY 1 copy paste as new layer resize 37 percent add drop shadow drag under main tube
Open SD CS PEBBLES copy paste as new layer resize 60 percent add drop shadow drag under main tube
Open the SD CS WA 1 Country copy paste as new layer resize 40 percent add drop shadow
Open the SD CS WA 1 Summer copy paste as new layer resize 24 percent add drop shadow
Add your name Font AdvertisersGothic forground #ffffff background #258bb1 with magic wand click in each letter open SD CS PAPER 1 copy paste as new layer invert delete on keyboard add gradient glow & add drop shadow
Add your copyright info
resize & save your tag
Love to see your results please email to me so i can put in my show off blog
Thankyou ♥
Written by ©Lyn(akaAngel) 11th February 2011, any similarity to any other tutorial is purely coincidental!
♥ Bad Kitty ♥

Supplies Needed
Tube of choice im using ©Elias Chatzoudis he is no longer selling at MPT this is where i brought hes art work & my license
But you can find all hes tubes PSPTubes Emporium i have the link on the right hand side of my blog under Please Read
Scrap kit by Jessica called Suz Creations This is FTU Here
Mask BP_grungyBackgroundMasks 8 by Becky This is FTU Here
Kristin - Templates 40 this is FTU you will find this Here
Font of choice or the one im using is Ambiance BT Swash
Lets Get Started
Open Template Duplicate canvas size 650x600 delete raster 1 & white background layer
Open new image flood fill with #8a3040 copy paste as new layer apply mask merge send to bottom
Go to rectangle fill layer selection select all float defloat new raster flood fill with #b777a3 select none
Go to Words 1 layer selection select all float defloat new image flood fill with #ffffff copy paste as new layer invert delete on keyboard select none add drop shadow
Go to Rectangle Frame layer selection select all float defloat new raster layer flood fill with #8a3040 select none add gradient glow & add drop shadow
Go to Paw Prints layer selection select all float defloat new raster layer flood fill with #000000 invert delete on keyboard select none add gradient glow & drop shadow
Go to Words 2 layer selection select all float defloat new raster layer flood fill with #8a3040 invert delete on keyboard select none add gradient glow & add drop shadow
Open tube copy paste as new layer add drop shadow duplicate effects distortion effect wind from left 100 drag this tube under other tube
Open SC_doodle1_JD copy paste as new layer resize 50 percent add drop shadow
Open SC_doodle4_JD copy paste as new layer image rotate 45 percent then image rotate 90 percent left add drop shadow drag this under the writing layer see my tag for reference
Add your name Font Ambiance BT Swash forground #ffffff background #954a49 add drop shadow
Add your copyright info
resize & save your tag
Love to see your results please email to me so i can put in my show off blog
Thankyou ♥
Written by ©Lyn(akaAngel) 11th February 2011, any similarity to any other tutorial is purely coincidental!
♥ BCA ♥

Supplies Needed
Scrapkit by Tammy Scraps called Find the Cure this is FTU can find it under Freebies you can download kit from
Here
Tube of choice im using ©Elias Chatzoudis to purchase tubes go Here
All my tubes are a guide if the tubes i select are unavailable please use another tube of your liking thankyou
Mask WSL_Mask 178 at weescotslass Here
Font of choice or the one im using is A&S Snapper Script
Lets Get Started
Open new image 650x550
Open Find The Cure _ Paper 9 copy paste as new layer apply mask merge group duplicate merge down
Open Find The Cure _ Frame 3 copy paste as new layer with magic wand click in frame modify expand by 2
open Find The Cure _ Paper 7 copy paste as new layer invert delete on keyboard select none drag paper under frame click in right frame copy your tube paste as new layer invert delete on keyboard drag under frame apply xero porcelain default setting repeat add drop shadow to frame
open another of the tube copy paste as new layer mirror add drop shadow
Open Find The Cure _ Glitter Charm 1 copy paste as new layer
Open Find The Cure _ Label 5 copy paste as new layer resize 74 percent add drop shadow
Open Find The Cure _ Flower 2 copy paste as new layer resize 33 percent mirror drag this under tube add drop shadow
Open Find The Cure _ Stitched Heart 2 copy paste as new layer resize 24 percent add drop shadow
Add your name Font A&S Snapper Script forground #ff5c7d background #ffffff add drop shadow
Add your copyright info
resize & save your tag
Love to see your results please email to me so i can put in my show off blog
Thankyou ♥
Written by ©Lyn(akaAngel) 11th February 2011, any similarity to any other tutorial is purely coincidental!
♥ LIfe Guard ♥

Supplies Needed
Tube of choice im using ©Elias Chatzoudis he is no longer selling at MPT this is where i brought hes art work & my license
But you can find all hes tubes PSPTubes Emporium i have the link on the right hand side of my blog
Scrapkit by wishing on a starr called voice on the beach this is FTU Can be downloaded Here
Mask WSL_Mask 38 at weescotslass Here
Template01 by me this is FTU you will find this Here
Font of choice or the one im using is Tagettes
Lets Get Started
Open Template Duplicate close off original template delete raster 12
Open WishingonaStarr_A voice on the beach_Papers019 copy paste as new layer apply mask merge send to bottom
Go to Raster 1 layer selection select all float defloat Open WishingonaStarr_A voice on the beach_Papers020 copy paste as new layer invert delete on keyboard select none add drop shadow
Go to Raster 2 selection select all float defloat Open WishingonaStarr_A voice on the beach_Papers03 copy paste as new layer invert delete on keyboard select none add gradient glow & drop shadow
Go to Raster 3 layer selection select all float defloat Open WishingonaStarr_A voice on the beach_Papers019 copy paste as new layer invert delete on keyboard select none
Go to raster 4 layer selection select all float defloat Open WishingonaStarr_A voice on the beach_Papers02 copy paste as new layer invert delete on keyboard select none
Go to Raster 5 layer selection select all float defloat Open WishingonaStarr_A voice on the beach_Papers03 copy paste as new layer invert delete on keyboard select none add gradient glow add drop shadow
Go to Raster 6 layer selection select all float defloat Open WishingonaStarr_A voice on the beach_Papers04 copy paste as new layer invert delete on keyboard select none apply penta.com color dot add gradient glow & drop shadow
Go to Raster 7 layer selection select all float defloat Open WishingonaStarr_A voice on the beach_Papers05 copy paste as new layer invert delete on keyboard select none add gradient glow add drop shadow
Go to Raster 8 layer selection select all float defloat Open RR_Paper6 copy paste as new layer invert delete on keyboard select none
Go to Raster 8 layer selection select all float defloat Open Open WishingonaStarr_A voice on the beach_Papers010 copy paste as new layer invert delete on keyboard select none add gradient glow add drop shadow
Go to Raster 9 layer selection select all float defloat Open WishingonaStarr_A voice on the beach_Papers018 copy paste as new layer invert delete on keyboard select none add gradient glow add drop shadow
Go to Raster 10 layer selection select all float defloat Open WishingonaStarr_A voice on the beach_Papers03 copy paste as new layer invert delete on keyboard select none add gradient glow add drop shadow
Go to Raster 11 layer selection select all float defloat Open WishingonaStarr_A voice on the beach_Papers03 copy paste as new layer invert delete on keyboard select none add gradient glow add drop shadow
Open WishingonaStarr_AVOTB_Bucket n spade copy paste as new layer resize 40 percent add drop shadow
Open WishingonaStarr_AVOTB_BeachBall copy paste as new layer resize 20 percent add drop shadow
Open WishingonaStarr_AVOTB_Yacht copy paste as new layer resize 55 percent add drop shadow duplicate resize 70 percent lower opacity 27
Open WishingonaStarr_AVOTB_Reeds copy paste as new layer resize 77 percent drag under the shells add drop shadow
Open WishingonaStarr_AVOTB_Camera copy paste as new layer resize 40 percent add drop shadow
Open your tube paste as new layer drag tube under the writing layers add drop shadow
Add your name Font Tagettes forground #3c4e7d background #9dabcd add drop shadow
Add your copyright info
resize & save your tag
Love to see your results please email to me so i can put in my show off blog
Thankyou ♥
Written by ©Lyn(akaAngel) 11th Februaury 2011, any similarity to any other tutorial is purely coincidental!
♥ The Look ♥

Supplies Needed
Tube of choice im using ©Keith Garvey he is no longer selling at MPT this is where i brought hes art work & my license
To Purchase all hes tubes at PSPTubes Emporium i have the link on the right hand side of my blog under Please Read
Scrapkit by fantasydreamsdesignzs called Rock Star this is FTU Can be purchased Here
Mask BP_grungyBackgroundMasks 8 by Becky This is FTU Here
BP_template36, by Becky this is FTU you will find this Here
Font of choice or the one im using is BickhamScriptFancy2
Lets Get Started
Open Template Duplicate canvas size 650x600 delete preview & tou & white background
Open FDD-RS-Pa7 copy paste as new layer apply mask merge send to bottom
Go to Center, large black rectangle layer selection select all float defloat Open FDD-RS-Pa4 copy paste as new layer invert delete on keyboard select none add gradient glow add drop shadow
Go to left med gray rectangle selection select all float defloat Open FDD-RS-Pa13 copy paste as new layer invert delete on keyboard select none add gradient glow add drop shadow
Go to right med. gray rectangle layer selection select all float defloat Open FDD-RS-Pa13 copy paste as new layer invert delete on keyboard select none add gradient glow add drop shadow
Go to left dark gray rectangle selection select all float defloat Open FDD-RS-Pa10 copy paste as new layer invert delete on keyboard select none add gradient glow add drop shadow
Go to left light gray rectangle layer selection select all float defloat Open FDD-RS-Pa13 copy paste as new layer invert delete on keyboard open your tube copy paste as new layer delete on keyboard add drop shadow go to raster 5 add gradient glow & drop shadow
Go to center dark gray rectangle layer selection select all float defloat Open FDD-RS-Pa10 copy paste as new layer invert delete on keyboard select none add gradient glow add drop shadow
Go to center, light gray rectangle layer selection select all float defloat Open FDD-RS-Pa13 copy paste as new layer invert delete on keyboard open your tube copy paste as new layer delete on keyboard add drop shadow go to raster 8 add gradient glow & drop shadow
Go to right dark gray rectangle layer selection select all float defloat Open FDD-RS-Pa10 copy paste as new layer invert delete on keyboard select none add gradient glow add drop shadow
Go to right light gray rectangle layer selection select all float defloat Open FDD-RS-Pa13 copy paste as new layer invert delete on keyboard open your tube copy paste as new layer delete on keyboard add drop shadow go to raster 8 add gradient glow & drop shadow
Open FDD-RS-El19 copy paste as new layer image rotate 90 percent right then rotate 20 left duplicate mirror merge down add gradient glow & add drop shadow duplicate image flip
Open FDD-RS-El33 copy paste as new layer resize 85 percent image rotate 90 percent right drag this above mask layer add gradient glow & add drop shadow
Open FDD-RS-El39 copy paste as new layer resize 75 percent drag under mask layer
Add your name & the words The Look Font BickhamScriptFancy2 forground #3c4e7d background #9dabcd add gradient glow & add drop shadow
Add your copyright info
resize & save your tag
Love to see your results please email to me so i can put in my show off blog
Thankyou ♥
Written by ©Lyn(akaAngel) 11th february 2011, any similarity to any other tutorial is purely coincidental!
♥ Looking Cool ♥

Supplies Needed
Tube of choice im using ©Keith Garvey he is no longer selling at MPT this is where i brought hes art work & my license
But you can find all hes tubes PSPTubes Emporium i have the link on the right hand side of my blog under Please Read
Scrapkit by ziggyfan Scraps called TRUE LOVE IS FOREVER this is FTU you can download kit from
Here
Mask WSL_Mask339 at weescotslass Here
Font of choice or the one im using is P22 Da Vinci Forward
Lets Get Started
Open new image 650x550
Open TLIF-TS_Paper6_ZiggyFan_Scraps copy paste as new layer apply mask merge group duplicate merge down
Open TLIF-TS_Element10_ZiggyFan_Scraps copy paste as new layer resize 80 percent with magic wand click in frame modify expand by 2
Open your tube copy paste as new layer duplicate drag one under frame erase little on bottom that is overlapping do the same with the top one add drop shadow to bottom tube add gradient glow & add drop shadow to frame
Open TLIF-TS_Element13_ZiggyFan_Scraps copy paste as new layer duplicate flip mirror merge down add gradient glow & add drop shadow drag under frame
Open TLIF-TS_Element29_ZiggyFan_Scraps copy paste as new layer add drop shadow
Open TLIF-TS_Element4_ZiggyFan_Scraps copy paste as new layer add drop shadow
Open TLIF-TS_Element4_ZiggyFan_Scraps copy paste as new layer drag under top tube add drop shadow
Add the words Looking Cool Font P22 Da Vinci Forward forground #000000 background #954a49 add gradient glow add drop shadow
Add your name Font P22 Da Vinci Forward forground #000000 background #954a49 add drop shadow
Add your copyright info
resize & save your tag
Love to see your results please email to me so i can put in my show off blog
Thankyou ♥
Written by ©Lyn(akaAngel) 10th February 2010, any similarity to any other tutorial is purely coincidental!
♥ Love ♥

Supplies Needed
Scrapkit by randyssin called Dark Love this is FTU you can download kit from
Here
Tube of choice im using ©Elias Chatzoudis he is no longer selling at MPT this is where i brought hes art work & my license
But you can find all hes tubes PSPTubes Emporium i have the link on the right hand side of my blog under Please Read
Mask WSL_Mask 160 at weescotslass Here
Font of choice or the one im using is Tagettes
Lets Get Started
Open new image 650x550
Open rs_paper7 copy paste as new layer apply mask merge group duplicate merge down
with preset tool make circle in middle of image width 9 background null forground #000000 with magic wand click in frame modify expand by 2
open rs_paper4 copy paste as new layer invert delete on keyboard select none drag paper under frame add drop shadow to frame
Open rs_rose1 copy paste as new layer resize 60 percent duplicate mirror duplicate again resize 90 percent add drop shadow
Open rs_love copy paste as new layer resize 50 percent then resize again at 67 percent add drop shadow
Open rs_chocbox2 copy paste as new layer resize 25 percent add drop shadow
Open rs_wa5 copy paste as new layer resize 45 percent then again 85 percent add gradient glow & add drop shadow
Open tube copy paste as new layer add drop shadow
Add your name Font Tagettes forground Null background #000000 add drop shadow
Add your copyright info
resize & save your tag
Love to see your results please email to me so i can put in my show off blog
Thankyou ♥
Written by ©Lyn(akaAngel) 9th February 2011, any similarity to any other tutorial is purely coincidental!
♥ Love of Roses ♥

Supplies Needed
Scrapkit by sizzelsdesigns called Love Of Roses this is PTU you can to the site to get info how to purchase the kit
Here
Tube of choice im using ©Elias Chatzoudis he is no longer selling at MPT this is where i brought hes art work & my license
But you can find all hes tubes PSPTubes Emporium i have the link on the right hand side of my blog
Mask WSL_Mask 84 at weescotslass Here
Font of choice or the one im using is Edwardian Script ITC Bold
Lets Get Started
Open new image 650x550
Open SD_Paper9 copy paste as new layer apply mask merge group duplicate merge down
Open SD_RoseFrame_Tagger copy paste as new layer resize 65 percent with magic wand click in frame modify expand by 2
open SD_Paper24 copy paste as new layer invert delete on keyboard select none drag paper under frame apply pent.com color dots add drop shadow to frame
Open SD_Hanger3 copy paste as new layer resize 33 percent add drop shadow
Open StickPin copy paste as new layer add drop shadow
Open SD_GroupRose3 copy paste as new layer resize 40 percent image rotate 30 right add drop shadow
Open Gemcurtain go back to frame click in frame with magic wand modify expand by 2 copy Gemcurtain paste as new layer resize 54 percent invert delete on keyboard select none effects enhance drag under frame add drop shadow
Open tube copy paste as new layer add drop shadow
Add your name Font Edwardian Script ITC Bold forground #000000 background #a61d1d add drop shadow & add gradient glow
Add your copyright info
resize & save your tag
Love to see your results please email to me so i can put in my show off blog
Thankyou ♥
Written by ©Lyn(akaAngel) 8th February 2011, any similarity to any other tutorial is purely coincidental!
♥ Dream Catcher ♥

Supplies Needed
Scrapkit by sizzelsdesigns called Indian Dreams this is PTU
Here
Tube of choice im using ©Keith Garvey to purchase tubes go Here
All my tubes are a guide if the tubes i select are unavailable please use another tube of your liking thankyou
Mask WSL_Mask 82 at weescotslass Here
Font of choice or the one im using is Whiskey Bravo Victor Bold
Lets Get Started
Open new image 650x550
Open SD_Paper1_TS copy paste as new layer apply mask merge group duplicate merge down
Open Image28 copy paste as new layer resize 67 percent with magic wand click in frame modify expand by 2
open SD_Paper3_TS copy paste as new layer invert delete on keyboard select none drag paper under frame add drop shadow to frame
Open SD_JugIndian copy paste as new layer resize 45 percent add drop shadow
Open SD_WeedFlower copy paste as new layer resize 65 percent mirror duplicate the jugindian drag one above the weedflower now erease little of the top jug now duplicate the weed flower & mirror this one & resize 74 percent merge down the flowers & jugs together then resize 85 percent see my tag for reference add drop shadow
Open SD_Axe copy paste as new layer resize 33 percent add drop shadow
Open SD_Ribbon copy paste as new layer resize 40 percent add drop shadow
Open SD_TanBeads copy paste as new layer resize 70 percent image rotate 90 percent add drop shadow
Open SD_DreamCatcher copy paste as new layer resize 45 percent add drop shadow
Open Knife copy paste as new layer resize 10 percent add drop shadow
Open tube copy paste as new layer add drop shadow
Add your name Font Whiskey Bravo Victor Bold forground #000000 background #b9a475 add drop shadow
Add your copyright info
resize & save your tag
Love to see your results please email to me so i can put in my show off blog
Thankyou ♥
Written by ©Lyn(akaAngel) 8th February 2011, any similarity to any other tutorial is purely coincidental!
♥ Love ♥

Supplies Needed
Scrapkit by Bea called forever-yours this is FTU you can download kit from
Here
Tube of choice im using ©Elias Chatzoudis he is no longer selling at MPT this is where i brought hes art work & my license
But you can find all hes tubes PSPTubes Emporium i have the link on the right hand side of my blog under Please Read
Mask WSL_Mask 83 at weescotslass Here
Font of choice or the one im using is MaryHelenJF
Lets Get Started
Open new image 650x550
Open p07_bc_foreveryours copy paste as new layer apply mask merge group
Open frame09_bc_foreveryours copy paste as new layer with magic wand click in frame modify expand by 2
Open p01_bc_foreveryours copy paste as new layer invert delete on keyboard select none drag paper under frame add drop shadow to frame
Open ballon01_bc_foreveryours copy paste as new layer drag under frame mirror
Open heart14_bc_foreveryours copy paste as new layer image rotate 90 percent right add drop shadow
Open flower03_bc_foreveryours copy paste as new layer resize 75 percent add drop shadow
Open tube copy paste as new layer add drop shadow
Open doddle01_bc_foreveryours copy paste as new layer drag under frame add drop shadow
bling01_bc_foreveryours copy paste as new layer add drop shadow drag under the hearts
Add your name Font MaryHelenJF forground #000000 background #a21017 add drop shadow
Add your copyright info
resize & save your tag
Love to see your results please email to me so i can put in my show off blog
Thankyou ♥
Written by ©Lyn(akaAngel) 7th February 2011, any similarity to any other tutorial is purely coincidental!
♥ Happy Time ♥

Supplies Needed
Scrapkit by Bea called Happy Time this is FTU you can download kit from
Here
Tube of choice im using ©Girlfriends From MPT Here
Mask WSL_Mask 38 at weescotslass Here
Font of choice or the one im using is Miss Le Gatees
Lets Get Started
Open new image 650x550
Open p10_bc_happytime copy paste as new layer apply mask merge group
Open frame4_bc_happytime copy paste as new layer add drop shadow
Open flower6_bc_happytime copy paste as new add drop shadow
Open bead2_bc_happytime copy paste as new layer drag under frame mirror
Open ribbon1_bc_happytime copy paste as new layer with pick tool bring in on all sides add drop shadow
Open flower4_bc_happytime copy paste as new layer resize 55 percent add drop shadow
Open tube copy paste as new layer add drop shadow
close off the mask layer merge visible duplicate on bottom layer adjust guassian blur 35
Add your name & the words Happy Time Font Miss Le Gatees forground #495494 background #c88a95 add gradient glow & add drop shadow
Add your copyright info
resize & save your tag
Love to see your results please email to me so i can put in my show off blog
Thankyou ♥
Written by ©Lyn(akaAngel) 7th February 2011, any similarity to any other tutorial is purely coincidental!
♥ MardiGras ♥

Supplies Needed
Scrapkit by randyssin called MardiGras this is FTU you can download kit from
Here
Tube of choice im using ©Keith Garvey to purchase tubes go
Here
All my tubes are a guide if the tubes i select are unavailable please use another tube of your liking thankyou
Mask1 made by me this is FTU Can be downloaded
Here
Font of choice or the one im using is Miss Lankfort
Lets Get Started
Open new image 650x550
Open rs_pap11 copy paste as new layer apply mask merge group
Open rs_frame3 copy paste as new layer resize 85 percent with magic wand click in frames modify expand by 2
open rs_pap1 copy paste as new layer invert delete on keyboard drag paper under frame add drop shadow to frame
Open rs_mask1 copy paste as new layer resize 58 percent add drop shadow
Open rs_gloves1 copy paste as new layer resize 35 percent image rotate 30 right add drop shadow
Open tube copy paste as new layer mirror add drop shadow
Open rs_trail2 copy paste as new layer with pick tool bring in all sides drag this under the gloves
Add your name Font Miss Lankfort forground #377d31 background #ddd15a add drop shadow
Add your copyright info
resize & save your tag
Love to see your results please email to me so i can put in my show off blog
Thankyou ♥
Written by ©Lyn(akaAngel) 7th February 2011, any similarity to any other tutorial is purely coincidental!
This awesome tag is from Mellissa thankyou ♥

♥ Sweet As ♥

Supplies Needed
Scrapkit by Designed by Stina called Gone Chocko this is PTU you can download kit from
Here
Tube of choice im using ©Keith Garvey to purchase tubes go Here
All my tubes are a guide if the tubes i select are unavailable please use another tube of your liking thankyou
Mask WSL_Mask 81 at weescotslass Here
Font of choice or the one im using is Miss Le Gatees
Lets Get Started
Open new image 650x550
Open DBS_Paper05 copy paste as new layer apply mask merge group
Open DBS_Frame09 copy paste as new layer resize 70 percent add drop shadow
Open DBS_ScatteredHearts drag under frame resize 67 percent add drop shadow
Open DBS_ChocDippedStrawberries copy paste as new layer resize 64 percent opacity 66 percent add drop shadow
Open DBS_ChocolateHearts02 copy paste as new layer resize 45 percent add drop shadow
Open DBS_LaceHeart_w_ChocolateArrows copy paste as new layer resize 20 percent add drop shadow
Open DBS_Roses01 copy paste as new layer resize 20 percent image rotate right 20 duplicate move down slightly add drop shadow
Open DBS_ChocolateBox copy paste as new layer resize 25 percent add drop shadow
Open DBS_ChocolateSwirl copy paste as new layer resize 25 percent drag under frame add drop shadow
Open tube copy paste as new layer add drop shadow
Open DBS_Ribbon_w_Hearts03 with pick tool bring in on all sides add drop shadow
Add your name & the words Sweet As Font Miss Le Gatees forground #000000 background #840205 add drop shadow
Add your copyright info
resize & save your tag
Love to see your results please email to me so i can put in my show off blog
Thankyou ♥
Written by ©Lyn(akaAngel) 6th February 2011, any similarity to any other tutorial is purely coincidental!
♥ Love Masquerade ♥

Supplies Needed
Scrapkit by Designed by Stina called Gone Chocko this is PTU you can download kit from
Here
Tube of choice im using ©Elias Chatzoudis he is no longer selling at MPT this is where i brought hes art work & my license
But you can find all hes tubes PSPTubes Emporium i have the link on the right hand side of my blog
Mask WSL_Mask 38 at weescotslass Here
Font of choice or the one im using is Jellyka - Love and Passion
Lets Get Started
Open new image 650x550
Open DBS_Paper15 copy paste as new layer apply mask merge group duplicate merge down
Open DBS_Frame05 copy paste as new layer resize 80 percent add drop shadow
Open DBS_Bow09 copy paste as new layer resize 30 percent add drop shadow
Open tube copy paste as new layer add drop shadow
Open DBS_Stars03 copy paste as new layer add drop shadow drag under frame
Open DBS_LaceHeart_w_ChocolateArrows copy paste as new layer resize 20 percent add drop shadow
eye out the mask layer merge all visible duplicate on bottom layer resize 80 percent adjust blur gaussian blur 22 percent adjust add remove noise uniform 64 monochrome checked
unhide mask layer
Add your name Font Jellyka - Love and Passion forground #8b5945 background #a40000 add drop shadow
Add your copyright info
resize & save your tag
Love to see your results please email to me so i can put in my show off blog
Thankyou ♥
Written by ©Lyn(akaAngel) 6th February 2011, any similarity to any other tutorial is purely coincidental!
♥ Especially for You ♥
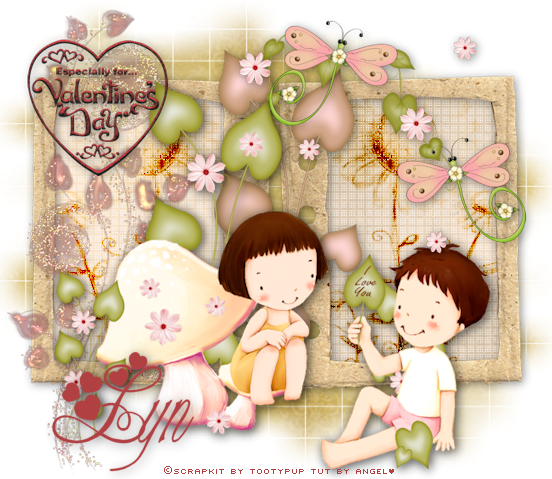
Supplies Needed
Scrapkit by Tootypup Scraps called I Love You this is PTU you can download kit from
Here
Mask WSL_Mask84 at weescotslass Here
Font of choice or the one im using is MC Sweetie Hearts
Lets Get Started
Open new image 650x550
Open tp-paper24 copy paste as new layer apply mask merge group duplicate mirror flip merge down
Open tp-frame1 copy paste as new layer resize 60 percent with magic wand click in frame modify expand by 2
open tp-paper2 copy paste as new layer invert delete on keyboard select none apply penta.com dot & crosses default setting drag paper under frame add drop shadow to frame
Open tp-doodle1 copy paste as new layer resize 55 percent add drop shadow
Open tp-loveGrass2 copy paste as new layer resize 58 percent then again at 80 percent add drop shadow
Open tp-ILoveYou11 copy paste as new layer resize 67 percent add drop shadow
Open tp-dragonfly2 copy paste as new layer resize 45 percent add drop shadow
Open tp-sunflower1 copy paste as new layer resize 55 percent drag under frame blend mode burn duplicate mirror
Open tp-waHeart4 copy paste as new layer resize 55 percent add drop shadow
Add your name Font MC Sweetie Hearts forground #faaaab background #faaaab add drop shadow
Add your copyright info
resize & save your tag
Love to see your results please email to me so i can put in my show off blog
Thankyou ♥
Written by ©Lyn(akaAngel) 6th February 2011, any similarity to any other tutorial is purely coincidental!
Subscribe to:
Posts (Atom)


