♥ Welcome ♥

♥ My Blinkie ♥

♥ Sexy Crazy Cool ♥

To View Tag In Proper Size Click On The Tag
Supplies Needed
Scrapkit Dark Angel by Sharon FTU Here
Tube of choice im using ©Michael Landefeld i brought my license & tube at CILM tubes are at CDO Here
Mask WSL_Mask26 at weescotslass Here
Font of choice or the one im using is Mr Leopolde
Lets Get Started
Open new image 650x550
Open CBS-Paper 10 copy paste as new layer apply mask merge group duplicate merge down
Open CBS-Frame 1 copy paste as new layer resize 70 percent effects edge effects Enhance with preset eclipse make circle forground #ffffff
convert to layer Open CBS-Paper 09 copy paste as new layer invert delete on keyboard delete the circle layer we made drag under frame
Open CBS-Doodle String 1 copy paste as new layer add drop shadow
Open CBS-Crystal Curtain 3 copy paste as new layer resize 75 percent effects edge effects Enhance erase that is overlapping add drop shadow
Open CBS-Car 1 copy paste as new layer add drop shadow
Open CBS-Button 7 copy paste as new layer add drop shadow
Open CBS-Balloon 4 copy paste as new layer add drop shadow
Open CBS-Balloon 4 copy paste as new layer duplicate resize 90 percent add gradient glow #750000 to both layers
Open tube copy paste as new layer add drop shadow
Add your name Font Mr Leopolde forground #000000 background #7f1313 effects add drop shadow
Add your copyright info
resize & save your tag
Love to see your results please email to me so i can put in my show off blog
Thankyou ♥
Written by ©Lyn(akaAngel) 31st August 2011, any similarity to any other tutorial is purely coincidental!
This is result from Dixie this is awesome thankyou ♥


♥ Subtle Autumn ♥

To View Tag In Proper Size Click On The Tag
Supplies Needed
Scrapkit By Wilma4Ever called Subtle Autumn (Tagger Size) This is PTU Here
Tube of choice im using ©Suzanne Woolcott can purchase Tube
Here
Mask WSL_Mask84 at weescotslass
Here
Font of choice or the one im using is Mr Dafoe
Lets Get Started
Open new image 650x550
Open Wilma4ever_SubtleAutumn_PP04 copy paste as new layer resize 80 percent apply mask merge group
Open Wilma4ever_SubtleAutumn_EL18 copy paste as new layer resize 85 percent add drop shadow Go around frame with selection tool Open Wilma4ever_SubtleAutumn_PP10 copy paste as new layer invert press delete on keyboard drag paper under frame
Open Wilma4ever_SubtleAutumn_EL49 copy paste as new layer resize 88 percent add drop shadow
Open Wilma4ever_SubtleAutumn_EL11 copy paste as new layer resize 75 percent add drop shadow
Open Wilma4ever_SubtleAutumn_EL09 copy paste as new layer resize 45 percent add drop shadow
Open Wilma4ever_SubtleAutumn_EL05 copy paste as new layer resize 75 percent drag under frame add drop shadow
Open Wilma4ever_SubtleAutumn_EL19 copy paste as new layer resize 75 percent add drop shadow
Open Wilma4ever_SubtleAutumn_EL24 resize 55 percent add drop shadow
Open Wilma4ever_SubtleAutumn_EL25 resize 35 percent image free rotate 20 percent right add drop shadow
Open Wilma4ever_SubtleAutumn_EL37 copy paste as new layer resize 32 percent add drop shadow
Open tube copy paste as new layer add drop shadow
Add your name & the words Subtle Autumn Font Mr Dafoe forground #dedecf background #906b34 add gradient glow & add drop shadow
Add your copyright info
resize & save your tag
Love to see your results please email to me so i can put in my show off blog
Thankyou ♥
Written by ©Lyn(akaAngel) 31st August 2011, any similarity to any other tutorial is purely coincidental!
♥ One Perfect Day ♥

To View Tag In Proper Size Click On The Tag
Supplies Needed
Scrapkit By Wilma4Ever called Perfect Day This is PTU Here
Tube of choice im using ©Keith Garvey i brought my license & tube at MPT all hes tubes are at PTE Here
Mask WSL_Mask53 at weescotslass Here
Font of choice or the one im using is Mr Lackboughs
Lets Get Started
Open new image 650x550
Open Wilma4ever_PerfectDay_PP02 copy paste as new layer resize 80 percent apply mask merge group duplicate merge down
Open Wilma4ever_PerfectDay_EL09 copy paste as new layer add drop shadow
Open Wilma4ever_PerfectDay_EL23 copy paste as new layer resize 65 percent image rotate 10 right add drop shadow
Open Wilma4ever_PerfectDay_EL08 copy paste as new layer resize 60 percent erase the top stem slightly add drop shadow
Open Wilma4ever_PerfectDay_EL17 copy paste as new layer
Open Wilma4ever_PerfectDay_EL22 copy paste as new layer resize 65 percent add drop shadow
Open Wilma4ever_PerfectDay_EL14 copy paste as new layer resize 30 percent mirror put this on the chair add drop shadow
Open Wilma4ever_PerfectDay_EL01 resize 20 percent image rotate 30 right add drop shadow
Open Wilma4ever_PerfectDay_EL16 resize 25 percent flip put this on the chair add drop shadow
Open tube copy paste as new layer add drop shadow
Open Wilma4ever_PerfectDay_EL21 copy paste as new layer add drop shadow
Add your name & the words One Perfect Day Font Mr Lackboughs forground #942317 background #8cadc1 add gradient glow & add drop shadow
Add your copyright info
resize & save your tag
Love to see your results please email to me so i can put in my show off blog
Thankyou ♥
Written by ©Lyn(akaAngel) 31st August 2011, any similarity to any other tutorial is purely coincidental!
♥ Autumn is Coming ♥

To View Tag In Proper Size Click On The Tag
Supplies Needed
Scrapkit By stefs scrapkits called Autumn is Coming This is PTU Here
Tube of choice im using ©pinup toons i brought my license & tube at Cilm all the tubes are at CDO Here
Mask WSL_Mask84 at weescotslass Here
Font of choice or the one im using is Mr Lackboughs
Lets Get Started
Open new image 650x600
Open pap04_Autumniscoming_Stef'sScrapkits copy paste as new layer apply mask merge group
Open ele53_Autumniscoming_Stef'sScrapkits copy paste as new layer with magic wand click in frame selection modify expand by 4
Open pap05_Autumniscoming_Stef'sScrapkits copy paste as new layer invert delete on keyboard select none drag under frame add drop shadow to frame
Open ele71_Autumniscoming_Stef'sScrapkits copy paste as new layer resize 65 percent add drop shadow
Open ele03_Autumniscoming_Stef'sScrapkits copy paste as new layer resize 40 percent add drop shadow
Open ele64_Autumniscoming_Stef'sScrapkits copy paste as new layer resize 47 percent add drop shadow
Open ele41_Autumniscoming_Stef'sScrapkits copy paste as new layer resize 55 percent add drop shadow
Open ele34_Autumniscoming_Stef'sScrapkits copy paste as new layer resize 55 percent add drop shadow
Open ele67_Autumniscoming_Stef'sScrapkits copy paste as new layer drag this under frame add drop shadow
right click copy merge paste this as new layer
open tube copy paste as new layer add drop shadow with magic wand click in the canvas of the tube go back to the merge layer we made copy paste into selection of the tube select none
Add your name & the words Autumn is Coming Font Mr Lackboughs forground #250400 background #cc985a effects add drop shadow
Add your copyright info
resize & save your tag
Love to see your results please email to me so i can put in my show off blog
Thankyou ♥
Written by ©Lyn(akaAngel) 29th August 2011, any similarity to any other tutorial is purely coincidental!
Result from Vickie isnt it Awesome Thankyou ♥

♥ Lost WithOut You ♥

To View Tag In Proper Size Click On The Tag
Supplies Needed
Scrapkit by Bea called Lost this is FTU Here
(To get the kit click on download this will take you to her 4shared you will find Lost on second page click on the icon to download)
Tube of choice im using ©Keith Garvey tubes are at PTE Here
Mask WSL_Mask33 at weescotslass Here
Font of choice or the one im using is Miss Le Gatees
Lets Get Started
Open new image 650x600
Open p14_bc_lost copy paste as new layer apply mask merge group duplicate merge down add remove noise 47 random monochrome checked resize 85 percent
Open frame4_bc_lost copy paste as new layer add drop shadow
Open tube copy paste as new layer drag this under frame duplicate put this above frame erase on bottom of tube on both layers on bottom tube add drop shadow
Open bling1_bc_lost copy paste as new layer add drop shadow
Open text_tag_bc_lost copy paste as new layer resize 85 percent add drop shadow
Open flower_deco_2_bc_lost copy paste as new layer resize 70 percent then resize again at 80 percent add drop shadow
Open heart4_bc_lost copy paste as new layer duplicate mirror add drop shadow
Add your name Font Miss Le Gatees forground #6e271f background #f27daa add gradient glow & add drop shadow
Add your copyright info
resize & save your tag
Love to see your results please email to me so i can put in my show off blog
Thankyou ♥
Written by ©Lyn(akaAngel) 28th August 2011, any similarity to any other tutorial is purely coincidental!
This is the lovely result from Dixie thankyou ♥

♥ We Rock ♥

To View Tag In Proper Size Click On The Tag
Supplies Needed
Scrapkit by Tonie Posers called Summer Dayz this is PTU Here
4 Tubes of choice im using ©Keith Garvey i brought my license & tube at MPT all hes tubes are at PTE Here
Mask WSL_Mask38 at weescotslass Here
Font of choice or the one im using is Miss Lankfort
Lets Get Started
Open new image 650x550
Open p18_bc_youandme copy paste as new layer apply mask merge group duplicate merge down add remove noise 47 random monochrome checked
Open frame02_bc_youandme copy paste as new layer with magic wand click in frame selection modify expand by 4
Open p23_bc_youandme copy paste as new layer invert delete on keyboard select none drag under frame add drop shadow to frame
Open frame03_bc_youandme copy paste as new layer with magic wand click in frames selection modify expand by 4
Open p07_bc_youandme copy paste as new layer invert delete on keyboard drag under frame keep selected open 3 tubes of choice copy paste them line them up & delete on keyboard to each add drop shadow to tubes & frame
Open bling03_bc_youandme copy paste as new layer erase around the top add drop shadow
Open bow_deco01_bc_youandme copy paste as new add drop shadow
Open guitar01_bc_youandme copy paste as new layer image rotate 20 right add drop shadow
Open main tube copy paste as new layer add drop shadow
Add your name Font Miss Lankfort Caps forground #000000 background #a52d82 add gradient glow & add drop shadow
Add your copyright info
resize & save your tag
Love to see your results please email to me so i can put in my show off blog
Thankyou ♥
Written by ©Lyn(akaAngel) 28th August 2011, any similarity to any other tutorial is purely coincidental!
♥ Summer Feeling ♥

To View Tag In Proper Size Click On The Tag
Supplies Needed
Scrapkit by Bea called Summer Feeling this is FTU Here
Tube of choice im using ©Elias Chatzoudis i brought my license & tube at MPT all hes tubes are at PTE Here
Mask WSL_Mask6 at weescotslass Here
Font of choice or the one im using is Mr Keningbeck
Lets Get Started
Open new image 650x600
Open p08_bc_summerfeeling copy paste as new layer apply mask merge group duplicate merge down duplicate move to right& down slightly
Open frame01_bc_summerfeeling copy paste as new layer with magic wand click in frame selection modify expand by 4
Open p09_bc_summerfeeling copy paste as new layer invert delete on keyboard drag under frame keep selected open the tubes copy paste them delete each on keyboard add drop shadow to frame & tubes
Open butterfly01_bc_summerfeeling copy paste as new layer resize 85 percent add drop shadow
Open glitter01_bc_summerfeeling copy paste as new layer drag under tubes which is under the frames
Open iceumbrella01_bc_summerfeeling copy paste as new layer add drop shadow
Open flipflop01_bc_summerfeeling copy paste as new layer resize 65 percent image rotate 20 right add drop shadow
Open ice02_bc_summerfeeling copy paste as new layer resize 70 percent image rotate 20 right add drop shadow
Add your name & the words Summer Feeling Font Mr Keningbeck forground #21d7da background #fa9638 add gradient glow & add drop shadow
Add your copyright info
resize & save your tag
Love to see your results please email to me so i can put in my show off blog
Thankyou ♥
Written by ©Lyn(akaAngel) 28th August 2011, any similarity to any other tutorial is purely coincidental!
♥ Autumn Days ♥

To View Tag In Proper Size Click On The Tag
Supplies Needed
Scrapkit by sharon called Autumn Days this is FTU Here
Tube of choice im using ©Elias Chatzoudis i brought my license & tube at MPT all hes tubes are at PTE Here
Font of choice or the one im using is MrBlaketon
Lets Get Started
Open new image 650x600
Open CBS-Autumn Days Frame 5 copy paste as new layer resize 75 percent with magic wand click in frame selection modify expand by 4
Open CBS-Autumn Days Paper 8 copy paste as new layer invert delete on keyboard select none drag under frame add drop shadow to frame
Open CBS-Autumn Days Fence 1 copy paste as new layer resize 71 percent add drop shadow
Open CBS-Autumn Days Tree 2 copy paste as new layer resize 90 percent add drop shadow
Open CBS-Autumn Days Bird 4 copy paste as new layer add drop shadow
Open CBS-Autumn Days Log 1 copy paste as new layer resize 70 percent mirror add drop shadow
Open CBS-Autumn Days Butterfly Swarm 1 copy paste as new layer add drop shadow
Open CBS-Autumn Days Ivy 1 copy paste as new layer add drop shadow duplicate mirror move next to first one
Open tube copy paste as new layer add drop shadow
Add your name Font MrBlaketon forground #ab5e26 background #cc9c7a add gradient glow & add drop shadow
Add your copyright info
resize & save your tag
Love to see your results please email to me so i can put in my show off blog
Thankyou ♥
Written by ©Lyn(akaAngel) 28th August 2011, any similarity to any other tutorial is purely coincidental!
Vickie has done a result of my tut this is awesome Thankyou ♥

♥ Love Is? ♥

To View Tag In Proper Size Click On The Tag
Supplies Needed
Scrapkit by clarey's designz called Kawaii Love this is FTU Here
Tube of choice im using ©Elias Chatzoudis i brought my license & tube at MPT all hes tubes are at PTE Here
Mask WSL_Mask84 at weescotslass Here
Font of choice or the one im using is Mr Lackboughs
Lets Get Started
Open new image 650x600
Open clarey_kawaiilove_flower2 copy paste as new layer resize 65 percent add drop shadow
Open clarey_kawaiilove_paper5 copy paste as new layer resize 65 percent apply mask merge group duplicate merge down
Open clarey_kawaiilove_frame1 copy paste as new layer resize 25 percent
Open clarey_kawaiilove_heartleaves1 copy paste as new layer resize 15 percent add drop shadow
Open clarey_kawaiilove_flower1 copy paste as new layer resize 15 percent add drop shadow duplicate 2 times arrange on tag
Open clarey_kawaiilove_bug1 copy paste as new layer resize 15 percent add drop shadow
Open clarey_kawaiilove_wordart2 copy paste as new layer resize 39 percent add drop shadow
Open tube copy paste as new layer add drop shadow
Add your name & the word Is? Font Mr Lackboughs forground #d9627e background #df7793 add gradient glow & add drop shadow
Add your copyright info
resize & save your tag
Love to see your results please email to me so i can put in my show off blog
Thankyou ♥
Written by ©Lyn(akaAngel) 27th August 2011, any similarity to any other tutorial is purely coincidental!
This a result of the tut its awesome Thankyou Deb ♥

♥ Who's That Girl ♥

To View Tag In Proper Size Click On The Tag
Supplies Needed
Scrapkit by sweet craving scraps called Who'sThatGirl this is PTU Here
Tube of choice im using ©Elias Chatzoudis i brought my license & tube at MPT all hes tubes are at PTE Here
Font of choice or the one im using is CK Alis Hand & Copper Alt Caps Expert
Lets Get Started
Open new image 650x600
Open SCS_Who'sThatGirl_Frame2 copy paste as new layer resize 75 percent with magic wand click in frame selection modify expand by 4
Open SCS_Who'sThatGirl_Paper14 copy paste as new layer invert delete on keyboard drag under frame select none add drop shadow to frame
Open male tube copy paste as new layer drag under frame erase the over lap add drop shadow
Open SCS_Who'sThatGirl_Umbrella copy paste as new layer resize 65 percent mirror add drop shadow
Open SCS_Who'sThatGirl_Flower6 copy paste as new layer resize 65 percent mirror add drop shadow
Open SCS_Who'sThatGirl_PerfumeBottle copy paste as new layer add drop shadow
Open SCS_Who'sThatGirl_Lipstick copy paste as new layer resize 65 add drop shadow
Open SCS_Who'sThatGirl_NailPolish copy paste as new layer resize 45 percent add drop shadow
Open main tube copy paste as new layer add drop shadow
Add the words Who's That Girl Font CK Alis Hand forground #ff8f9f background #f6888e add gradient glow & add drop shadow
Add your name Font Copper Alt Caps Expert forground #ff8f9f background #f6888e add gradient glow & add drop shadow
Add your copyright info
resize & save your tag
Love to see your results please email to me so i can put in my show off blog
Thankyou ♥
Written by ©Lyn(akaAngel) 27th August 2011, any similarity to any other tutorial is purely coincidental!
♥ Shiver Me Timbers ♥

To View Tag In Proper Size Click On The Tag
Supplies Needed
Scrapkit by sweet craving scraps called Shiver Me Timbers this is PTU Here
Tube of choice im using ©Elias Chatzoudis this is a PTU Tube can purchase at PTE Here
Mask WSL_Mask38 & WSL_Mask84 at weescotslass Here
Font of choice or the one im using is 2Peas Gone Postal & Satisfaction
Lets Get Started
Open new image 650x600
Open SCS_ShiverMeTimbers_Paper15 copy paste as new layer apply mask merge group duplicate merge down add remove noise 47 random monochrome checked
Open SCS_ShiverMeTimbers_Frame8 copy paste as new layer resize 75 percent with magic wand click in frame selection modify expand by 4
Open SCS_ShiverMeTimbers_Paper9 copy paste as new layer invert delete on keyboard drag under frame keep selected Open SCS_ShiverMeTimbers_PirateShip copy paste as new layer resize 70 percent select none add drop shadow to frame & ship
Open SCS_ShiverMeTimbers_Barrel copy paste as new layer resize 27 percent add drop shadow
Open SCS_ShiverMeTimbers_FishingNet1 copy paste as new layer resize 50 apply mask 84 add drop shadow
Open SCS_ShiverMeTimbers_ShipBell copy paste as new layer resize 55 percent add drop shadow
Open SCS_ShiverMeTimbers_Anker copy paste as new layer resize 60 percent image rotate 20 right add drop shadow
Open SCS_ShiverMeTimbers_Parrot copy paste as new layer resize 70 percent mirror add drop shadow
Open tube copy paste as new layer add drop shadow
Add the words Shiver Me Timbers Font 2Peas Gone Postal forground #7e5d3e background #9f855e add gradient glow & add drop shadow
Add your name Font Satisfaction forground #7e5d3e background #9f855e add gradient glow & add drop shadow
Add your copyright info
resize & save your tag
Love to see your results please email to me so i can put in my show off blog
Thankyou ♥
Written by ©Lyn(akaAngel) 27th August 2011, any similarity to any other tutorial is purely coincidental!
♥ Private Dancer ♥

To View Tag In Proper Size Click On The Tag
Supplies Needed
Scrapkit by Sweet Cravings Scraps called Private Dancer this is PTU Here
Tube of choice im using ©Keith Garvey avaiable at PTE Here
Mask WSL_Mask10 at weescotslass Here
Font of choice or the one im using is BayernHandschriftNF
Lets Get Started
Open new image 650x550
Open SCS_PrivateDancer_Paper6 copy paste as new layer apply mask merge group duplicate merge down
Open SCS_PrivateDancer_Frame5 copy paste as new layer resize 75 percent with magic wand click in frame selection modify expand by 4
Open SCS_PrivateDancer_Paper18 copy paste as new layer invert delete on keyboard select none drag under frame add drop shadow to frame
Open SCS_PrivateDancer_FlowerDoodle4 copy paste as new layer add gradient glow add drop shadow
Open SCS_PrivateDancer_Balloon1 copy paste as new layer resize 65 percent add drop shadow
Open SCS_PrivateDancer_Flower6 copy paste as new layer resize 45 percent add drop shadow
Open tube copy paste as new layer add drop shadow
Add your name & the words Private Dancer Font BayernHandschriftNF forground #677e93 background #b5c0cc add gradient glow & add drop shadow
Add your copyright info
resize & save your tag
Love to see your results please email to me so i can put in my show off blog
Thankyou ♥
Written by ©Lyn(akaAngel) 27th August 2011, any similarity to any other tutorial is purely coincidental!
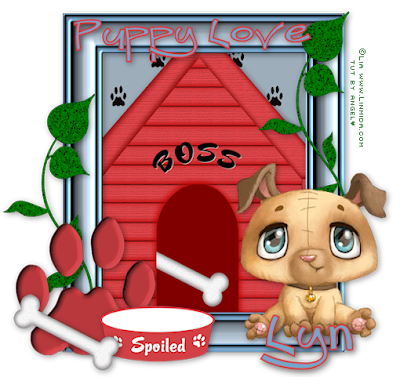
♥ Puppy Love ♥
To View Tag In Proper Size Click On The Tag
Supplies Needed
Scrapkit Puppy Love by Sharon FTU Here
Tube of choice i used FTU ©Lia Here
Font of choice or the one im using is Bullwinkle
Lets Get Started
Open new image 650x550
Open Frame1 copy paste as new layer resize 80 percent with magic wand click in frame selection modify expand by 4
Open Paper 15 copy paste as new layer invert delete on keyboard select none drag under frame add drop shadow to frame
Open Leaf 2 copy paste as new layer duplicate move to right
Open Paws 2 copy paste as new layer add drop shadow
Open tube copy paste as new layer add drop shadow
Open Bowl 4 copy paste as new layer resize 75 percent add drop shadow
Open Bone 1 copy paste as new layer add drop shadow
Open Dog House 2 copy paste as new layer drag under frame add drop shadow
Add your name & the words Puppy Love Font Bullwinkle forground #da3c41 background #78a5c9 effects add drop shadow
Add your copyright info
resize & save your tag
Love to see your results please email to me so i can put in my show off blog
Thankyou ♥
Written by ©Lyn(akaAngel) 26th August 2011, any similarity to any other tutorial is purely coincidental!
Result from Dixie this is awesome thankyou ♥

♥ Spookylicious ♥

To View Tag In Proper Size Click On The Tag
Supplies Needed
Scrapkit by Tonie Posers called Spookylicious this is PTU Here
Tube of choice im using ©Elias Chatzoudis i brought my license & tube at MPT all hes tubes are at PTE Here
Mask WSL_Mask38 at weescotslass Here
Font of choice or the one im using is BlueMoon
Lets Get Started
Open new image 650x550
Open Spookylicious paper 17 copy paste as new layer apply mask merge group
Open Spookylicious frame 5 copy paste as new layer resize 85 percent add drop shadow to frame then add gradient glow #fc5c04
Open Spookylicious button 1 copy paste as new layer
Open Spookylicious spooky book copy paste as new layer resize 80 percent image rotate 20 percent left add drop shadow
Open Spookylicious bones 2 copy paste as new layer resize 27 percent add drop shadow
Open Spookylicious bewere copy paste as new layer add drop shadow
Open Spookylicious spider 1 copy paste as new layer resize 65 percent add drop shadow
Open tube copy paste as new layer add drop shadow
Add your name Font BlueMoon forground #f46d01 background #000000 add drop shadow & add gradient glow #fc5c04
Add your copyright info
resize & save your tag
Love to see your results please email to me so i can put in my show off blog
Thankyou ♥
Written by ©Lyn(akaAngel) 26th August 2011, any similarity to any other tutorial is purely coincidental!
♥ Somewhere Over The Rainbow ♥

To View Tag In Proper Size Click On The Tag
Supplies Needed
Scrapkit by Sweet Cravings Scraps called Somewhere Over The Rainbow this is PTU Here
Font of choice or the one im using is 2Peas Blessings
Lets Get Started
Open new image 650x550
Open SCS_SOTR_Frame5 copy paste as new layer resize 85 percent with with freehand tool go around frame
Open SCS_SOTR_Paper16 copy paste as new layer invert delete on keyboard drag paper under frame keep selected open SCS_SOTR_YellowBrickRoad resize 70 percent delete on keyboard select none lower opacity 79 add drop shadow
Open SCS_SOTR_FlyingTree copy paste as new layer resize 75 percent add drop shadow
Open SCS_SOTR_Rainbow copy paste as new layer resize 75 percent add drop shadow
Open SCS_SOTR_CuteFlyingMonkey copy paste as new layer resize 30 percent add drop shadow
Open SCS_SOTR_CuteScarecrow copy paste as new layer resize 55 percent add drop shadow
Open SCS_SOTR_Cloud copy paste as new layer resize 39 percent duplicate image rotate 20 right move slightly to the right
Open medi_dotty3 copy paste as new layer resize 65 percent add drop shadow
Open SCS_SOTR_CuteTinMan copy paste as new layer resize 20 percent add drop shadow
Add your name Font 2Peas Blessings forground #ffffff background #5897aa add drop shadow
Add your copyright info
resize & save your tag
Love to see your results please email to me so i can put in my show off blog
Thankyou ♥
Written by ©Lyn(akaAngel) 26th August 2011, any similarity to any other tutorial is purely coincidental!
♥ Land Of Confusion ♥

To View Tag In Proper Size Click On The Tag
Supplies Needed
Scrapkit by Sweet Cravings Scraps called Land Of Confusion this is PTU Here
Mask WSL_Mask84 at weescotslass Here
Template5a by Me this is FTU you can find this Here
Font of choice or the one im using is Voluta Script Pro
Lets Get Started
Open Template duplicate close original © layer
Go to Raster 2 layer select all float defloat open SCS_LandOfConfusion_Paper18 copy paste as new layer invert delete on keyboard select none add drop shadow move this layer slightly to the right
Open SCS_LandOfConfusion_CheckerPath1 Copy paste as new layer apply mask merge group add drop shadow
Go to Raster 3 layer add drop shadow
Go to Copy of Raster 3 add drop shadow
Go to Raster 4 layer select all float defloat open SCS_LandOfConfusion_Paper1 copy paste as new layer invert delete on keyboard keep selected Open gemini_dolly2_3 add drop shadow to tube
Go to Raster 5 layer select all float defloat open SCS_LandOfConfusion_Paper9 copy paste as new layer invert delete on keyboard select none add drop shadow
Go to Raster 6 layer select all float defloat open SCS_LandOfConfusion_Paper1 copy paste as new layer invert delete on keyboard keep selected Open gemini_dolly2_1 add drop shadow to tube
Go to Raster 7 layer select all float defloat open SCS_LandOfConfusion_Paper9 copy paste as new layer invert delete on keyboard keep selected add drop shadow
Open SCS_LandOfConfusion_Flare3 Copy paste as new layer add drop shadow
Open SCS_LandOfConfusion_Dragonfly3 Copy paste as new layer resize 56 percent add drop shadow
Open SCS_LandOfConfusion_PinTag3 Copy paste as new layer resize 50 percent erese part of the pin add drop shadow
Open SCS_LandOfConfusion_Feather2 copy paste as new layer resize 70 percent duplicate mirror
Add your name font Voluta Script Pro forground #9683bd background #d3d5e2 add drop shadow & add gradient glow
Add your copyright info
resize & save your tag
Love to see your results please email to me so i can put in my show off blog
Thankyou ♥
Written by ©Lyn(akaAngel) 26th August 2011, any similarity to any other tutorial is purely coincidental!
♥ Escape ♥

To View Tag In Proper Size Click On The Tag
Supplies Needed
Scrapkit by Sweet Cravings Scraps called Escape this is PTU Here
Tube of choice im using ©Girlfriends i brought my license & tube at MPT im sorry im not sure where the Artist has gone with MPT Closing
Font of choice or the one im using is 2Peas Barefoot Professor
Lets Get Started
Open new image 650x550
Open SCS_Escape_Frame10 copy paste as new layer resize 63 percent with magic wand click in frame selection modify expand by 4
Open SCS_Escape_Paper11 copy paste as new layer invert delete on keyboard select none drag under frame add drop shadow to frame
Open SCS_Escape_FloralSwing copy paste as new layer erase so is inside frame add drop shadow
Open SCS_Escape_Well copy paste as new layer resize 63 percent add drop shadow
Open SCS_Escape_Wheat copy paste as new layer resize 57 percent duplicate merge down duplicate mirror move back next to other one merge down add drop shadow
Open SCS_Escape_TreeLog copy paste as new layer resize 45 percent mirror add drop shadow
Open tube copy paste as new layer add drop shadow
Open SCS_Escape_Flower6 copy paste as new layer resize 46 percent duplicate mirror move back next to other flowers add drop shadow
Open SCS_Escape_Flare3 copy paste as new layer resize 75 percent mirror drag under frame add drop shadow
Open SCS_Escape_BirdInNest copy paste as new layer resize 45 percent mirror add drop shadow
Add your name Font 2Peas Barefoot Professor forground #ffffff background #d7c30b effects add drop shadow
Add your copyright info
resize & save your tag
Love to see your results please email to me so i can put in my show off blog
Thankyou ♥
Written by ©Lyn(akaAngel) 26th August 2011, any similarity to any other tutorial is purely coincidental!
♥ Breakfast At Tiffanys ♥

To View Tag In Proper Size Click On The Tag
Supplies Needed
Scrapkit by Sweet Cravings Scraps called Breakfast At Tiffany this is PTU Here
Tube of choice im using ©Keith Garvey i brought my license & tube at MPT all hes tubes are at PTE Here
Mask WSL_Mask38 at weescotslass Here
Font of choice or the one im using is Mon Amour Script Alt
Lets Get Started
Open new image 650x550
Open SCS_BreakfastAtTiffanys_Paper19 copy paste as new layer apply mask merge group duplicate
Open SCS_BreakfastAtTiffanys_Frame4 copy paste as new layer resize 85 percent with magic wand click in frame modify expand by 4
Open SCS_BreakfastAtTiffanys_Paper14 copy paste as new layer invert delete on keyboard drag paper under frame keep selected open SCS_BreakfastAtTiffanys_Cityscape copy paste as new layer delete on keyboard drag under frame kepp selectes open SCS_BreakfastAtTiffanys_Rain delete on keyboard drag above city scape add drop shadow select none
Open SCS_BreakfastAtTiffanys_Doodle2 copy paste as new layer apply drag this under the cityscape layer add drop shadow
Open SCS_BreakfastAtTiffanys_Flower1 copy paste as new layer resize 50 percent add drop shadow
Open SCS_BreakfastAtTiffanys_FlowerSwag copy paste as new layer resize 80 percent add drop shadow
Open SCS_BreakfastAtTiffanys_RetroDress1 copy paste as new layer resize 75 percent add drop shadow
Open SCS_BreakfastAtTiffanys_Perfume copy paste as new layer resize 75 percent mirror add drop shadow
Open SCS_BreakfastAtTiffanys_ChampangeGlass copy paste as new layer resize
Open SCS_BreakfastAtTiffanys_Champange copy paste as new layer resize 52 percent image rotate 25 right add drop shadow
Open tube copy paste as new layer add drop shadow
Add your name Font Mon Amour Script Alt forground #000000 background #70c6c0 add drop shadow & add gradient glow #fc5c04
Add your copyright info
resize & save your tag
Love to see your results please email to me so i can put in my show off blog
Thankyou ♥
Written by ©Lyn(akaAngel) 26th August 2011, any similarity to any other tutorial is purely coincidental!
♥ Hen & Chicken Lane ♥

To View Tag In Proper Size Click On The Tag
Supplies Needed
Scrapkit by Kims Corner called On the Farm this is FTU Here
Tube of choice im using ©Ben Tan Here
Mask WSL_Mask84 at weescotslass Here
Font of choice or the one im using is AL Charisma
Lets Get Started
Open new image 650x550
Open kk_ONTF_Paper20 copy paste as new layer apply mask merge group
Open kk_ONTF_Silo copy paste as new layer resize 75 percent add drop shadow
Open kk_ONTF_Rooster02 copy paste as new layer add drop shadow
Open kk_ONTF_Flower03 copy paste as new layer resize 58 percent duplicate resize 85 percent duplicate resize 75 percent add drop shadow
Open kk_ONTF_Chicken01 copy paste as new layer resize 32 percent add drop shadow
Open kk_ONTF_Hen02 copy paste as new layer resize 45 percent add drop shadow
Open kk_ONTHF_wheel2 copy paste as new layer resize 70 percent add drop shadow put this behind the fence see my tag
Open kk_ONTF_Hen01 copy paste as new layer resize 28 percent add drop shadow
Open tube copy paste as new layer add drop shadow
Add your name & the words Chicken & Hen Lane Font AL Charisma forground #5c5c3d background #ffe2ab add gradient glow & drop shadow
Add your copyright info
resize & save your tag
Love to see your results please email to me so i can put in my show off blog
Thankyou ♥
Written by ©Lyn(akaAngel) 20th August 2011, any similarity to any other tutorial is purely coincidental!
These are The result from this Tut Thankyou for showing me ♥


♥ Ok Lets Go ♥

To View Tag In Proper Size Click On The Tag
Supplies Needed
Scrapkit by Jaded this is FTU Here
Tube of choice im using ©LiaHere
Mask WSL_Mask38 at weescotslass Here
Font of choice or the one im using is Apple Boy BTN
Lets Get Started
Open new image 650x550
Open SCE JADED PAPER 2 copy paste as new layer apply mask merge group
Open SCE JADED FRAME copy paste as new layer resize 30 percent effects enhance with magic wand click in frame selection modify expand by 4
Open SCE JADED PAPER 3 copy paste as new layer resize 45 percent invert delete on keyboard select none drag under frame add drop shadow to frame
Open SCE JADED DECO FLOWER copy paste as new layer resize 50 percent add drop shadow
Open SCE JADED BRAD 2 copy paste as new layer resize 15 percent duplicate 2 times arrange on tag add drop shadow
Open tube copy paste as new layer add drop shadow
Add your name Font Apple Boy BTN forground #3e5140 background #acc8b0 add gradient glow & add drop shadow
Add your copyright info
resize & save your tag
Love to see your results please email to me so i can put in my show off blog
Thankyou ♥
Written by ©Lyn(akaAngel) 20th August 2011, any similarity to any other tutorial is purely coincidental!
This is the result from Lori the tag is awesome Thankyou ♥

♥ Sand Surf & Some R&R ♥

To View Tag In Proper Size Click On The Tag
Supplies Needed
Scrapkit by Lizquis Scraps called Bella Mermaid this is FTU Here
Tube of choice im using ©Elias Chatzoudis i brought my license & tube at MPT all hes tubes are at PTE Here
Mask WSL_Mask84 at weescotslass Here
Font of choice or the one im using is Impact & AL Sandra
Lets Get Started
Open new image 650x550
Open paper16 copy paste as new layer apply mask merge group
Open red copy paste as new layer resize 80 percent
Open marco1 copy paste as new layer resize 80 percent with magic wand click in frame selection modify expand by 4
Open papel1 copy paste as new layer invert delete on keyboard select none drag under frame add drop shadow to frame
Open sparkle copy paste as new layer drag this under frame
Open arena copy paste as new layer
Open palmera copy paste as new layer resize 88 percent add drop shadow
Open algas copy paste as new layer resize 52 percent add drop shadow
Open almeja copy paste as new layer resize 88 percent add drop shadow
Open botella copy paste as new layer resize 52 percent add drop shadow
Open cangrejo copy paste as new layer resize 45 percent add drop shadow
Open delfin copy paste as new layer resize 45 percent lower opacity 65 add drop shadow
Open pez1 copy paste as new layer resize 52 percent lower opacity 44 add drop shadow
Open tube copy paste as new layer add drop shadow
Add the word Sand Surf & Some R&R Font Impact forground #ac71ab background #72c9ff add gradient glow & drop shadow
Add your name Font AL Sandra forground #ac71ab background #72c9ff add gradient glow & drop shadow
Add your copyright info
resize & save your tag
Love to see your results please email to me so i can put in my show off blog
Thankyou ♥
Written by ©Lyn(akaAngel) 20th August 2011, any similarity to any other tutorial is purely coincidental!
♥ Happy Birthday ♥

To View Tag In Proper Size Click On The Tag
Supplies Needed
Scrapkit by Tinx Scraps called Happy Birthday this is FTU Here
Tube of choice i used FTU ©Lia Here
Mask WSL_Mask84 at weescotslass Here
Font of choice or the one im using is Larger Mime
Lets Get Started
Open new image 650x550
Open TS Happy Birthday paper 13 copy paste as new layer apply mask merge group duplicate merge down Djust add remove noise 47 random monochrome checked
Open TS Happy Birthday frame 4 copy paste as new layer duplicate frame image rotate 20 percent left wand merge down click in both frames selection modify expand by 4
Open TS Happy Birthday paper 6 copy paste as new layer invert delete on keyboard select none drag under frame add remove noise 47 random monochrome checked add drop shadow to frames
Open TS Happy Birthday ballons multi copy paste as new layer add drop shadow
Open TS Happy Birthday happy birthday 3 copy paste as new layer image rotate 20 left add drop shadow
Open TS Happy Birthday cake 3 copy paste as new layer add drop shadow
Open TS Happy Birthday cake 2 copy paste as new layer resize 45 percent add drop shadow
Open TS Happy Birthday bear copy paste as new layer resize 58 percent add drop shadow
Open tube copy paste as new layer add drop shadow
Add your name Font Larger Mime forground #fb65b3 background #8a0052 add drop shadow
Add your copyright info
resize & save your tag
Love to see your results please email to me so i can put in my show off blog
Thankyou ♥
Written by ©Lyn(akaAngel) 17th August 2011, any similarity to any other tutorial is purely coincidental!
♥ I'm Hot For You ♥

To View Tag In Proper Size Click On The Tag
Supplies Needed
Scrapkit Clean Living this is FTU Here
Tube of choice im using ©Keith Garvey i brought my license & tube at MPT all hes tubes are at PTE Here
Mask WSL_Mask84 at weescotslass Here
Font of choice or the one im using is Miss Le Gatees
Lets Get Started
Open new image 650x550
Open SCE CL PAPER 3 copy paste as new layer resize 25 percent apply mask merge group duplicate merge down
Open SCE CL FRAME copy paste as new layer resize 35 percent then resize again 65 percent add drop shadow
Open SCE CL BLOSSOM BRANCH copy paste as new layer resize 20 percent erase the stem slightly add drop shadow
Open SCE CL BOW RIBBON copy paste as new layer resize 9 percent add drop shadow
Open SCE CL BUTTERFLY copy paste as new layer resize 20 percent add drop shadow
Open tube copy paste as new layer add drop shadow
Add your name & the words I'm Hot For You Font Miss Le Gatees forground #ffa057 background #ffffff add gradient glow add drop shadow
Add your copyright info
resize & save your tag
Love to see your results please email to me so i can put in my show off blog
Thankyou ♥
Written by ©Lyn(akaAngel) 17th August 2011, any similarity to any other tutorial is purely coincidental!
♥ Party Time ♥

To View Tag In Proper Size Click On The Tag
Supplies Needed
Scrapkit by sinfullycreativescraps called Birthday Bash Limited Time Collab FREEBIE Here
Tube of choice i used FTU ©Lia Here
Font of choice or the one im using is Carpenter Script
Lets Get Started
Open new image 650x550
Open BB_Frame_3 copy paste as new layer resize 75 percent click in frame with magic wand selection modify expand by 4
Open BB_Paper_5 copy paste as new layer invert delete on keyboard drag under frame select none add drop shadow
Open BB_Element_31 copy paste as new layer add drop shadow
Open BB_Element_12 copy paste as new layer add drop shadow
Open BB_Element_25 copy paste as new layer add drop shadow
Open BB_Element_48 copy paste as new layer add drop shadow
Open BB_Element_38 copy paste as new layer resize 23 percent add drop shadow
Open Tube copy paste as new layer copy paste as new layer resize 55 percent add drop shadow
Add your name Font Carpenter Script forground #c81b6b background #ffffff add drop shadow
Add your copyright info
resize & save your tag
Love to see your results please email to me so i can put in my show off blog
Thankyou ♥
Written by ©Lyn(akaAngel) 13th August 2011, any similarity to any other tutorial is purely coincidental!
♥ Love is in the Air ♥

To View Tag In Proper Size Click On The Tag
Supplies Needed
Scrapkit by Stef's Scrapkits called Love is in the Air this is PTU Here
Tube of choice im using ©Elias Chatzoudis i brought my license & tube at MPT all hes tubes are at PTE Here
Font of choice or the one im using is Copperplate Yevida Potens
Lets Get Started
Open new image 650x550
Open ele60_LoveisintheAir_Stef'sScrapkits copy paste as new layer resize 55 percent click in frame with magic wand modify 5
Open pap04_LoveisintheAir_Stef'sScrapkits copy paste as new layer invert drag under frame select none add drop shadow to frame
Open ele23_LoveisintheAir_Stef'sScrapkits copy paste as new layer resize 65 percent add drop shadow
Open ele18_LoveisintheAir_Stef'sScrapkits copy paste as new layer 65 percent drag under frame add drop shadow
Open ele37_LoveisintheAir_Stef'sScrapkits copy paste as new layer resize 47 percent add drop shadow
Open ele47_LoveisintheAir_Stef'sScrapkits copy paste as new layer resize 67 percent duplicate resize 67 add drop shadow
Open tube copy paste as new layer add drop shadow
Add your name Font Yevida Potens forground #961120 background #d20026 add drop shadow
Add your copyright info
resize & save your tag
Love to see your results please email to me so i can put in my show off blog
Thankyou ♥
Written by ©Lyn(akaAngel) 11th August 2011, any similarity to any other tutorial is purely coincidental!
♥ Birthday Bash ♥

To View Tag In Proper Size Click On The Tag
Supplies Needed
Scrapkit by Stef Scrapkit called Birthday Bash this is FTU for the time being until 25th August then will be PTU Here
Mask WSL_Mask84 at weescotslass Here
Font of choice or the one im using is Copperplate Gothic Bold
Lets Get Started
Open new image 650x550
Open pap12_Stef'sScrapkits copy paste as new layer apply mask merge group duplicate merge down add remove noise 47 random monochrome checked
Open ele39_Stef'sScrapkits copy paste as new layer resize 75 percent add drop shadow
Open ele15_Stef'sScrapkits copy paste as new layer resize 45 percent add drop shadow
Open ele10_Stef'sScrapkits copy paste as new layer 58 percent drag under frame
Open ele59_Stef'sScrapkits copy paste as new layer resize 67 percent add drop shadow
Open ele14_Stef'sScrapkits copy paste as new layer resize 50 percent mirror add drop shadow
Open ele46_Stef'sScrapkits copy paste as new layer resize 25 percent with pick tool i arranged it so it is sitting on the rack on the bike add drop shadow
Open ele19_Stef'sScrapkits copy paste as new layer resize 45 percent duplicate mirror add drop shadow
Open ele21_Stef'sScrapkits copy paste as new layer resize 55 percent drag under the bike layer add drop shadow
Open ele28_Stef'sScrapkits copy paste as new layer resize 55 percent add drop shadow
Add your name Font Copperplate Gothic Bold forground #f0a800 background #f0a800 convert to raster layer effects texture effects blinds with this setting Width 10 Opacity 24 Horizontal & light from left/top checked #975f00add drop shadow
Add your copyright info
resize & save your tag
Love to see your results please email to me so i can put in my show off blog
Thankyou ♥
Written by ©Lyn(akaAngel) 11th August 2011, any similarity to any other tutorial is purely coincidental!
♥ Im Here For The Entertainment ♥

To View Tag In Proper Size Click On The Tag
Supplies Needed
Scrapkit by HAPPY DAYZ this is FTU Here
Tube of choice im using ©Ismael Rac this is PTU tube you need proper licence to use this Here
Template by Dolly's Tag World Entertainment Template Here
Mask WSL_Mask26 at weescotslass Here
Font of choice or the one im using is Do I like Stripes?
Lets Get Started
Open new image 650x550
Open Template duplicate close original canvas size 750x650 delete Dolly layer & white background layer
Go to left Glitter Square layer select all float defloat open SCE HD PAPER 2 copy paste as new layer invert delete on keyboard select none close original layer off add drop shadow
Go to Left Black Square layer select all float defloat open SCE HD PAPER 3 copy paste as new layer resize 49 percent invert delete on keyboard select none close original layer off
Go to Right Glitter Square layer select all float defloat open SCE HD PAPER 2 copy paste as new layer invert delete on keyboard select none close original layer off add drop shadow
Go to Right Black Square layer select all float defloat open SCE HD PAPER 3 copy paste as new layer resize 49 percent invert delete on keyboard select none close original layer off
Go to Black Lines layer select all float defloat open SCE HD PAPER 1 copy paste as new layer invert delete on keyboard select none
Go to Pink Circle layer select all float defloat open tp-paper-4 copy paste as new layer invert delete on keyboard select none effects texture effects weave 2 2 23 #000000 in both boxes fill gaps checked add drop shadow
Go to frame fill layer select all float defloat open SCE HD PAPER 2 copy paste as new layer resize 45 percent invert delete on keyboard select none close original layer off add drop shadow
Go to Black Circle layer select all float defloat open SCE HD PAPER 3 copy paste as new layer resize 35 percent keep selected add tube copy paste as new layer delete on keyboard select none add drop shadow to tube
Go to Raster 2 Adjust huie & saturation colourize Hue 212 Saturation 99 add drop shadow
Open SCE HD BOW 2 Copy paste as new layer resize 15 percent then again at 85 percent add drop shadow
Open SCE HD BUTTON 2 Copy paste as new layer resize 15 percent duplicate 5 times arrange on tag add drop shadow to all
Open your tube Copy paste as new layer add drop shadow
Open SCE HD PAPER 2 apply mask merge group arrange send to bottom duplicate 2 times merge down
Add your name Font Do I like Stripes? forground #000000 background #8a6ab5 add gradient glow & add drop shadow
Add your copyright info
resize & save your tag
Love to see your results please email to me so i can put in my show off blog
Thankyou ♥
Written by ©Lyn(akaAngel) 10th August 2011, any similarity to any other tutorial is purely coincidental!
♥Spoiled Rotten Brat ♥

To View Tag In Proper Size Click On The Tag
Supplies Needed
Scrapkit by vaybs called Brattitude this is FTU Here
Tube of choice im using ©Lady Mishka i brought my license & tube at PTE she is no longer selling there you can purchase her tubes Here
Mask WSL_Mask149 at weescotslass Here
Font of choice or the one im using is Buffet Script
Lets Get Started
Open new image 650x550
Open DBV Brattitude paper (5) copy paste as new layer apply mask merge group duplicate merge down
Open DBV Brattitude frame (5) copy paste as new layer resize 64 percent with magic wand click in frame selection modify expand by 4
Open DBV Brattitude paper (5) copy paste as new layer invert delete on keyboard keep selected open your tube copy paste as new layer delete on keyboard select none drag under frame add drop shadow to frame & tube
Open DBV Brattitude element (45) copy paste as new layer mirror add drop shadowOpen DBV Brattitude element (7) copy paste as new layer add drop shadow
Open DBV Brattitude element (15) copy paste as new layer resize 55 percent add drop shadow
Open DBV Brattitude element (17) copy paste as new layer add drop shadow
Open tube copy paste as new layer add drop shadow
Open DBV Brattitude element (38) copy paste as new layer resize 45 percent image rotate 20 left add drop shadow
Open DBV Brattitude element (39) copy paste as new layer resize 45 percent image rotate 20 left add drop shadow
Open DBV Brattitude element (40) copy paste as new layer resize 55 add drop shadow
Add your name Font Buffet Script forground #000000 background #df6791 add drop shadow
Add your copyright info
resize & save your tag
Love to see your results please email to me so i can put in my show off blog
Thankyou ♥
Written by ©Lyn(akaAngel) 10th August 2011, any similarity to any other tutorial is purely coincidental!
♥ Summer Holiday ♥

To View Tag In Proper Size Click On The Tag
Supplies Needed
Scrapkit by Junkin' Punkin called No Rain Today this is PTU Here
Tube of choice im using ©Dean Yeagle i brought my license & tube at CILM all tubes are at PTE Here
Mask WSL_Mask145 at weescotslass Here
Font of choice or the one im using is Bavand
Lets Get Started
Open new image 650x550
Open pp2 copy paste as new layer apply mask merge group duplicate merge down add remove noise 47 random monochrome checked
Open sand copy paste as new layer with pick tool bring in sides a little
Open frame4 copy paste as new layer image rotate 90 left with magic wand click in frames selection modify expand by 4
Open pp9 copy paste as new layer invert delete on keyboard select none drag under frame add drop shadow to frame
Open outlawbydesignft545 copy paste as new layer resize 45 percent image rotate 20 right resize again 65 percent add drop shadow
Open chair copy paste as new layer resize 55 percent add drop shadow
Open tube copy paste as new layer add drop shadow
Duplicate chair bring this one to top of tube erase parts so that it looks like your tube is sitting on chair see my tag for reference merge down so chairs & tube is one layer resize 90 percent
Open drink copy paste as new layer resize 45 percent add drop shadow
Open dolphin copy paste as new layer resize 25 percent add drop shadow duplicate resize percent mirror merge down drag under frame
Open seagull copy paste as new layer resize 35 percent add drop shadow drag under frame
Add your name & the words Summer Holiday Font Bavand forground #0e9cac background #ffffff add drop shadow & add gradient glow
Add your copyright info
resize & save your tag
Love to see your results please email to me so i can put in my show off blog
Thankyou ♥
Written by ©Lyn(akaAngel) 10th August 2011, any similarity to any other tutorial is purely coincidental!
♥ Lost In The Dark ♥

To View Tag In Proper Size Click On The Tag
Supplies Needed
Scrapkit by Stefs Scrapkits called Lost In The Dark this is PTU Here
Tube of choice im using ©Keith Garvey i brought my license & tube at MPT all hes tubes are at PTE Here
Mask WSL_Mask124 at weescotslass Here
Font of choice or the one im using is Barrista
Lets Get Started
Open new image 650x550
Open Paper12_LostintheDark_Stef'sScrapkits copy paste as new layer apply mask merge group
Open Element50_LostintheDark_Stef'sScrapkits copy paste as new layer resize 52 percent add drop shadow
Open Element28_LostintheDark_Stef'sScrapkits copy paste as new layer add drop shadow
Open Element07_LostintheDark_Stef'sScrapkits copy paste as new layer resize 39 percent add drop shadow
Open Element35_LostintheDark_Stef'sScrapkits copy paste as new layer resize 35 percent image rotate 20 left duplicate mirror add drop shadow
Open tube copy paste as new layer add drop shadow
Add your name & the words Lost In The Dark Font Barrista forground #ffffff background #000000 add drop shadow
Add your copyright info
resize & save your tag
Love to see your results please email to me so i can put in my show off blog
Thankyou ♥
Written by ©Lyn(akaAngel) 10th August 2011, any similarity to any other tutorial is purely coincidental!
♥ Love is in the Air ♥

To View Tag In Proper Size Click On The Tag
Supplies Needed
Scrapkit by Stefs Scrapkits called TurquoisePassion this is PTU Here
Tube of choice im using ©Keith Garvey i brought my license & tube at MPT all hes tubes are at PTE Here
Mask WSL_Mask84 at weescotslass Here
Font of choice or the one im using is BayernHandschriftNF
Lets Get Started
Open new image 650x550
Open Paper04_TurquoisePassion_Stef'sScrapkits copy paste as new layer apply mask merge group add remove noise 47 random monochrome checked
Open Element29_TurquoisePassion_Stef'sScrapkits copy paste as new layer resize 75 percent add drop shadow
Open Element41_TurquoisePassion_Stef'sScrapkits copy paste as new layer resize 70 percent add drop shadow
Open Element25_TurquoisePassion_Stef'sScrapkits copy paste as new layer resize 65 percent add drop shadow
Open Element24_TurquoisePassion_Stef'sScrapkits copy paste as new layer add drop shadow
Open Element30_TurquoisePassion_Stef'sScrapkits copy paste as new layer resize 55 percent add drop shadow
Open tube copy paste as new layer drag under frame erase any ovelapping
Open main tube copy paste as new layer add drop shadow
Add your name & the words Love is in the Air Font BayernHandschriftNF forground #65a197 background #abdfd6 add gradient glow & add drop shadow
Add your copyright info
resize & save your tag
Love to see your results please email to me so i can put in my show off blog
Thankyou ♥
Written by ©Lyn(akaAngel) 9th August 2011, any similarity to any other tutorial is purely coincidental!
♥ Make Believe ♥

To View Tag In Proper Size Click On The Tag
Supplies Needed
Scrapkit by TootyPup called Make Believe this is PTU Here
Mask WSL_Mask81 at weescotslass Here
Font of choice or the one im using is Voluta Script Pro
Lets Get Started
Open new image 650x550
Open tp-paper-7 copy paste as new layer apply mask merge group duplicate merge down duplicate
Open tp-framePlain-4 copy paste as new layer resize 55 percent add drop shadow
Open tp-flowerPad-2 copy paste as new layer resize 50 percent add drop shadow
Open tp-balloons-2 copy paste as new layer resize 65 percent add drop shadow
Open tp-mushroomCottage-1 copy paste as new layer resize 45 percent image mirror add drop shadow
Open tp-Unicorn-3 copy paste as new layer resize 44 percent add drop shadow
Open tp-poser-2 copy paste as new layer resize add drop shadow
Add your name Font Voluta Script Pro forground #d9b3d8 background #c9d0fc add gradient glow & add drop shadow
Add your copyright info
resize & save your tag
Love to see your results please email to me so i can put in my show off blog
Thankyou ♥
Written by ©Lyn(akaAngel) 9th August 2011, any similarity to any other tutorial is purely coincidental!
♥ Vintage Autumn ♥

To View Tag In Proper Size Click On The Tag
Supplies Needed
Scrapkit by Babycakes Scraps called Vintage Autumn Here
Tube of choice im using ©Suzanne Woolcott Here
Mask WSL_Mask38 at weescotslass Here
Template117 by Becky FTU Here
Font of choice or the one im using is Valeria Script Two
Lets Get Started
Open Template duplicate close original delete info layer & white background layer canvas size 650 x 500
Go to rectangle2 background layer select all float defloat open bcs_paper_six copy paste as new layer invert delete on keyboard select none add drop shadow
Go to top rectangle2 layer select all float defloat open bcs_paper_one copy paste as new layer invert delete on keyboard select none
Go to rectangle1 background layer select all float defloat open bcs_paper_six copy paste as new layer invert delete on keyboard select none add drop shadow
Go to rectangle1 layer select all float defloat open bcs_paper_six copy paste as new layer invert delete on keyboard select none
Go to square2 background layer select all float defloat open bcs_paper_ten copy paste as new layer invert delete on keyboard select none add drop shadow
Go to square2 layer select all float defloat open bcs_paper_four copy paste as new layer invert delete on keyboard open bcs_berry_cluster resize 50 percent delete on keyboard add drop shadow
Go to square1 background layer select all float defloat open bcs_paper_ten copy paste as new layer invert delete on keyboard select none add drop shadow
Go to square2 layer select all float defloat open bcs_paper_four copy paste as new layer invert delete on keyboard open bcs_leaf_cluster resize 50 percent delete on keyboard add drop shadow
Go to frame fill select all float defloat open bcs_paper_twenty copy paste as new layer invert delete on keyboard keep selected open bce_lace_butterfly copy paste as new layer resize 80 percent delete on keyboard select none add drop shadow
Go to frame layer select all float defloat open bcs_paper_seventeen copy paste as new layer invert delete on keyboard
Open bcs_birdhouse Copy paste as new layer resize 50 percent add drop shadow
Open bcs_flourish Copy paste as new layer resize 55 percent arrange send to bottom image flip add drop shadow
Open bcs_brown_bow_two Copy paste as new layer resize 52 percent image rotate 25 left add drop shadow
Open bcs_nut_cluster Copy paste as new layer resize 30 percent add drop shadow
Open bcs_small_leaf_cluster Copy paste as new layer arrange send to bottom duplicate flip mirror merge down add drop shadow
Open bcs_paper_six copy paste as new layer send to bottom apply mask merge group
Add your name Font Valeria Script Two forground #673e23 background #bd7323 add drop shadow & add gradient glow
Add your copyright info
resize & save your tag
Love to see your results please email to me so i can put in my show off blog
Thankyou ♥
Written by ©Lyn(akaAngel) 8th August 2011, any similarity to any other tutorial is purely coincidental!
♥ We're All SuperStars ♥

To View Tag In Proper Size Click On The Tag
Supplies Needed
Scrapkit by Designed by Stina called We're All Superstars this is PTU Here
Tube of choice im using ©Elias Chatzoudis i brought my license & tube at MPT all hes tubes are at PTE Here
Mask WSL_Mask145 at weescotslass Here
Template118 by Becky FTU Here
Font of choice or the one im using is Do I like Stripes?
Lets Get Started
Open Template duplicate close original delete info layer & white background layer canvas size 650 x 500
Go to bottom rectangle layer select all float defloat open DBS_Paper14 copy paste as new layer invert delete on keyboard select none add drop shadow
Go to top rectangle layer select all float defloat open DBS_Paper08 copy paste as new layer invert delete on keyboard select none add drop shadow
Go to strip 4 layer select all float defloat open DBS_Paper12 copy paste as new layer invert delete on keyboard select none add drop shadow
Go to strip 3 layer select all float defloat open DBS_Paper07 copy paste as new layer invert delete on keyboard select none add drop shadow
Go to strip 2 layer select all float defloat open DBS_Paper07 copy paste as new layer invert delete on keyboard select none add drop shadow
Go to strip 1 layer select all float defloat open DBS_Paper12 copy paste as new layer invert delete on keyboard select none add drop shadow
Go to right side frame layer select all float defloat open DBS_Paper06 copy paste as new layer invert delete on keyboard keep selected open tube copy paste as new layer delete on keyboard select none add drop shadow
Go to right side frame trim select all float defloat open DBS_Paper13 copy paste as new layer invert delete on keyboard select none add drop shadow
Go to right side frame layer select all float defloat open DBS_Paper02 copy paste as new layer invert delete on keyboard
Go to center frame layer select all float defloat open DBS_Paper06 copy paste as new layer invert delete on keyboard keep selected open tube copy paste as new layer delete on keyboard select none add drop shadow
Go to center frame trim layer select all float defloat open DBS_Paper13 copy paste as new layer invert delete on keyboard select none add drop shadow
Go to center frame select all float defloat open DBS_Paper02 copy paste as new layer invert delete on keyboard
Go to left side frame fill layer select all float defloat open DBS_Paper06 copy paste as new layer invert delete on keyboard keep selected open tube copy paste as new layer delete on keyboard select none add drop shadow
Go to left side frame trim layer select all float defloat open DBS_Paper13 copy paste as new layer invert delete on keyboard select none add drop shadow
Go to left side frame select all float defloat open DBS_Paper02 copy paste as new layer invert delete on keyboard
Open DBS_Doodle06 Copy paste as new layer arrange send to bottom add drop shadow
Open DBS_Guitar01 Copy paste as new layer resize 64 percent arrange send to top add drop shadow
Open DBS_MusicNotes06 Copy paste as new layer resize 64 percent arrange send to bottom select all float defloat open DBS_Paper14 invert delete on keyboard add drop shadow
Open DBS_PianoKeyboard Copy paste as new layer resize 60 percent arrange send to top add drop shadow
Open DBS_Paper18 copy paste as new layer send to bottom apply mask merge group
Add your name & the words Were All SuperStars Font Do I like Stripes? forground #5f3762 background #d68e18 add gradient glow & add drop shadow
Add your copyright info
resize & save your tag
Love to see your results please email to me so i can put in my show off blog
Thankyou ♥
Written by ©Lyn(akaAngel) 7th August 2011, any similarity to any other tutorial is purely coincidental!
Subscribe to:
Posts (Atom)


