♥ My Tou ♥
All of my tutorials are written by me Any resemblance to any other tutorial is purely coincidental. Do NOT claim as your own or alter them in any way. Hotlinking is strictly prohibited. Anything you create as a result of following my Tuts is yours to do with what you wish so long as it is not for monetary gain In other words you can not sell what you make from my Tuts Thankyou♥
♥ My Blinkie ♥

Blog Archive
- 2014 (27)
- 2013 (128)
-
2012
(198)
- October(32)
- September(35)
- August(29)
- July(2)
- June(12)
- May(20)
-
April(17)
- ♥ Berry Cherry ♥
- ♥All you need is Love ♥
- ♥ May Your Dreams Come True ♥
- ♥Everybody Needs Somebody ♥
- A is for Apple
- ♥ Denim Girl ♥
- ♥ Turkish Delight ♥
- ♥ Strawberry Fields2 ♥
- ♥ Strawberry Fields ♥
- ♥ Summer Nights ♥
- ♥ Love ♥
- ♥ Lifes Just Beachy ♥
- ♥ Sweetie Pie ♥
- ♥ Angel Above ♥
- ♥ Spring Beauty ♥
- ♥ My Angel Above ♥
- ♥ We Rock ♥
- March(18)
- February(10)
- January(23)
- 2011 (481)
- 2010 (46)
♥ My Licenses ♥
Tony Tzanoukakis-TTZ331
Keith Garvey-KG1356
GORJUSS ART-SW1123
Ismael Rac-IRL098C
Zindy-ZZT3017
PTE-PTE0365
Gild-GildLYCO
CDO-CDO-1657
AMI-AMILYCO
MPT-MPT9633
CILM-CI-1635LM
SATC-SATC1136
UYA-UYA3238
PFD-PFD_AngelLC405
The Psp Project-TPP01171
Elias Chatzoudis-EAS10190
Arthur Crowe AC780
MTA-3740
♥ Berry Cherry ♥
To View Tag In Proper Size Click On The Tag
Supplies Needed
Scrapkit Berry Cherry By Designed By Stina This is PTU Here
Tube of choice im using ©Suzanne Woolcott to purchase tubes go to Here
All my tubes are a guide if the tubes i select are unavailble please use another tube of your liking thankyou
Mask WSL_Mask84 at weescotslass Here
Font of choice or the one im using is SF Juggernaut Condensed
Lets Get Started
Open new image 650x600
Open pap10_BerryCherry_Stef'sScrapkits copy paste as new layer apply mask merge group
Open ele54_BerryCherry_Stef'sScrapkits copy paste as new layer resize 45 percent add drop shadow
Open ele05_BerryCherry_Stef'sScrapkits copy paste as new layer resize 35 percent add drop shadow
Open ele19_BerryCherry_Stef'sScrapkits copy paste as new layer resize 55 percent add drop shadow
Open ele67_BerryCherry_Stef'sScrapkits copy paste as new layer resize 55 percent add drop shadow
Open ele34_BerryCherry_Stef'sScrapkits copy paste as new layer resize 50 percent add drop shadow
Open ele62_BerryCherry_Stef'sScrapkits copy paste as new layer resize 55 percent add drop shadow
Open tube copy paste as new layer add drop shadow
Add your name & the words Berry Cherry Font SF Juggernaut Condensed forground #d91f29 background #d18275 click in each letter with magic wand add remove noise random 100 percent Monochrome checked select none add drop shadow
Add your copyright info
resize & save your tag
If you like this Tut check the boxes below Love to see your results please email to me
Thankyou ♥
Written by ©Lyn(akaAngel) 28th April 2012, any similarity to any other tutorial is purely coincidental!
Labels:
PTU ♥,
Suzanne Woolcott
♥All you need is Love ♥
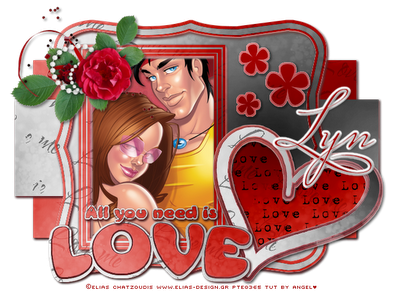
To View Tag In Proper Size Click On The Tag
Supplies Needed
Scrapkit All for Sweet Love By Stefs Scrapkits This is PTU Here
Tube of choice im using ©Elias Chatzoudis to purchase tubes go to PTE Here
All my tubes are a guide if the tubes i select are unavailble please use another tube of your liking thankyou
Template 148 by Becky's creation Here
Font of choice or the one im using is Miss Le Gatees
Lets Get Started
Open Template duplicate close original delete white background Info
This is a long Tut so grab a Coffee
We will be starting from the bottom of layer pallette
Go to shadow(delete) select all float defloat Open pap05_AllforSweetLove_Stef'sScrapkits copy paste as new layer select invert delete on keyboard select none merge down
Go to pink rectangle select all float defloat Open pap01_AllforSweetLove_Stef'sScrapkits copy paste as new layer select invert delete on keyboard select none merge down
Go to shadow(delete) select all float defloat Open pap05_AllforSweetLove_Stef'sScrapkits copy paste as new layer select invert delete on keyboard select none merge down
Go to black rectangle select all float defloat Open pap03_AllforSweetLove_Stef'sScrapkits copy paste as new layer select invert delete on keyboard select none merge down
Go to frame fill select all float defloat Open pap03_AllforSweetLove_Stef'sScrapkits copy paste as new layer select invert delete on keyboard select none merge down
Go to shadow(delete) select all float defloat Open pap05_AllforSweetLove_Stef'sScrapkits copy paste as new layer select invert delete on keyboard select none merge down
Go to shape frame bg select all float defloat Open pap01_AllforSweetLove_Stef'sScrapkits copy paste as new layer select invert delete on keyboard select none
Go to shape frame select all float defloat Open pap03_AllforSweetLove_Stef'sScrapkits copy paste as new layer select invert delete on keyboard select none
Go to square frame fill select all float defloat Open pap05_AllforSweetLove_Stef'sScrapkits copy paste as new layer select invert delete on keyboard select none merge down
Go to shadow(delete) select all float defloat Open pap03_AllforSweetLove_Stef'sScrapkits copy paste as new layer select invert delete on keyboard select none
Go to square frame white bg select all float defloat Open pap01_AllforSweetLove_Stef'sScrapkits copy paste as new layer select invert delete on keyboard select none
Go to shadow(delete) select all float defloat Open pap03_AllforSweetLove_Stef'sScrapkits copy paste as new layer select invert delete on keyboard select none merge down
Go to Raster 4 select all float defloat Open pap05_AllforSweetLove_Stef'sScrapkits copy paste as new layer select invert delete on keyboard select none
Go to square frame white bg select all float defloat Open pap01_AllforSweetLove_Stef'sScrapkits copy paste as new layer select invert delete on keyboard select none
Go to Raster 5 select all float defloat Open pap01_AllforSweetLove_Stef'sScrapkits copy paste as new layer select invert delete on keyboard select none
Go to square frame black bg select all float defloat Open pap03_AllforSweetLove_Stef'sScrapkits copy paste as new layer select invert delete on keyboard select none
Go to square frame select all float defloat Open pap01_AllforSweetLove_Stef'sScrapkits copy paste as new layer select invert delete on keyboard select none
Now thats all done go back to square frame fill select all float defloat open tube copy paste as new layer invert delete on keyboard select none add drop shadow to tube
Go to heart fill select all float defloat Open pap01_AllforSweetLove_Stef'sScrapkits copy paste as new layer select invert delete on keyboard select none
Go to heart white bg select all float defloat Open pap05_AllforSweetLove_Stef'sScrapkits copy paste as new layer select invert delete on keyboard select none
Go to heart black bg select all float defloat Open pap05_AllforSweetLove_Stef'sScrapkits copy paste as new layer select invert delete on keyboard select none
Go to heart select all float defloat Open pap03_AllforSweetLove_Stef'sScrapkits copy paste as new layer select invert delete on keyboard select none
Go to shadow(delete) select all float defloat Open pap05_AllforSweetLove_Stef'sScrapkits copy paste as new layer select invert delete on keyboard select none
Go to love white bg select all float defloat Open pap03_AllforSweetLove_Stef'sScrapkits copy paste as new layer select invert delete on keyboard select none
Go to love black bg select all float defloat Open pap05_AllforSweetLove_Stef'sScrapkits copy paste as new layer select invert delete on keyboard select none
Go to LOVE select all float defloat Open pap01_AllforSweetLove_Stef'sScrapkits copy paste as new layer select invert delete on keyboard select none
Go to shadow(delete) select all float defloat Open pap05_AllforSweetLove_Stef'sScrapkits copy paste as new layer select invert delete on keyboard select none
Go To all you need, white bg select all float defloat Open pap03_AllforSweetLove_Stef'sScrapkits copy paste as new layer select invert delete on keyboard select none
Go To all you need select all float defloat Open pap01_AllforSweetLove_Stef'sScrapkits copy paste as new layer select invert delete on keyboard select none
Go To shadow(delete) select all float defloat Open pap03_AllforSweetLove_Stef'sScrapkits copy paste as new layer select invert delete on keyboard select none
Go To flower white bg select all float defloat Open pap05_AllforSweetLove_Stef'sScrapkits copy paste as new layer select invert delete on keyboard select none
Go To flowers select all float defloat Open pap03_AllforSweetLove_Stef'sScrapkits copy paste as new layer select invert delete on keyboard select none
Open ele14_AllforSweetLove_Stef'sScrapkits copy paste as new layer resize 45 percent add drop shadow
Now go back to heart fill select all float defloat open ele50_AllforSweetLove_Stef'sScrapkits copy paste as new layer invert delete on keyboard select none add drop shadow
Add your name Font Miss Le Gatees forground #d0d0d0 background #9f0000 add drop shadow
Add your copyright info
resize & save your tag
If you like this Tut check the boxes below Love to see your results please email to me
Thankyou ♥
Written by ©Lyn(akaAngel) 22nd April 2012, any similarity to any other tutorial is purely coincidental!
Labels:
Elias Chatzoudis,
PTU ♥
♥ May Your Dreams Come True ♥
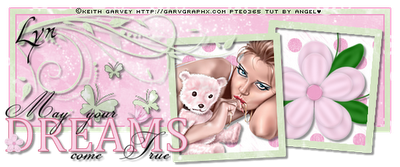
To View Tag In Proper Size Click On The Tag
Supplies Needed
Scrapkit Sweet Dreams By Twinky Dezines This is FTU Here
Tube of choice im using ©Keith Garvey to purchase tubes go to PTE Here
All my tubes are a guide if the tubes i select are unavailble please use another tube of your liking thankyou
Template 153 by Becky's creation Here
Font of choice or the one im using is Yevida
Lets Get Started
Open Template duplicate close original delete white background & Info
Go to rectangle fill select all float defloat Open SD_Paper18byTwinky copy paste as new layer select invert delete on keyboard select none
Go to rectangle trim select all float defloat Open SD_Paper3byTwinky copy paste as new layer select invert delete on keyboard select none
Go to rectangle select all float defloat Open SD_Paper12byTwinky copy paste as new layer select invert delete on keyboard select none effects blinds
Go to right frame fill select all float defloat Open SD_Paper5byTwinky copy paste as new layer select invert delete on keyboard open SD_FlowerwithLeavesbyTwinky_1 copy paste as new layer delete on keyboard select none add drop shadow to tube
Go to right frame trim select all float defloat Open SD_Paper5byTwinky copy paste as new layer select invert delete on keyboard select none
Go to right frame select all float defloat Open SD_Paper7byTwinky copy paste as new layer select invert delete on keyboard select none
Go to left frame fill select all float defloat Open SD_Paper5byTwinky copy paste as new layer select invert delete on keyboard open tube copy paste as new layer delete on keyboard select none add drop shadow to tube
Go to left frame trim select all float defloat Open SD_Paper5byTwinky copy paste as new layer select invert delete on keyboard select none
Go to left frame select all float defloat Open SD_Paper7byTwinky copy paste as new layer select invert delete on keyboard select none
Go to floral element select all float defloat Open SD_Paper7byTwinky copy paste as new layer select invert delete on keyboard select add drop shadow
Go to butterfly3 select all float defloat Open SD_Paper7byTwinky copy paste as new layer select invert delete on keyboard select none add drop shadow
Go to butterfly2 select all float defloat Open SD_Paper7byTwinky copy paste as new layer select invert delete on keyboard select none add drop shadow
Go to butterfly1 select all float defloat Open SD_Paper7byTwinky copy paste as new layer select invert delete on keyboard select none add drop shadow
Open SD_Wordart1byTwinky copy paste as new layer resize 55 percent add drop shadow
Add your name Font Yevida forground null background #000000 add drop shadow
Add your copyright info
resize & save your tag
If you like this Tut check the boxes below Love to see your results please email to me
Thankyou ♥
Written by ©Lyn(akaAngel) 22nd April 2012, any similarity to any other tutorial is purely coincidental!
This is a lovely result from Dixie Thankyou ♥
Labels:
FTU ♥,
Keith Garvey
♥Everybody Needs Somebody ♥
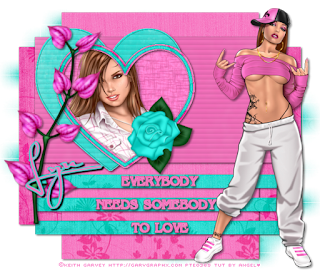
To View Tag In Proper Size Click On The Tag
Supplies Needed
Scrapkit Cndy Girl By Twinky Dezines This is FTU Here
Tube of choice im using ©Keith Garvey to purchase tubes go to PTE Here
All my tubes are a guide if the tubes i select are unavailble please use another tube of your liking thankyou
Mask WSL_Mask84 at weescotslass Here
Template 149 by Becky's creation Here
Font of choice or the one im using is Satisfaction
Lets Get Started
Open Template duplicate close original delete white background Info
Go to bottom rectangle select all float defloat Open CG_BabyPinkFlowerPaperbyTwinky copy paste as new layer select invert delete on keyboard select none
Go to black square select all float defloat Open CG_BabyPinkBottomFlowerPaperbyTwinky copy paste as new layer select invert delete on keyboard select none
Go to top rectangle select all float defloat Open CG_BabyPinkPlainGrungyPaperbyTwinky copy paste as new layer select invert delete on keyboard select none effects blinds
Go to three slats select all float defloat Open CG_CyanFlowerPaperbyTwinky copy paste as new layer select invert delete on keyboard select none
Go to text bg select all float defloat Open CG_BabyPinkBottomFlowerPaperbyTwinky copy paste as new layer select invert delete on keyboard select none
Go to text select all float defloat Open CG_BabyPinkPlainGrungyPaperbyTwinky copy paste as new layer select invert delete on keyboard select
Go to heart 2 bg select all float defloat Open CG_CyanBottomFlowerPaperbyTwinky copy paste as new layer select invert delete on keyboard select none
Go to heart 2 select all float defloat Open CG_CyanPlainGrungyPaperbyTwinky copy paste as new layer select invert delete on keyboard select none effects Blinds
Go to heart 1 fill select all float defloat Open CG_BabyPinkPlainGrungyPaperbyTwinky copy paste as new layer select invert delete on keyboard Open tube copy paste as new layer delete on keyboard select none go back to the paper effects texteure effects add drop shadow to tube
Go to heart 1 bg select all float defloat Open CG_BabyPinkFlowerPaperbyTwinky copy paste as new layer select invert delete on keyboard select none
Go to heart 1 select all float defloat Open CG_CyanFlowerPaperbyTwinky copy paste as new layer select invert delete on keyboard select none
Open CG_CyanFlowerPaperbyTwinky apply mask merge group duplicate flip merge down arrange send to bottom
Open main tube copy paste as new layer add tube
Open CG_BabyPinkBranchesbyTwinky copy paste as new layer resize 90 percent add drop shadow
Open CG_CyanRosebyTwinky copy paste as new layer resize 45 percent add drop shadow
Add your name Font Satisfaction forground #3dd7cf background #f774bf add drop shadow
Add your copyright info
resize & save your tag
If you like this Tut check the boxes below Love to see your results please email to me
Thankyou ♥
Written by ©Lyn(akaAngel) 22nd April 2012, any similarity to any other tutorial is purely coincidental!
This is awesome Thankyou Jo for sending in to show me ♥
Labels:
FTU ♥,
Keith Garvey
A is for Apple

To View Tag In Proper Size Click On The Tag
Supplies Needed
A is For Apple FTU By Twinky Dezines Here
Tube of choice im using ©Suzanne Woolcott to purchase tubes go to Here
All my tubes are a guide if the tubes i select are unavailble please use another tube of your liking thankyou
Mask WSL_Mask38 at weescotslass Here
Font of choice or the one im using is PetraScriptEF-Regular
Lets Get Started
Open new image 650x600
Open AisforApple_Paper4_Twinky copy paste as new layer apply mask merge group
Open AisforApple_Frame1_Twinky copy paste as new layer resize 75 percent with magic wand click in frame selection modify expand by 5
Open AisforApple_Paper9_Twinky copy paste as new layer invert delete on keyboard drag under frame keep selected
Open AisforApple_Fence_Twinky copy paste as new layer delete on keyboard select none add drop shadow to frame & fence
Open AisforApple_AppleTree_Twinky copy paste as new layer resize 75 percent add drop shadow
Open AisforApple_AppleBittenRed_Twinky copy paste as new layer resize 45 percent add drop shadow
Open AisforApple_Owl2_Twinky copy paste as new layer resize 25 percent add drop shadow duplicate resize this one 45 percent
Open tube copy paste as new layer add drop shadow
Add your name & the words A Is For Apple Font PetraScriptEF-Regular forground #6e0a05 background #ede6a6 add drop shadow
Add your copyright info
resize & save your tag
If you like this Tut check the boxes below Love to see your results please email to me
Thankyou ♥
Written by ©Lyn(akaAngel) 22nd April 2012, any similarity to any other tutorial is purely coincidental!
This is awesome Dixie thankyou for sending in to show me ♥
Labels:
FTU ♥,
Suzanne Woolcott
♥ Denim Girl ♥

To View Tag In Proper Size Click On The Tag
Supplies Needed
Scrapkit Denim Days FTU I have used both callob Kits
Here OR Here
Tube of choice im using ©Stefs Scrapkit JeansGirl to get this tube go to pspingwithfriends forum Here
you will need to join the forum
All my tubes are a guide if the tubes i select are unavailble please use another tube of your liking thankyou
Mask WSL_Mask178 at weescotslass Here
Font of choice or the one im using is Copper Alt Caps Expert & Copperplate Gothic Bold
Lets Get Started
Open new image 650x600
Open AP_DenimDays_PP1 copy paste as new layer apply mask merge group
Open AP_DenimDays_ELEMENT20 copy paste as new layer resize 70 percent with magic wand click in frame selection modify expand by 5
Open paper5 copy paste as new layer invert delete on keyboard drag under the frame add drop shadow to frame
Open AP_DenimDays_ELEMENT19 copy paste as new layer resize 70 percent
Open flowers copy paste as new layer duplicate mirror add drop shadow
Open Bubbles copy paste as new layer add drop shadow
Add the words Denim Girl Font Copperplate Gothic Bold forground #49463d background #788a9d click in each letter with magic wand Adjust add remove noise with this setting

add gradient glow & add drop shadow sharpen
Open JeansGirl2_Stef'sScrapkits copy paste as new layer resize 35 percent sharpen add drop shadow
Open AP_DenimDays_ELEMENT11 copy paste as new layer resize 65 percent drag under frame add drop shadow
Add your name Font Copper Alt Caps Expert forground #49463d background #788a9d add drop shadow
Add your copyright info
resize & save your tag
If you like this Tut check the boxes below Love to see your results please email to me
Thankyou ♥
Written by ©Lyn(akaAngel) 13th April 2012, any similarity to any other tutorial is purely coincidental!
Labels:
FTU ♥
♥ Turkish Delight ♥
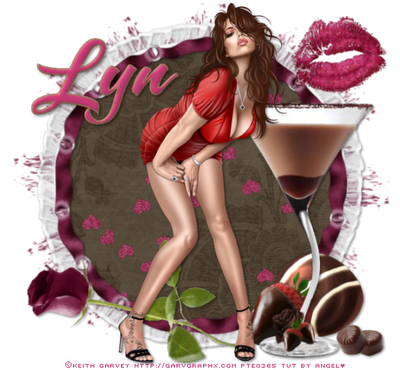
To View Tag In Proper Size Click On The Tag
Supplies Needed
Scrapkit Turkish Delight By Designed By Stina This is PTU Here
Tube of choice im using ©Keith Garvey to purchase tubes go to PTE Here
All my tubes are a guide if the tubes i select are unavailble please use another tube of your liking thankyou
Mask WSL_Mask178 at weescotslass Here
Font of choice or the one im using is A&S Snapper Script
Lets Get Started
Open new image 650x600
Open DBS_Paper01 copy paste as new layer apply mask merge group
Open DBS_Frame03 copy paste as new layer resize 70 percent with magic wand click in frame selection modify expand by 2
Open DBS_Paper04 copy paste as new layer select invert delete on keyboard Open DBS_HeartScatter copy paste as new layer delete on keyboard drag paper & hearts under frame select none add drop shadow to frame
Open DBS_Chocolate01 copy paste as new layer resize 30 percent add drop shadow
Open DBS_ChocolateStrawberry copy paste as new layer resize 30 percent add drop shadow
Open DBS_ChocolateTini copy paste as new layer add drop shadow
Open DBS_Rose01 copy paste as new layer resize 45 percent image rotate 90 percent left add drop shadow
Open tube copy paste as new layer add drop shadow
Open DBS_Kiss copy paste as new layer resize 35 percent add drop shadow
Add your name Font A&S Snapper Script forground #a4745e background #c73c74 add drop shadow
Add your copyright info
resize & save your tag
If you like this Tut check the boxes below Love to see your results please email to me
Thankyou ♥
Written by ©Lyn(akaAngel) 6th April 2012, any similarity to any other tutorial is purely coincidental!
Labels:
Keith Garvey,
PTU ♥
♥ Strawberry Fields2 ♥

To View Tag In Proper Size Click On The Tag
Supplies Needed
Scrapkit Strawberry Fields By TootyPup This is PTU Here
Mask WSL_Mask221 at weescotslass Here
Font of choice or the one im using is CK Alis Hand
Lets Get Started
Open new image 650x600
Open tp-paper-3 copy paste as new layer apply mask merge group
Open tp-tagFrameSquare-1 copy paste as new layer resize 65 percent add drop shadow
Open tp-grass-4 copy paste as new layer resize 60 percent add drop shadow
Open tp-strawberryPlantGrass-1 copy paste as new layer resize 55 percent add drop shadow
Open tp-flower-Deco-5 copy paste as new layer resize 35 percent add drop shadow
Open tp-StrawberryPatchCottage-2 copy paste as new layer resize 65 percent
Open tp-ladybug-1 copy paste as new layer resize 25 percent add drop shadow
Open tp-heart-6 copy paste as new layer resize 25 percent add drop shadow
Open tp-poser_medi_dari_3 copy paste as new layer resize 50 percent add drop shadow
Add your name Font CK Alis Hand forground #dda87c background #9f1e19 add drop shadow
Add your copyright info
resize & save your tag
If you like this Tut check the boxes below Love to see your results please email to me
Thankyou ♥
Written by ©Lyn(akaAngel) 4th April 2012, any similarity to any other tutorial is purely coincidental!
Labels:
PTU ♥
♥ Strawberry Fields ♥
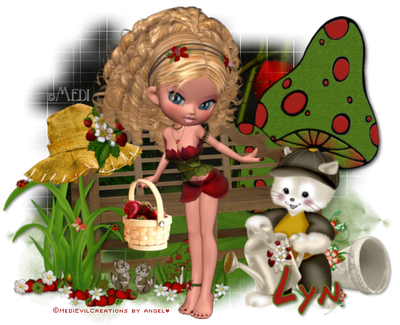
To View Tag In Proper Size Click On The Tag
Supplies Needed
Scrapkit Strawberry Fields By TootyPup This is PTU Here
Mask WSL_Mask84 at weescotslass Here
Font of choice or the one im using is Delany
Lets Get Started
Open new image 650x600
Open tp-paper-6 copy paste as new layer apply mask merge group
Open tp-ground-grass-1 copy paste as new layer resize 34 percent add drop shadow
Open tp-Shrooms-4 copy paste as new layer resize 55 percent mirror add drop shadow
Open tp-gardenBench-1 copy paste as new layer resize 70 percent mirror add drop shadow
Open tp-flowerPotDeco-1 copy paste as new layer resize 25 percent add drop shadow
Open tp-grass-5 copy paste as new layer resize 34 percent add drop shadow
Open tp-catBoy-2 copy paste as new layer resize 35 percent add drop shadow
Open tp-strawberryPatch-7 copy paste as new layer resize 35 percent mirror add drop shadow
Open tp-hat-1 copy paste as new layer resize 25 percent add drop shadow
Open tp-poser_medi_dari_4 copy paste as new layer resize 75 percent add drop shadow
Add your name Font Delany forground #547820 background #9f1e19 add drop shadow
Add your copyright info
resize & save your tag
If you like this Tut check the boxes below Love to see your results please email to me
Thankyou ♥
Written by ©Lyn(akaAngel) 4th April 2012, any similarity to any other tutorial is purely coincidental!
Labels:
PTU ♥
♥ Summer Nights ♥

To View Tag In Proper Size Click On The Tag
Supplies Needed
Scrapkit Sunset Summer Creative Scraps by Crys This is PTU Here
Tube of choice im using ©Keith Garvey to purchase tubes go to PTE Here
All my tubes are a guide if the tubes i select are unavailble please use another tube of your liking thankyou
Mask WSL_Mask59 at weescotslass Here
Font of choice or the one im using is DJB MY DEAR MARSHA
Lets Get Started
Open new image 650x600
Open Paper9 copy paste as new layer apply mask merge group
Open Frame2 copy paste as new layer resize 80 percent with magic wand click in frame selection modify expand by 2
Open Paper12 copy paste as new layer select invert delete on keyboard drag under frame Open twinkles copy paste as new layer delete on keyboard select none add drop shadow to frame
Open beach grass copy paste as new layer resize 55 percent paste again resize this one at 80 percent add drop shadow
Open cattail2 copy paste as new layer resize 15 percent add drop shadow
Open drink copy paste as new layer resize 80 percent mirror add drop shadow
Open flower3 copy paste as new layer mirror resize 40 percent add drop shadow
Open surf board copy paste as new layer resize 70 percent image rotate 25 percent right add drop shadow
Open tube copy paste as new layer add drop shadow
Add your name Font DJB MY DEAR MARSHA forground #e57751 background #01000b add drop shadow
Add your copyright info
resize & save your tag
If you like this Tut check the boxes below Love to see your results please email to me
Thankyou ♥
Written by ©Lyn(akaAngel) 4th April 2012, any similarity to any other tutorial is purely coincidental!
This is an awesome result from Vickie Thankyou ♥

Labels:
Keith Garvey,
PTU ♥,
Summer
♥ Love ♥

To View Tag In Proper Size Click On The Tag
Supplies Needed
scrapkit By Sweet Cravings Scrap January Rain Blogtrain "Lucky in Love" - PU Tagger Kit Freebie!
Here
Tube of choice im using ©CEI Jalapeno i brought this at MPT which is no longer available if someone knows where they have gone please let me know
All my tubes are a guide if the tubes i select are unavailable please use another tube of your liking thankyou
Mask WSL_Mask178 at weescotslass
Here
Font of choice or the one im using is Directors ScriptBig Caps
Lets Get Started
Open new image 650x600
Open SCS_LuckyInLove_Paper7 copy paste as new layer apply mask merge group
Open SCS_LuckyInLove_Frame1 copy paste as new layer resize 70 percent with magic wand click in frame selection modify expand by 5
Open SCS_LuckyInLove_Paper8 copy paste as new layer resize 40 percent select none add drop shadow to frame
Open SCS_LuckyInLove_HeartDoodle2 drag under frame add drop shadow
Open SCS_LuckyInLove_Confetti1 copy paste as new layer drag under frame above the paper
Open SCS_LuckyInLove_Tag2 copy paste as new layer resize 55 percent image rotate left 25 percent add drop shadow
Open SCS_LuckyInLove_WordArt copy paste as new layer resize 35 percent add drop shadow
Open tube copy paste as new layer add drop shadow
Add your name Font Directors ScriptBig Caps forground #7e7699 background #95c42e add gradient glow add drop shadow
Add your copyright info
resize & save your tag
If you like this Tut check the boxes below Love to see your results please email to me
Thankyou ♥
Written by ©Lyn(akaAngel) 4th April 2012, any similarity to any other tutorial is purely coincidental!
Labels:
FTU ♥
♥ Lifes Just Beachy ♥

Supplies Needed
JRB Scraps - Life's Just Beachy SCRAP Kit you will find this under free tubes section at PTE
Here
Tubes of choice im using ©Elias Chatzoudis to purchase tubes go to PTE Here
All my tubes are a guide if the tubes i select are unavailble please use another tube of your liking thankyou
Mask WSL_Mask84 at weescotslass Here
Font of choice or the one im using is Scriptina
Lets Get Started
Open new image 650x600
Open Paper2 copy paste as new layer apply mask merge group
Open element1 copy paste as new layer resize 75 percent add drop shadow
Open element13 copy paste as new layer resize 70 percent mirror add drop shadow
Open element3 copy paste as new layer
Open element6 copy paste as new layer add drop shadow
Open element9 copy paste as new layer resize 45 percent duplicate resize 65 percent duplicate arrange these on tag add drop shadow
Open element2 copy paste as new layer resize 35 percent add drop shadow
Open tube copy paste as new layer add drop shadow
Add your name Font Scriptina forground #4da2ff background #ffffff add gradient glow & add drop shadow
Add your copyright info
resize & save your tag
If you like this Tut check the boxes below Love to see your results please email to me
Thankyou ♥
Written by ©Lyn(akaAngel) 3rd April 2012, any similarity to any other tutorial is purely coincidental!
Labels:
Elias Chatzoudis,
FTU ♥
♥ Sweetie Pie ♥

Supplies Needed
JRB Scraps - Taggin' Club Mini Kit FREE Scrap Kit you will find this under free tubes at PTE
Here
Template56 by Becky
Here
Tubes of choice im using ©FourXsDesigns you will find this under free tubes section at PTE Here
All my tubes are a guide if the tubes i select are unavailble please use another tube of your liking thankyou
Mask WSL_Mask178 at weescotslass Here
Font of choice or the one im using is TKDoodle
Lets Get Started
Open Template duplicate close original delete background layer TOU Layer & Preview layer
Go to large curly flowers select all float defloat Open paper2 select invert delete on keyboard select none add drop shadow
Go to large circle background select all float defloat Open paper3 select invert delete on keyboard select none
Go to rectangle background select all float defloat Open paper3 select invert delete on keyboard select none add drop shadow
Go to rectangle select all float defloat Open paper2 select invert delete on keyboard select none
Go to BPcurlyWflowers select all float defloat Open paper2 select invert delete on keyboard select none
Go to small circle background select all float defloat Open paper3 select invert delete on keyboard select none add drop shadow
Go to small circle select all float defloat Open paper1 select invert delete on keyboard select none
Open element3 copy paste as new layer resize 80 percent duplicate resize this one 65 percent duplicate again resize 85 percent add drop shadow
Open element4 copy paste as new layer image rotate 25 percent add drop shadow
Open element1 copy paste as new layer resize 85 percent add drop shadow
Add your name Font TKDoodle forground #4f3639 background #e66cb4 add drop shadow
Open tube copy paste as new layer add drop shadow
Open Paper2 copy paste as new layer resize 115 percent sharpen apply mask merge group arrange send to bottom duplicate merge down
Add your copyright info
resize & save your tag
If you like this Tut check the boxes below Love to see your results please email to me
Thankyou ♥
Written by ©Lyn(akaAngel) 3rd April 2012, any similarity to any other tutorial is purely coincidental!
Labels:
FTU ♥
♥ Angel Above ♥

To View Tag In Proper Size Click On The Tag
Supplies Needed
Scrapkit My Angel Above By Stefs Scrakits can get kit Here this Kit Is PTU
Mask WSL_Mask33 at weescotslass Here
Font of choice or the one im using is PetraScriptEF-Alternate
Lets Get Started
Open new image 650x600
Open paper1 copy paste as new layer apply mask merge group duplicate merge down
Open frame1 copy paste as new layer with magic wand click in frame selection modify expand by 5
Open paper3 copy paste as new layer select invert delete on keyboard select none drag under frame add drop shadow to frame
Open flowerscatter copy paste as new layer add drop shadow
Open dove copy paste as new layer mirror add drop shadow
Open branch2 copy paste as new layer resize 80 percent add drop shadow
Open flower3 copy paste as new layer add drop shadow
Open wordart copy paste as new layeradd gradient glow
Open candle copy paste as new layer duplicate resize 75 percent add drop shadow
Add your name Font PetraScriptEF-Alternate forground #d29295 background #a299c1 add drop shadow
Add your copyright info
resize & save your tag
If you like this Tut check the boxes below Love to see your results please email to me
Thankyou ♥
Written by ©Lyn(akaAngel) 2nd April 2012, any similarity to any other tutorial is purely coincidental!
Labels:
PTU ♥
♥ Spring Beauty ♥
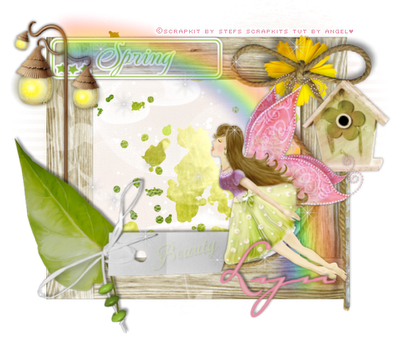
To View Tag In Proper Size Click On The Tag
Supplies Needed
Scrapkit Spring Beauty By Stefs Scrakits can get kit Here this Kit Is PTU
Mask WSL_Mask10 at weescotslass Here
Font of choice or the one im using is Carpenter Script
Lets Get Started
Open new image 650x600
Open pap10_SpringBeauty_Stef'sScrapkits copy paste as new layer apply mask merge group
Open ele35_SpringBeauty_Stef'sScrapkits copy paste as new layer move to right duplicate flip mirror
Open ele11_SpringBeauty_Stef'sScrapkits copy paste as new layer resize 75 percent add drop shadow
Open ele49_SpringBeauty_Stef'sScrapkits copy paste as new layer drag under frame
Open ele46_SpringBeauty_Stef'sScrapkits copy paste as new layer resize 75 percent add drop shadow
Open ele06_SpringBeauty_Stef'sScrapkits copy paste as new layer resize 80 percent add drop shadow
Open ele07_SpringBeauty_Stef'sScrapkits copy paste as new layer resize 70 percent add gradient glow & drop shadow
Open ele03_SpringBeauty_Stef'sScrapkits copy paste as new layer resize 65 percent add drop shadow
Open ele19_SpringBeauty_Stef'sScrapkits copy paste as new layer
Open ele18_SpringBeauty_Stef'sScrapkits copy paste as new layer add drop shadow
Open ele08_SpringBeauty_Stef'sScrapkits copy paste as new layer
Add your name Font Carpenter Script forground #e88ba5 background #e2afaf add drop shadow
Add your copyright info
resize & save your tag
If you like this Tut check the boxes below Love to see your results please email to me
Thankyou ♥
Written by ©Lyn(akaAngel) 2nd April 2012, any similarity to any other tutorial is purely coincidental!
This is an awesome result from Dixie Thankyou ♥

♥ My Angel Above ♥
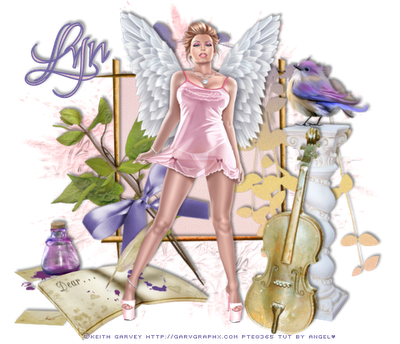
To View Tag In Proper Size Click On The Tag
Supplies Needed
Scrapkit My Angel Above By Stefs Scrakits can get kit Here this Kit Is PTU
Tube of choice im using ©Keith Garvey to purchase tubes go to PTE Here
All my tubes are a guide if the tubes i select are unavailble please use another tube of your liking thankyou
Mask WSL_Mask38 at weescotslass Here
Font of choice or the one im using is Carpenter Script
Lets Get Started
Open new image 650x600
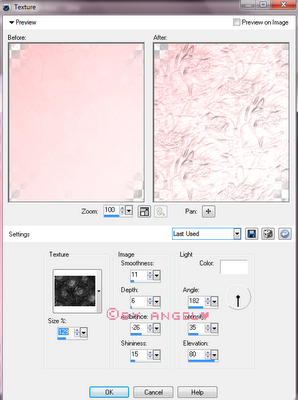
Open pap08_MyAngelabove_Stef'sScrapkits copy paste as new layer apply mask merge group duplicate merge down effects texture with this setting
Open ele17_MyAngelabove_Stef'sScrapkits copy paste as new layer with magic wand click in frame selection modify expand by 5
Open pap05_MyAngelabove_Stef'sScrapkits copy paste as new layer select invert delete on keyboard select none drag under frame add drop shadow to frame
Open ele33_MyAngelabove_Stef'sScrapkits copy paste as new layer resize 80 percent add drop shadow
Open ele31_MyAngelabove_Stef'sScrapkits copy paste as new layer add drop shadow
Open ele28_MyAngelabove_Stef'sScrapkits copy paste as new layer resize 80 percent add drop shadow
Open ele64_MyAngelabove_Stef'sScrapkits copy paste as new layer add drop shadow
Open ele61_MyAngelabove_Stef'sScrapkits copy paste as new layer resize 55 percent add drop shadow
Open Tube copy paste as new layeradd drop shadow
Add your name Font Carpenter Script forground #7265a3 background #edcfce add drop shadow
Add your copyright info
resize & save your tag
If you like this Tut check the boxes below Love to see your results please email to me
Thankyou ♥
Written by ©Lyn(akaAngel) 2nd April 2012, any similarity to any other tutorial is purely coincidental!
Lovely result from Vickie Thankyou ♥

Labels:
Keith Garvey,
PTU ♥
♥ We Rock ♥
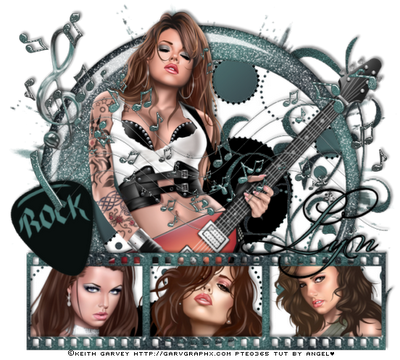
To View Tag In Proper Size Click On The Tag
Supplies Needed
Rockstar kit freebie FTU By Alikas Scraps Here
Tube of choice im using ©Keith Garvey to purchase tubes go to PTE Here
All my tubes are a guide if the tubes i select are unavailble please use another tube of your liking thankyou
Mask WSL_Mask38 at weescotslass Here
Font of choice or the one im using is BickhamScriptFancy2
Lets Get Started
Open new image 650x600
Open as_paper03 copy paste as new layer apply mask merge group
Open as18 copy paste as new layer resize 95 percent with magic wand click in frames selection modify expand by 5
Open as_paper08 copy paste as new layer invert delete on keyboard drag under frame select none add drop shadow to frame
Open as14 copy paste as new layer add drop shadow drag under frame
open main tube copy paste as new layer add drop shadow
Open as10 copy paste as new layer resize 90 percent with magic wand click in frames selection modify expand by 5
Open as_paper08 copy paste as new layer invert delete on keyboard drag under frame keep selected open tubes copy paste each tube arrange on tag delete on keyboard select none add drop shadow to frame & Tubes
Open as45 copy paste as new layer image rotate 25 percent left add drop shadow
Open as47 copy paste as new layer add drop shadow
Open as58 copy paste as new layer add drop shadow
Add your name Font BickhamScriptFancy2 forground #000000 background #537978 add drop shadow
Add your copyright info
resize & save your tag
If you like this Tut check the boxes below Love to see your results please email to me
Thankyou ♥
Written by ©Lyn(akaAngel) 1st April 2012, any similarity to any other tutorial is purely coincidental!
Awesome result from Dixie Thankyou ♥

Labels:
FTU ♥,
Keith Garvey
Subscribe to:
Posts (Atom)
♥ My Time ♥
♥ My Exclusive Tuts ♥
You can view My Exclusive tuts
Here
You will need to join the Forum
♥ User online ♥
♥ Tube Stores ♥
Labels
- Animated
- Arthur Crowe
- Autumn
- Awards ♥
- Birthday
- Christmas
- Dean Yeagle
- Easter
- Elias Chatzoudis
- FTU ♥
- Halloween
- Ismael Rac
- Jamie Kidd
- Joel Adams
- Keith Garvey
- Kiwi Fire Storm
- Lady Mishka
- Martin Abel
- Michael Landefield
- Myka Jelina
- No Scrap ♥
- Nolan Worthington
- Pinuptoons
- Popeye Wong
- PsycoJimi
- PTU
- PTU ♥
- Robin Mcquay ♥
- Sad News ♥
- Scott Blair ♥
- Sexy
- Spring
- Summer
- Suzanne Woolcott
- Thankyou ♥
- Tony Tzanoukakis
- Valentines
- Winter
- Zindy Nielson
