♥ Welcome ♥

♥ My Blinkie ♥

♥Once Upon A Time ♥

To View Tag In Proper Size Click On The Tag
Supplies Needed
Scrapkit Once upon a Time By Designed By Stina This is PTU
This is a full size Kit im using it in tagger size with permission so my sizing may not be accurate
This is a full size Kit im using it in tagger size with permission so my sizing may not be accurate
Font of choice or the one im using is Dark Crystal
Lets Get Started
Open new image 650x600
Open DBS_Frame03 copy paste as new layer resize 85 percent with magic wand click in frame selection modify expand by 5
Open DBS_Paper01 copy paste as new layer invert delete on keyboard select none drag under frame add drop shadow to frame
Open DBS_Lantern copy paste as new layer resize 55 percent erase slightly add drop shadow
Open DBS_Cloud02 copy paste as new layer resize 65 percent
Open DBS_Clock copy paste as new layer resize 80 percent add drop shadow
Open DBS_Storybook copy paste as new layer resize 45 percent add drop shadow
Open DBS_SnowWhite copy paste as new layer resize 80 percent drag under frame add drop shadow
Open DBS_AppleBasket copy paste as new layer resize 25 percent add drop shadow
Open DBS_Pidgeon copy paste as new layer resize 30 percent add drop shadow
Add your name Font Dark Crystal forground #392b39 background #ffffff effects inner bevel with this setting

Add drop shadow
Add your copyright info
resize & save Tag
If you like this Tut check the boxes below Love to see your results please email to me
Thankyou ♥
Written by ©Lyn(akaAngel) 30th May 2012, any similarity to any other tutorial is purely coincidental!

♥ Golden Dreams ♥

To View Tag In Proper Size Click On The Tag
Supplies Needed
Scrapkit by sunnysidescraps called African Dreams
Tube of choice im using ©Pinuptoons to purchase tubes go to CDO
All my tubes are a guide if the tubes i select are unavailable please use another tube of your liking thankyou
Font of choice or the one im using is CoolDots
Lets Get Started
Open new image 650x600
Open SSS_AfricanDreams_Element-69 copy paste as new layer resize 90 percent
Open SSS_AfricanDreams_Element-41 copy paste as new layer resize 65 percent with magic wand click in frame selection modify expand by 5
Open SSS_AfricanDreams_Paper-6 copy paste as new layer invert delete on keyboard select none drag under frame add drop shadow to frame
Open SSS_AfricanDreams_Element-48 copy paste as new layer resize 55 percent add drop shadow
Open SSS_AfricanDreams_Element-34 copy paste as new layer resize 65 percent add drop shadow
Open SSS_AfricanDreams_Element-29 copy paste as new layer resize 50 percent image rotate 20 percent right add drop shadow
Open tube copy paste as new layer add drop shadow
Add your name Font CoolDots forground #a26c27 background #cfb04b effects inner bevel with this setting

Add drop shadow
Add your copyright info
resize & save Tag
If you like this Tut check the boxes below Love to see your results please email to me
Thankyou ♥
Written by ©Lyn(akaAngel) 29th May 2012, any similarity to any other tutorial is purely coincidental!
This is an awesome result from Kaye Thankyou ♥

♥ Picture Of You ♥

To View Tag In Proper Size Click On The Tag
Supplies Needed
Scrapkit by sunnysidescraps called fruity this is FTU
Tube of choice im using ©Keith Garvey to purchase tubes go to PTE
All my tubes are a guide if the tubes i select are unavailable please use another tube of your liking thankyou
Mask WSL_Mask84 at weescotslass
Font of choice or the one im using is Valeria Script One
Lets Get Started
Open new image 650x600
Open SSS_Fruity_Paper-20 copy paste as new layer apply mask merge group
Open SSS_Fruity_Element-14 copy paste as new layer resize 80 percent with magic wand click in frame selection modify expand by 5
Open SSS_Fruity_Paper-5 copy paste as new layer invert delete on keyboard keep selected
Open your tube deleted on keyboard select none drag under frame add drop shadow to frame & tube
Open SSS_Fruity_Element-47 copy paste as new layer resize 45 percent add drop shadow
Open SSS_Fruity_Element-78 copy paste as new layer resize 20 percent with magic wand click in frame selection modify expand by 5
Open SSS_Fruity_Paper-14 copy paste as new layer invert delete on keyboard keep selected
Open your tube deleted on keyboard select none drag under frame add drop shadow to frame & tube
Open SSS_Fruity_Element-38 copy paste as new layer resize 30 percent add drop shadow
Open SSS_Fruity_Element-40 copy paste as new layer resize 25 percent mirror add drop shadow
Add your name & the words Picture of You Font Valeria Script One forground #ff8f79 background #ffcf7a add drop shadow
Add your copyright info
resize & save Tag
If you like this Tut check the boxes below Love to see your results please email to me
Thankyou ♥
Written by ©Lyn(akaAngel) 29th May 2012, any similarity to any other tutorial is purely coincidental!
this is a awesome result from Kaye thankyou ♥

♥ Rock ♥

To View Tag In Proper Size Click On The Tag
Supplies Needed
Scrapkit by sweet cravings scrap Called Bad Reputation This is PTU
Font of choice or the one im using is Blueberry
Lets Get Started
Open new image 650x600
Open SCS_BadReputation_Spotlight copy paste as new layer resize 95 percent add drop shadow
Open SCS_BadReputation_Frame4 copy paste as new layer resize 70 percent with magic wand click in frame selection modify expand by 5
Open SCS_BadReputation_Paper15 copy paste as new layer invert delete on keyboard select none drag under frame add drop shadow to frame
Open SCS_BadReputation_MusicNote copy paste as new layer drag under frame add drop shadow
Open SCS_BadReputation_Guitar copy paste as new layer image rotate 20 left mirror add drop shadow
Open SCS_BadReputation_Mask2 copy paste as new layer image rotate 20 right add drop shadow
Open SCS_BadReputation_Heels copy paste as new layer resize 55 percent add drop shadow
Open SCS_BadReputation_MetalPlate1 copy paste as new layer resize 45 percent image rotate 20 left add drop shadow
Open medi_wicked9 copy paste as new layer resize 65 percent add drop shadow
Add your name Font Blueberry forground #000000 background #5f316a add drop shadow
Add your copyright info
resize & save Tag
If you like this Tut check the boxes below Love to see your results please email to me
Thankyou ♥
Written by ©Lyn(akaAngel) 28th May 2012, any similarity to any other tutorial is purely coincidental!
♥ Tea For Me ♥

To View Tag In Proper Size Click On The Tag
Supplies Needed
Creative Scraps by Crys Called Tea for Two This is PTU
Tube of choice im using ©Pinuptoons to purchase tubes go to CDO
All my tubes are a guide if the tubes i select are unavailable please use another tube of your liking thankyou
Font of choice or the one im using is BickhamScriptFancy2
Lets Get Started
Open new image 650x600
Open TFT_Frame_4 copy paste as new layer resize 80 percent with magic wand click in frame selection modify expand by 5
Open TFT_Paper_8 copy paste as new layer invert delete on keyboard keep select
open TFT_Element_1 copy paste as new layer delete on keyboard select none drag under frame add drop shadow to frame
Open TFT_Element_57 copy paste as new layer add drop shadow
Open TFT_Element_4 copy paste as new layer add drop shadow
Open TFT_Element_6 copy paste as new layer resize 65 percent add drop shadow
Open TFT_Element_39 copy paste as new layer resize 35 percent add drop shadow
Open TFT_Element_40 copy paste as new layer resize 60 percent image rotate right 20 percent mirror add drop shadow
Open TFT_Element_56 copy paste as new layer image rotate 90 percent left add drop shadow
Open tube copy paste as new layer add drop shadow
Add your name Font BickhamScriptFancy2 forground #6a3279 background #cf4eae add gradient glow & add drop shadow
Add your copyright info
Save Your Tag
If you like this Tut check the boxes below Love to see your results please email to me
Thankyou ♥
Written by ©Lyn(akaAngel) 28th May 2012, any similarity to any other tutorial is purely coincidental!
♥ Bungle In The Jungle ♥

To View Tag In Proper Size Click On The Tag
Supplies Needed
Scrapkit by sweet cravings scrap Called Bungle in the Jungle This is PTU
Tube of choice im using ©Elias Chatzoudis to purchase tubes go to PTE
All my tubes are a guide if the tubes i select are unavailable please use another tube of your liking thankyou
Font of choice or the one im using is Baby Kruffy
Lets Get Started
Open new image 650x600
Open SCS_BungleInTheJungle_Frame4 copy paste as new layer resize 80 percent with magic wand click in frame selection modify expand by 5
Open SCS_BungleInTheJungle_Paper9 copy paste as new layer invert delete on keyboard keep selected
Open SCS_BungleInTheJungle_Flair3 deleted on keyboard select none drag under frame add drop shadow to frame & Flair
Open SCS_BungleInTheJungle_Sand copy paste as new layer resize 75 percent
Open SCS_BungleInTheJungle_Hut copy paste as new layer resize 54 percent add drop shadow
Open SCS_BungleInTheJungle_Weed2 copy paste as new layer resize 70 percent add drop shadow
Open SCS_BungleInTheJungle_Grass copy paste as new layer resize 70 percent add drop shadow
Open SCS_BungleInTheJungle_PalmTree copy paste as new layer resize 60 percent add drop shadow
Open SCS_BungleInTheJungle_CuteGiraffe copy paste as new layer resize 40 percent add drop shadow
Open SCS_BungleInTheJungle_CutePelican copy paste as new layer resize 30 percent mirror add drop shadow
Open SCS_BungleInTheJungle_Shell2 copy paste as new layer resize 20 percent duplicate mirror add drop shadow
open SCS_BungleInTheJungle_CuteCrocodile copy paste as new layer resize 35 percent mirror add drop shadow to the bottom tube
Open tube copy paste as new layer drag this under frame duplicate drag this one to top erase slightly near bottom of tube add drop shadow
Add your name Font Baby Kruffy forground #85ad28 background #fada33 add drop shadow
Add your copyright info
resize & save Tag
If you like this Tut check the boxes below Love to see your results please email to me
Thankyou ♥
Written by ©Lyn(akaAngel) 28th May 2012, any similarity to any other tutorial is purely coincidental!
♥ Midnight In Paris ♥

To View Tag In Proper Size Click On The Tag
Supplies Needed
Creative Scraps by Crys Called Midnight in Paris This is PTU
Mask WSL_Mask38 at weescotslass Here
Font of choice or the one im using is Cocktail Script
Lets Get Started
Open new image 650x600
Open MIP_Frame_2 copy paste as new layer resize 85 percent with magic wand click in frame selection modify expand by 5
Open MIP_Paper_9 copy paste as new layer invert delete on keyboard keep select
Open MIP_Element_59 copy paste as new layer delete on keyboard select none drag under frame add drop shadow to frame click in windows of the element 59 with magic wand then apply add remove noise with this setting


select none
open MIP_Element_33 copy paste as new layer resize 85 percent add drop shadow
Open MIP_Element_40 copy paste as new layer resize 50 percent add drop shadow
Open MIP_Element_41 copy paste as new layer resize 45 percent add drop shadow
Open MIP_Element_35 copy paste as new layer resize 35 percent mirror add drop shadow
Open MIP_Element_1 copy paste as new layer resize 70 percent add drop shadow
Open MIP_Element_3 copy paste as new layer resize 35 percent add drop shadow
Open MIP_Paper_8 copy paste as new layer apply mask merge group arrange send to bottom
Add your name Font Cocktail Script forground #201a1f background #dc8a88 add drop shadow
Add your copyright info
Save Your Tag
If you like this Tut check the boxes below Love to see your results please email to me
Thankyou ♥
Written by ©Lyn(akaAngel) 28th May 2012, any similarity to any other tutorial is purely coincidental!
This an awesome result thankyou Debbie ♥


♥ CupCakes ♥

To View Tag In Proper Size Click On The Tag
Supplies Needed
Creative Scraps by Crys Called Cupcake Wars TS This is PTU
Here
Tube of choice im using ©Elias Chatzoudis to purchase tubes go to PTE
Here
All my tubes are a guide if the tubes i select are unavailable please use another tube of your liking thankyou
Font of choice or the one im using is Miss Le Gatees
Lets Get Started
Open new image 650x600
Open CCW_Frame_2 copy paste as new layer with magic wand click in frame selection modify expand by 5
Open CCW_Paper_9 copy paste as new layer invert delete on keyboard keep select open CCW_Element_30 copy paste as new layer delete on keyboard select none drag under frame add drop shadow to frame
Open CCW_Element_19 copy paste as new layer with font MsMadiROB forground null background #000000 add this ingredient 2 cups SR flour
2 fruit juice poppers (orange or tropical)
1tspn cinnamon
Soak dried fruit in juice overnight,add flour & cinnamon mix thoroughly,put in greased loaf tin or muffin tray
bake 160 fan forced oven 15 to 20 mins or until cooked add drop shadow merge down resize 65 percent image rotate 20 percent left edge effects enhance more
Open CCW_Element_34 copy paste as new layer add drop shadow
Open CCW_Element_2 copy paste as new layer resize 25 percent add drop shadow
Open CCW_Element_1 copy paste as new layer resize 75 percent add drop shadow
Open CCW_Element_4 copy paste as new layer resize 65 percent add drop shadow
Open CCW_Element_5 copy paste as new layer resize 45 percent add drop shadow
Open CCW_Element_18 copy paste as new layer resize 50 percent image rotate 40 percent left add drop shadow
Open tube copy paste as new layer add drop shadow
Open CCW_Element_61 copy paste as new layer resize 86 percent add drop shadow
Add your name Font Miss Le Gatees forground #06b4bb background #000000 add gradient glow & add drop shadow
Add your copyright info
Save Your Tag
If you like this Tut check the boxes below Love to see your results please email to me
Thankyou ♥
Written by ©Lyn(akaAngel) 26th May 2012, any similarity to any other tutorial is purely coincidental!
♥ Fairy Bee Time ♥

To View Tag In Proper Size Click On The Tag
Supplies Needed
Fairy Bee Time By Stef's Scrapkit This is PTU
Here
Font of choice or the one im using is MrBlaketon
Lets Get Started
Open new image 650x600
Open ele17_FairyBeeTime_Stef'sScrapkits copy paste as new layer resize 80 percent with magic wand click in frame selection modify expand by 5
Open pap15_FairyBeeTime_Stef'sScrapkits copy paste as new layer invert delete on keyboard select none drag under frame add drop shadow to frame
Open ele41_FairyBeeTime_Stef'sScrapkits copy paste as new layer add drop shadow
Open ele29_FairyBeeTime_Stef'sScrapkits copy paste as new layer resize 60 percent duplicate mirror add drop shadow
Open ele32_FairyBeeTime_Stef'sScrapkits copy paste as new layer resize 35 percent add drop shadow
Open ele05_FairyBeeTime_Stef'sScrapkits copy paste as new layer resize 60 percent then resize 80 percent add drop shadow
Open ele44_FairyBeeTime_Stef'sScrapkits copy paste as new layer resize 75 percent add drop shadow
Open ele27_FairyBeeTime_Stef'sScrapkits copy paste as new layer resize 50 percent add drop shadow
Open ele47_FairyBeeTime_Stef'sScrapkits copy paste as new layer resize 30 percent add drop shadow
Open ele23_FairyBeeTime_Stef'sScrapkits copy paste as new layer resize 45 percent add drop shadow & add gradient glow
Add your name Font MrBlaketon forground #769b15 background #000000 add gradient glow & add drop shadow
Add your copyright info
Save Your Tag
If you like this Tut check the boxes below Love to see your results please email to me
Thankyou ♥
Written by ©Lyn(akaAngel) 26th May 2012, any similarity to any other tutorial is purely coincidental!
♥ In The Forest ♥

To View Tag In Proper Size Click On The Tag
Supplies Needed
Scrapkit In The Forest By Stef's Scrapkit This is PTU
Here
Mask WSL_Mask145 at weescotslass
Here
Font of choice or the one im using is LittleRickeyNF
Lets Get Started
Open new image 650x600
Open pap09_IntheForest_Stef'sScrapkits copy paste as new layer apply mask merge group
Open ele03_IntheForest_Stef'sScrapkits copy paste as new layer resize 75 percent with magic wand click in frame selection modify expand by 5
Open pap05_IntheForest_Stef'sScrapkits copy paste as new layer invert delete on keyboard select none drag under frame add drop shadow to frame
Open ele01_IntheForest_Stef'sScrapkits copy paste as new layer resize 60 percent add drop shadow
Open ele26_IntheForest_Stef'sScrapkits copy paste as new layer resize 80 percent add drop shadow
Open ele40_IntheForest_Stef'sScrapkits copy paste as new layer resize 75 percent add drop shadow duplicate resize this one at 80 percent
Open ele39_IntheForest_Stef'sScrapkits copy paste as new layer resize 40 percent add drop shadow
Open ele41_IntheForest_Stef'sScrapkits copy paste as new layer resize 55 percent add drop shadow
Open ele46_IntheForest_Stef'sScrapkits copy paste as new layer resize 40 percent add drop shadow
Open ele42_IntheForest_Stef'sScrapkits copy paste as new layer add drop shadow
Open ele21_IntheForest_Stef'sScrapkits copy paste as new layer resize 35 percent add drop shadow
Add your name Font LittleRickeyNF forground #769b15 background #b0a879 add drop shadow
Add your copyright info
Save Your Tag
If you like this Tut check the boxes below Love to see your results please email to me
Thankyou ♥
Written by ©Lyn(akaAngel) 26th May 2012, any similarity to any other tutorial is purely coincidental!
♥ Under the board Walk ♥

To View Tag In Proper Size Click On The Tag
Supplies Needed
Scrapkit by ACowgirlsCreations called Vintage Sand this is FTU
Font of choice or the one im using is Mr Lackboughs
Lets Get Started
Open new image 650x600
Open Acc VS boardwalk mask copy paste as new layer
Open Acc VS sand copy paste as new layer add drop shadow
Open Acc corrugated paper frame copy paste as new layer resize 75 percent with magic wand click in frame selection modify expand by 5
Open zAcc VS paper 8 copy paste as new layer invert delete on keyboard select none drag under frame add drop shadow to frame
Go back to frame click in frame again with magic wand selection modify expand by 5
Open Acc VS dock copy paste as new layer invert delete select none lower opacity by 34
Open Acc chaise copy paste as new layer resize 80 percent add drop shadow
Open Acc VS grass copy paste as new layer add drop shadow
Open Acc VS lighthouse copy paste as new layer resize 60 percent add drop shadow
Open Acc VS rocks copy paste as new layer resize 45 percent add drop shadow
Open Acc VS bird copy paste as new layer resize 40 percent then resize again at 80 percent add drop shadow
Open Acc VS Starfish copy paste as new layer resize 25 percent add drop shadow
Open Acc VS vintage lady poser by outlawbydesign copy paste as new layer add drop shadow
Add your name Font Mr Lackboughs forground #82693d background #af917d add drop shadow
Add your copyright info
resize tag & save
If you like this Tut check the boxes below Love to see your results please email to me
Thankyou ♥
Written by ©Lyn(akaAngel) 26th May 2012, any similarity to any other tutorial is purely coincidental!
This an Awesome result from Baukje Thankyou ♥

This an Awesome result from Kaye Thankyou ♥

♥ On the Caribbean ♥

To View Tag In Proper Size Click On The Tag
Supplies Needed
Tootypup Scraps :: Caribbean Princess TG
Tube of choice im using ©Scott Blair i brought my tube at MPT which is no longer available you can purchase Hes tube at PTE
All my tubes are a guide if the tubes i select are unavailable please use another tube of your liking thankyou
Mask WSL_Mas84 at weescotslass
Font of choice or the one im using is Lamplighter Script
Lets Get Started
Open new image 650x600
Open TP_Paper_03 copy paste as new layer apply mask merge group
Open TP_WheelFrame_02 copy paste as new layer resize 55 percent with magic wand click in frame selection modify expand by 5
Open TP_Paper_07 copy paste as new layer invert delete on keyboard keep selected open TP_Ocean_01 copy paste as new layer delete on keyboard drag paper & TP_Ocean_01 under frame select none add drop shadow to frame
Open TP_BeachRocks_01 copy paste as new layer resize 55 percent add drop shadow
Open TP_PiratesFlag_01 copy paste as new layer resize 65 percent add drop shadow
Open TP_SailingShip_01 copy paste as new layer resize 45 percent add drop shadow
Open TP_TreasureChest_01 copy paste as new layer resize 35 percent effects enhance add drop shadow
Open TP_Telescope_01 copy paste as new layer resize 40 percent add drop shadow
Open TP_Anchor_01 copy paste as new layer resize 35 percent add drop shadow
resize all layer 85 percent
Open your tube copy paste as new layer add drop shadow
Add your name Font Lamplighter Script forground #ac7536 background #bfac84 add drop shadow
Add your copyright info
save your tag
If you like this Tut check the boxes below Love to see your results please email to me
Thankyou ♥
Written by ©Lyn(akaAngel) 25th May 2012, any similarity to any other tutorial is purely coincidental!
♥ Your In My Heart ♥

To View Tag In Proper Size Click On The Tag
Supplies Needed
Scrapkit Designed by Stina :: The Blue Butterfly this is PTU
2Tubes of choice im using ©Keith Garvey to purchase tubes go to PTE
All my tubes are a guide if the tubes i select are unavailable please use another tube of your liking thankyou
Mask WSL_Mask33 at weescotslass
Font of choice or the one im using is Lamplighter Script
Lets Get Started
Open new image 650x600
Open DBS_Paper02 copy paste as new layer resize 25 percent apply mask merge group duplicate merge down
Open DBS_Hearts03 copy paste as new layer resize 25 percent add drop shadow
Open DBS_Frame03 copy paste as new layer resize 25 percent then again at 65 percent with magic wand click in frame selection modify expand by 5
Open DBS_Paper03 copy paste as new layer invert delete on keyboard keep selected open tube copy paste as new layer delete on keyboard drag paper & tube under frame select none add drop shadow to frame & tube
Open DBS_Clock02 copy paste as new layer resize 10 percent sharpen add drop shadow
Open DBS_Foilage02 copy paste as new layer resize 30 percent add drop shadow
Open DBS_Perfume copy paste as new layer resize 45 percent add drop shadow
Open DBS_Locket copy paste as new layer resize 10 percent with magic wand click in the locket modify by 5
open tube copy paste as new layer delete on keyboard duplicate the locket & bring above the tube add drop shadow to bottom locket your layer pallette will look like this

Add your name Font Lamplighter Script forground #3382b4 background #d8e1f1 add drop shadow
Add your copyright info
merge all visible sharpen
If you like this Tut check the boxes below Love to see your results please email to me
Thankyou ♥
Written by ©Lyn(akaAngel) 24th May 2012, any similarity to any other tutorial is purely coincidental!
♥ Alone ♥
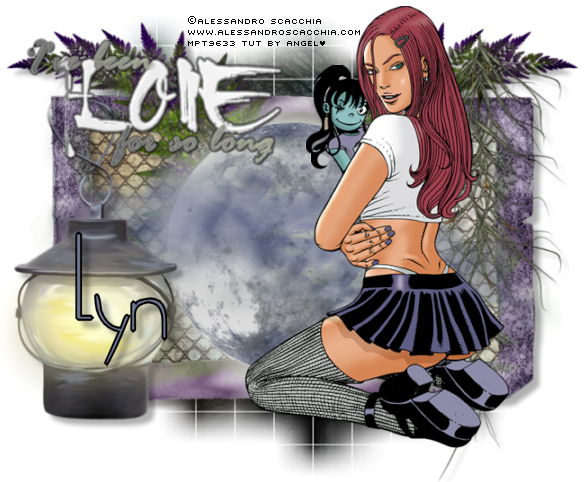
To View Tag In Proper Size Click On The Tag
Supplies Needed
Scrapkit The Darkest Night FTU by Gothic inspirations
Tube of choice im using ©Alessandro Scacchia i brought my tube at MPT which is no longer available
All my tubes are a guide if the tubes i select are unavailable please use another tube of your liking thankyou
Mask WSL_Mask84 at weescotslass
Font of choice or the one im using is Do I like Stripes?
Lets Get Started
Open new image 650x600
Open Paper4-GI_TheDarkestNight copy paste as new layer apply mask merge group
Open Frame4-GI_TheDarkestNight copy paste as new layer resize 65 percent image rotate 90 percent right with magic wand click in frame selection modify expand by 5
Open Paper5-GI_TheDarkestNight copy paste as new layer invert delete on keyboard keep selected
open Mesh-GI_TheDarkestNight copy paste as new layer delete on keyboard select none drag under frame add drop shadow to frame
Open Fern-GI_TheDarkestNight copy paste as new layer resize 60 percent duplicate mirror add drop shadow
Open Moon-GI_TheDarkestNight copy paste as new layer resize 75 percent
Open Moss-GI_TheDarkestNight copy paste as new layer resize 80 percent add drop shadow
Open Lamp-GI_TheDarkestNight copy paste as new layer resize 70 percent erase slightly so its sitting around the frame add drop shadow
Open WordArt-GI_TheDarkestNight copy paste as new layer resize 56 percent add gradient glow colour#ffffff then again gradient glow colour#000000 add drop shadow
Open tube copy paste as new layer add drop shadow
Add your name Font Do I like Stripes? forground #000000 background #707791 add drop shadow
Add your copyright info
resize & save your tag
If you like this Tut check the boxes below Love to see your results please email to me
Thankyou ♥
Written by ©Lyn(akaAngel) 20th May 2012, any similarity to any other tutorial is purely coincidental!
this is awesome result from Deb thankyou ♥

this is an awesome result from Dixie Thankyou ♥

♥ Splash Into Summer ♥

To View Tag In Proper Size Click On The Tag
Supplies Needed
Splash Into Summer FTU Scrap Kit
Tube of choice im using ©Elias Chatzoudis to purchase tubes go to PTE
All my tubes are a guide if the tubes i select are unavailable please use another tube of your liking thankyou
Mask WSL_Mask178 at weescotslass
Font of choice or the one im using is Jellyka - Love and Passion
Lets Get Started
Open new image 650x600
Open paper13 copy paste as new layer apply mask merge group duplicate merge down
Open frame2 copy paste as new layer resize 25 percent with magic wand click in frame selection modify expand by 5
Open paper2 copy paste as new layer invert delete on keyboard drag under frame keep selected
open element15 copy paste as new layer resize 15 percent select none add drop shadow to frame & boat
Open element2 copy paste as new layer resize 20 percent add drop shadow
Open element12 copy paste as new layer resize 30 percent add drop shadow
Open element24 copy paste as new layer resize 40 percent add drop shadow
Open element23 copy paste as new layer resize 15 percent add drop shadow
Open element21 copy paste as new layer resize 5 percent add drop shadow
Open tube copy paste as new layer add drop shadow
Add your name Font Jellyka - Love and Passion forground #6cd9e1 background #f2e740 add drop shadow
Add your copyright info
resize & save your tag
If you like this Tut check the boxes below Love to see your results please email to me
Thankyou ♥
Written by ©Lyn(akaAngel) 20th May 2012, any similarity to any other tutorial is purely coincidental!
this result is awesome thankyou to Dixie ♥

this result is awesome thankyou to Cindy ♥

♥ Autumn Time ♥

To View Tag In Proper Size Click On The Tag
Supplies Needed
Scrapkit Autumn Friends FTU By Angies Tuts N Tags
Tube of choice im using ©Elias Chatzoudis to purchase tubes go to PTE
All my tubes are a guide if the tubes i select are unavailble please use another tube of your liking thankyou
Mask WSL_Mask38 at weescotslass
Font of choice or the one im using is Fontdinerdotcom Huggable & Inspiration
Lets Get Started
Open new image 650x600
Open paper7 copy paste as new layer apply mask merge group
Open frame9 copy paste as new layer resize 80 percent with magic wand click in frame selection modify expand by 5
Open paper13 copy paste as new layer invert delete on keyboard select none drag under frame add drop shadow to frame
Open element1 copy paste as new layer resize 50 percent then resize 60 percent add drop shadow duplicate resize 75 percent
Open owl2 copy paste as new layer resize 15 percent resize again at 75 percent add drop shadow
Open element11 copy paste as new layer resize 5 percent duplicate mirror move back near first one add drop shadow merge down duplicate 3 times arrange on tag see my tag for reference
Open tube copy paste as new layer mirror add drop shadow
Open crow copy paste as new layer resize 15 percent add drop shadow
Add the words Autumn Time Font Fontdinerdotcom Huggable forground #000000 background #a20017 add drop shadow
Add your name Font Inspiration forground #000000 background #a20017 add drop shadow
Add your copyright info
Resize & save your tag
If you like this Tut check the boxes below Love to see your results please email to me
Thankyou ♥
Written by ©Lyn(akaAngel) 18th May 2012, any similarity to any other tutorial is purely coincidental!
This is an awesome result from Lyn Marie ..aka dustyrose thankyou ♥

♥ CupCakes ♥

To View Tag In Proper Size Click On The Tag
Supplies Needed
Scrapkit Cupcakery Scrap Kit This is FTU By Angies Tuts N Tags
Tube of choice im using ©Elias Chatzoudis to purchase tubes go to PTE
All my tubes are a guide if the tubes i select are unavailble please use another tube of your liking thankyou
Mask WSL_Mask84 at weescotslass
Font of choice or the one im using is Carpenter Script
Lets Get Started
Open new image 650x600
Open paper7 copy paste as new layer apply mask merge group
Open frame1 copy paste as new layer resize 25 percent with magic wand click in frame selection modify expand by 5
Open paper6 copy paste as new layer invert delete on keyboard select none drag under frame add drop shadow to frame
Open element31 copy paste as new layer resize 20 percent add drop shadow
Open element17 copy paste as new layer resize 15 percent image flip add drop shadow
Open element10 copy paste as new layer resize 65 percent image rotate 25 left add drop shadow
Open element11 copy paste as new layer resize 55 percent add drop shadow
Open element23 copy paste as new layer resize 10 percent add drop shadow
Open element14 copy paste as new layer resize 30 percent add drop shadow
Open element30 copy paste as new layer resize 10 percent add drop shadow
Open element29 copy paste as new layer resize 7 percent add drop shadow
copy element29 again paste as new layer resize 5 percent add drop shadow
open element5 copy paste as new layer resize 8 percent add drop shadow
open element2 copy paste as new layer resize 10 percent add drop shadow
copy element2 again paste as new layer resize 5 percent add drop shadow
open element1 copy paste as new layer resize 3 percent then resize 80 percent add drop shadow
copy element1 again paste as new layer resize 5 percent then resize again 35 percent add drop shadow
merge all cakes & cake stand together
image canvas size 750x750 we will be resize again soon
Open tube copy paste as new layer mirror add drop shadow
open element41 copy paste as new layer resize 15 percent image rotate 15 percent right add drop shadow
resize all layers 550x472 pixels
Add your name Font Carpenter Script forground #ec383a background #fe7b7c add drop shadow
Add your copyright info
merge all visible sharpen
If you like this Tut check the boxes below Love to see your results please email to me
Thankyou ♥
Written by ©Lyn(akaAngel) 19th May 2012, any similarity to any other tutorial is purely coincidental!
This Result is from Priscie its Awesome Thankyou ♥

This Result is from Kaye its Awesome Thankyou ♥


This is an awesome result from Dixie thankyou ♥

♥ Orange Juicy ♥

To View Tag In Proper Size Click On The Tag
Supplies Needed
Scrapkit Orange Juicy By Cadi's Fun Scraps This is FTU Here
Tubes of choice im using ©Elias Chatzoudis to purchase tubes go to PTE Here
All my tubes are a guide if the tubes i select are unavailble please use another tube of your liking thankyou
Mask WSL_Mask178 at weescotslass Here
Font of choice or the one im using is Mon Amour Script Alt
Lets Get Started
Open new image 650x600
Open CFS_Orange Juicy - Paper 12 copy paste as new layer apply mask merge group
open CFS_Orange Juicy - Flower 02 copy paste as new layer resize 20 percent with Muras filter Meister copies with this setting

Add drop shadow
Open CFS_Orange Juicy - Flower 06 copy paste as new layer resize 65 percent duplicate mirror merge down add drop shadow
Open CFS_Orange Juicy - Folded Heart 02 copy paste as new layer resize 40 percent add drop shadow effects enhance
Open tube copy paste as new layer add drop shadow
Open CFS_Orange Juicy - Ribbon copy paste as new layer resize 65 percent add drop shadow
Add your name Font Mon Amour Script Alt forground #ef9122 background #f9c11d add drop shadow
Add your copyright info
resize & save your tag
If you like this Tut check the boxes below Love to see your results please email to me
Thankyou ♥
Written by ©Lyn(akaAngel) 17th May 2012, any similarity to any other tutorial is purely coincidental!
This is awesome result from Kaye thankyou ♥

This is awesome result from Priscie Thankyou ♥

♥ Rainy Dayz ♥

To View Tag In Proper Size Click On The Tag
Supplies Needed
Scrapkit RainyDayz By Stef scrapkits This is PTU
Mask WSL_Mask84 at weescotslass
Font of choice or the one im using is DJ FiddleSticks
Lets Get Started
Open new image 650x600
Open pap06_RainyDayz_Stef'sScrapkits copy paste as new layer resize 55 percent apply mask merge group
Open ele06_RainyDayz_Stef'sScrapkits copy paste as new layer resize 60 percent with magic wand click in frame selection modify expand by 5
Open pap17_RainyDayz_Stef'sScrapkits copy paste as new layer resize 20 percent select none drag under frame add drop shadow to frame
Open ele46_RainyDayz_Stef'sScrapkits copy paste as new layer resize 25 percent add drop shadow
Open ele66_RainyDayz_Stef'sScrapkits copy paste as new layer resize 15 percent mirror
Open ele09_RainyDayz_Stef'sScrapkits copy paste as new layer resize 20 percent mirror
Open ele33_RainyDayz_Stef'sScrapkits copy paste as new layer resize 20 percent add drop shadow
Open ele45_RainyDayz_Stef'sScrapkits copy paste as new layer resize 10 percent then resize again at 80 percent add drop shadow
Add your name & the words RainyDayz Font DJ FiddleSticks forground #d18275 background #d91f29 add gradient glow & add drop shadow
Add your copyright info
resize & save your tag
If you like this Tut check the boxes below Love to see your results please email to me Thankyou ♥
Written by ©Lyn(akaAngel) 16th May 2012, any similarity to any other tutorial is purely coincidental!
This is Lovely result by Deb thankyou ♥

♥ Earth ♥

To View Tag In Proper Size Click On The Tag
Supplies Needed
Scrapkit Flair of Earth By Cadi's Fun Scraps This is FTU Here
Tubes of choice im using ©Keith Garvey to purchase tubes go to PTE Here
All my tubes are a guide if the tubes i select are unavailble please use another tube of your liking thankyou
Template FTU by Cadi's Fun Scraps can find in list at January on right of blog Here
Mask WSL_Mask145 at weescotslass Here
Font of choice or the one im using is BickhamScriptFancy2
Lets Get Started
Open Template duplicate close original delete © Cadi'S Fun Scraps & BG
starting from the bottom layer
Go to 2 select all float defloat Open CFS_Flair of Earth_Paper11 copy paste as new layer select invert delete on keyboard select none add drop shadow
Go to 3 select all float defloat Open CFS_Flair of Earth_Paper 06 copy paste as new layer select invert delete on keyboard select none
Go to 4 select all float defloat Open CFS_Flair of Earth_Paper11 copy paste as new layer select invert delete on keyboard select none add drop shadow
Go to 5 select all float defloat Open CFS_Flair of Earth_Paper 09 copy paste as new layer select invert delete on keyboard select none
Go to 6 select all float defloat Open CFS_Flair of Earth_Paper11 copy paste as new layer select invert delete on keyboard select none add drop shadow
Go to 7 select all float defloat Open CFS_Flair of Earth_Paper 06 copy paste as new layer select invert delete on keyboard select none
Go to 8 select all float defloat Open CFS_Flair of Earth_Paper 11 copy paste as new layer select invert delete on keyboard select none add drop shadow
Go to 9 select all float defloat Open CFS_Flair of Earth_Paper 08 copy paste as new layer select invert delete on keyboard select none
Go to 10 select all float defloat Open CFS_Flair of Earth_Paper 11 copy paste as new layer select invert delete on keyboard select none add drop shadow
Go to 11 select all float defloat Open CFS_Flair of Earth_Paper 06 copy paste as new layer select invert delete on keyboard select none
Go to 12 select all float defloat Open CFS_Flair of Earth_ Buckle 2 copy paste as new layer select invert delete on keyboard select none add drop shadow
Go to 15 select all float defloat Open CFS_Flair of Earth_ Buckle 2 copy paste as new layer select invert delete on keyboard select none add drop shadow
Go to 13 select all float defloat Open CFS_Flair of Earth_ Buckle 1 copy paste as new layer select invert delete on keyboard select none add drop shadow
Go to 16 select all float defloat Open CFS_Flair of Earth_ Buckle 1 copy paste as new layer select invert delete on keyboard select none add drop shadow
Go to 14 select all float defloat Open CFS_Flair of Earth_ Buckle 3 copy paste as new layer select invert delete on keyboard select none add drop shadow
Go to 17 select all float defloat Open CFS_Flair of Earth_ Buckle 3 copy paste as new layer select invert delete on keyboard select none add drop shadow
Go to 18 select all float defloat Open CFS_Flair of Earth_Paper11 copy paste as new layer select invert delete on keyboard select none add drop shadow
Go to 19 select all float defloat Open CFS_Flair of Earth_Paper 03 copy paste as new layer select invert delete on keyboard Open tube copy paste as new layer delete on keyboard select none blend mode luminancy (L)
open main tube copy paste as new layer add drop shadow
Open CFS_Flair of Earth_ Deko 4 copy paste as new layer resize 65 percent add drop shadow drag under tube see my tag for reference
Open CFS_Flair of Earth_Flower 06 copy paste as new layer resize 25 percent add drop shadow duplicate 2 times mirror the top flower drag these under both tubes see my tag for reference
Open CFS_Flair of Earth_Paper 03 copy paste as new layer apply mask merge group arrange send to bottom duplicate flip merge down
Add your name Font BickhamScriptFancy2 forground #796542 background #ce9f8c add gradient glow & add drop shadow
Add your copyright info
resize & save your tag
If you like this Tut check the boxes below Love to see your results please email to me
Thankyou ♥
Written by ©Lyn(akaAngel) 5th May 2012, any similarity to any other tutorial is purely coincidental!


Subscribe to:
Posts (Atom)


