♥ Welcome ♥

♥ My Blinkie ♥

♥ I Love You ♥

To View Tag In Proper Size Click On The Tag
Supplies Needed
Scrapkit Love Is So Sweet This is FTU
Here
Tube of choice im using ©Elias Chatzoudis to purchase tubes go to PTE Here
All my tubes are a guide if the tubes i select are unavailble please use another tube of your liking thankyou
Mask WSL_Mask84 at weescotslass
Here
Font of choice or the one im using is LainieDaySH
Lets Get Started
Open new image 750x750
Open rs_paper4 copy paste as new layer apply mask merge group duplicate image mirror image flip
Open rs_scatterz3 copy paste as new layer add drop shadow
Open rs_curtain2 copy paste as new layer resize 80 percent effects enhance add drop shadow
Open rs_diamonds1 copy paste as new layer resize 80 percent effects enhance duplicate image mirror duplicate image rotate 90 left duplicate image flip merge these down add drop shadow
Open rs_rose3 copy paste as new layer resize 45 percent duplicate mirror add drop shadow
Open rs_wordart4 copy paste as new layer resize 75 percent add drop shadow
Open rs_chocostrawberry3 copy paste as new layer resize 75 percent add drop shadow
Open tube copy paste as new layer drag tube under wordart
with selection tool on rectangle go around bottom of tube see below

selection modify feather with this setting

press delete twice on keyboard select none this takes away the edge on tube
Give tube drop shadow
Add your name Font LainieDaySH forground #652946 background #c7679e add drop shadow & add gradient glow
Add your copyright info
resize & save your tag
If you like this Tut check the boxes below Love to see your results please email to me
Thankyou ♥
Written by ©Lyn(akaAngel) 31st January 2012, any similarity to any other tutorial is purely coincidental!

♥ Do Ya Like It Like That ♥

To View Tag In Proper Size Click On The Tag
Supplies Needed
Scrapkit Purple Kreationz called Dragon Queen This is FTU
Here
2 Tubes of choice im using ©Popeye Wong this is FTU Here
All my tubes are a guide if the tubes i select are unavailble please use another tube of your liking thankyou
Mask WSL_Mask84 at weescotslass
Here
Font of choice or the one im using is Noir-et-Blanc
Lets Get Started
Open new image 750x750
Open PK-DQ-P5 copy paste as new layer apply mask merge group
Open PK-DQ-F4 copy paste as new layer with magic wand click in frame selection modify expand by 5
Open PK-DQ-P7 copy paste as new layer invert delete on keyboard drag under frame select none add drop shadow
Open PK-DQ-BULLWHIP copy paste as new layer add drop shadow
Open PK-DQ-TOOL1 copy paste as new layer add drop shadow
Open PK-DQ-MOON copy paste as new layer resize 75 percent add drop shadow
Open PK-DQ-BALLNCHAIN copy paste as new layer add drop shadow
Open tube copy paste as new layer add drop shadow
Add your name Font Noir-et-Blanc forground #ffffff background #000000 add drop shadow
Add your copyright info
resize & save your tag
If you like this Tut check the boxes below Love to see your results please email to me
Thankyou ♥
Written by ©Lyn(akaAngel) 30th January 2012, any similarity to any other tutorial is purely coincidental!
This awesome result is from Kaye Thankyou ♥

♥ Some Love ♥

To View Tag In Proper Size Click On The Tag
Supplies Needed
Scrapkit By Sinfully Creative Scraps Hug Bug This is PTU
Here
Tube of choice im using ©Keith Garvey to purchase tubes go to PTE
Here
All my tubes are a guide if the tubes i select are unavailble please use another tube of your liking thankyou
Mask WSL_Mask302 at weescotslass
Here
Font of choice or the one im using is Informal Roman
Lets Get Started
Open new image 650x600
Open HB_Paper_11 copy paste as new layer apply mask merge group
Open UAWD_Element_15 copy paste as new layer add drop shadow
Open HB_Frame_4 copy paste as new layer resize 70 percent with magic wand click in frame selection modify expand by 5
Open HB_Paper_10 copy paste as new layer invert delete on keyboard drag under frame select none add drop shadow to frame
open HB_Element_21 copy paste as new layer resize 75 percent effects enhance add drop shadow
Open HB_Element_55 copy paste as new layer resize 65 percent add drop shadow
Open HB_Element_39 copy paste as new layer resize 55 percent add drop shadow mirror bring back to first one
Open HB_Element_37 copy paste as new layer resize 55 percent add drop shadow mirror bring back to first one
Open HB_Element_1 copy paste as new layer resize 35 percent mirror add drop shadow
Open tube copy paste as new layer add drop shadow
Add your name Font Informal Roman forground #ffffff background #59e514 add gradient glow & add drop shadow
Add your copyright info
resize & save your tag
If you like this Tut check the boxes below Love to see your results please email to me
Thankyou ♥
Written by ©Lyn(akaAngel) 30th January 2012, any similarity to any other tutorial is purely coincidental!
♥ Winters Dream ♥

To View Tag In Proper Size Click On The Tag
Supplies Needed
Scrapkit By Sinfully Creative Scraps Upon A Winters Dream This is PTU
Here
Tube of choice im using ©Suzanne Woolcott to purchase tubes go to
Here
All my tubes are a guide if the tubes i select are unavailble please use another tube of your liking thankyou
Mask WSL_Mask358 at weescotslass
Here
Font of choice or the one im using is Yevida Potens & Eras Bold ITC
Lets Get Started
Open new image 650x600
Open UAWD_Paper_1 copy paste as new layer apply mask merge group
Open UAWD_Element_15 copy paste as new layer add drop shadow
Open UAWD_Element_45 copy paste as new layer resize 70 percent with magic wand click in frame selection modify expand by 5
Open UAWD_Paper_6 copy paste as new layer invert delete on keyboard drag under frame keep selected open UAWD_Element_48 copy paste as new layer add drop shadow
Open UAWD_Element_59 copy paste as new layer duplicate mirror image flip merge down add drop shadow
Open UAWD_Element_16 copy paste as new layer resize 85 percent add drop shadow
Open UAWD_Element_16 copy paste as new layer
Open UAWD_Element_51 copy paste as new layer resize 70 percent add drop shadow
Open tube copy paste as new layer add drop shadow
Add the words Font Eras Bold ITC forground #ffffff background #6e9296 add drop shadow
Add your name Font Yevida Potens forground #ffffff background #6e9296 add drop shadow
Add your copyright info
resize & save your tag
If you like this Tut check the boxes below Love to see your results please email to me
Thankyou ♥
Written by ©Lyn(akaAngel) 30th January 2012, any similarity to any other tutorial is purely coincidental!
♥ Have a Nice Day ♥

To View Tag In Proper Size Click On The Tag
Supplies Needed
Scrapkit By Seachell Scrapz Verde This is FTU you will find under Free Scraps
Here
Tube of choice im using ©Elias Chatzoudis to purchase tubes go to PTE Here
All my tubes are a guide if the tubes i select are unavailble please use another tube of your liking thankyou
Mask WSL_Mask328 at weescotslass Here
Font of choice or the one im using is Miss Le Gatees
Lets Get Started
Open new image 750x600
Open Seachell_Verde_Paper5 copy paste as new layer apply mask merge group
Open Seachell_Verde_Element41 copy paste as new layer resize 70 percent add drop shadow
Open Seachell_Verde_Element44 copy paste as new layer with magic wand click in frame selection modify expand by 5
Open Seachell_Verde_Paper5 copy paste as new layer invert delete on keyboard drag under frame keep selected open tube copy paste as new layer delete on keyboard drag under frame select none blend mode Luminace Legacy lower opacity 48 percent add drop shadow
Open Seachell_Verde_Element44 copy paste as new layer resize 55 percent add drop shadow duplicate mirror
Open Seachell_Verde_Element13 copy paste as new layer resize 45 percent add drop shadow
Open Seachell_Verde_Element9 copy paste as new layer resize 35 percent then resize 85 percent image rotate 15 percent right add drop shadow
Open Seachell_Verde_Element7 copy paste as new layer resize 20 percent duplicate 3 times arrange on tag see mine for reference add drop shadow
Open Seachell_Verde_Element26 copy paste as new layer resize 25 percent add drop shadow
Open tube copy paste as new layer add drop shadow
Add your name & the words Have A Nice Day Font Miss Le Gatees forground #1b0a02 background #4f6324 add drop shadow
Add your copyright info
resize & save your tag
If you like this Tut check the boxes below Love to see your results please email to me
Thankyou ♥
Written by ©Lyn(akaAngel) 29th January 2012, any similarity to any other tutorial is purely coincidental!
This is the awesome result from Dixie Thankyou ♥

♥ Love Me Forever ♥

To View Tag In Proper Size Click On The Tag
Supplies Needed
Scrapkit By Seachell Scrapz About Love Purple Valentine This is FTU you will find under Free Scraps
Here
Template Love Me Forever By Sinfully Creative Scraps
Here
Tube of choice im using ©Elias Chatzoudis to purchase tubes go to PTE Here
All my tubes are a guide if the tubes i select are unavailable please use another tube of your liking thankyou
Mask WSL_Mask320 at weescotslass
Here
Font of choice or the one im using is MrBlaketon
Lets Get Started
Open Template duplicate close original delete Raster 10
Open Seachell_PV_Paper6 copy paste as new layer apply mask merge group duplicate merge down add drop shadow
Go to Raster 7 selections select all float defloat Open Seachell_PV_Paper8 copy paste as new layer invert delete on keyboard select none add drop shadow
Go to Raster 3 selections select all float defloat Open Seachell_PV_Paper1 copy paste as new layer invert delete on keyboard select none add drop shadow
Go to Raster 2 selections select all float defloat Open Seachell_PV_Paper10 copy paste as new layer invert delete on keyboard select none add drop shadow
Open Seachell_PV_Element22 copy paste as new layer image rotate 90 percent left add drop shadow
Go to Raster 5 selections select all float defloat Open Seachell_PV_Paper4 copy paste as new layer invert delete on keyboard select none effects texture effects Blinds with this setting

add drop shadow
Go to Raster 6 selections select all float defloat Open Seachell_PV_Paper4 copy paste as new layer invert delete on keyboard select none repeat Blinds as above add drop shadow
Go to Raster 4 selections select all float defloat Open Seachell_PV_Paper7 copy paste as new layer invert delete on keyboard select none add drop shadow
Go to Raster 8 selections select all float defloat Open Seachell_PV_Paper5 copy paste as new layer invert delete on keyboard select none add drop shadow
Go to Raster 8 selections select all float defloat Open Seachell_PV_Paper5 copy paste as new layer invert delete on keyboard select none add drop shadow
Go to Raster 9 add drop shadow
Open Seachell_PV_Element30 resize 70 percent add drop shadow drag under Raster 9
Open Seachell_PV_Element1 resize 45 percent image rotate 40 percent left add drop shadow
Open tube copy paste as new layer add drop shadow
Add your name Font MrBlaketon forground #ffffff background #d2a4d2 add drop shadow
Add your copyright info
resize & save your tag
If you like this Tut check the boxes below Love to see your results please email to me
Thankyou ♥
Written by ©Lyn(akaAngel) 29th January 2012, any similarity to any other tutorial is purely coincidental!
This result is from Vickie this is Awesome Thankyou ♥

This result is from Dixie this is Awesome Thankyou ♥

♥ Cupids Help ♥

To View Tag In Proper Size Click On The Tag
Supplies Needed
Scrapkit by Randys Sin Called Kinky Kupid This is FTU Here
2 Tubes of choice im using ©Elias Chatzoudis to purchase tubes go to PTE Here
All my tubes are a guide if the tubes i select are unavailble please use another tube of your liking thankyou
Mask WSL_Mask354 at weescotslass Here
Font of choice or the one im using is Fontdinerdotcom Huggable & Glider Girls
Lets Get Started
Open new image 750x750
Open rs_paper14 copy paste as new layer apply mask merge group
Open rs_heartfram1 copy paste as new layer with magic wand click in frame selection modify expand by 5
Open rs_paper2 copy paste as new layer invert delete on keyboard drag under frame keep selected open tube copy paste as new layer delete on keyboard drag under frame select none blend mode hard light add drop shadow
Open rs_charm2 copy paste as new layer resize 55 percent add drop shadow
Open rs_rose3 copy paste as new layer resize 65 percent image rotate 90 left add drop shadow duplicate image mirror
Open rs_scatterz1 copy paste as new layer add drop shadow
Open tube copy paste as new layer add drop shadow
Add the words Cupids Help Font Fontdinerdotcom Huggable forground #000000 background #ac1807 add drop shadow apply Texture effects with this setting

Add your name Font Glider Girls forground #000000 background #b6b8bd add drop shadow
Add your copyright info
resize & save your tag
If you like this Tut check the boxes below Love to see your results please email to me
Thankyou ♥
Written by ©Lyn(akaAngel) 28th January 2012, any similarity to any other tutorial is purely coincidental!
This is the awesome result from Kaye Thankyou ♥

This is the awesome result from Dixie Thankyou ♥

♥ Love U Baby ♥

To View Tag In Proper Size Click On The Tag
Supplies Needed
Scrapkit Freebie Misfit Winter at Tasha's Playground Here
Tube of choice im using ©Elias Chatzoudis to purchase tubes go to PTE Here
All my tubes are a guide if the tubes i select are unavailble please use another tube of your liking thankyou
Mask WSL_Mask320 & Wordart at weescotslass Here
Font of choice or the one im using is Fontasia Onet
Lets Get Started
Open new image 600x600
Drop Shadow used in this tut is 6,6,45.10.15
Open starswirl copy paste as new layer resize 75 percent add drop shadow
Open paper6 copy paste as new layer apply mask merge group
Open frame1 copy paste as new layer resize 45 percent with magic wand click in frames selection modify expand by 5
Open paper9 copy paste as new layer invert delete on keyboard drag under frame keep selected
open branch copy paste as new layer delete on keyboard drag under frame mirroradd drop shadow
Open heart copy paste as new layer mirror add drop shadow
open tube copy paste as new layer duplicate drag this one under frame go back to top tube erase the bottom part of tube add drop shadow to bottom tube
Open lollipop copy paste as new layer resize 66 percent duplicate resize 76 percent add drop shadow
Open wordart copy paste as new layer add gradient glow & add drop shadow
Add your name Font Fontasia One forground #ffffff background #f411c5 add drop shadow
Add your copyright info
resize & save your tag
If you like this Tut check the boxes below Love to see your results please email to me
Thankyou ♥
Written by ©Lyn(akaAngel) 27th January 2012, any similarity to any other tutorial is purely coincidental!
This result is from Vickie this is awesome ♥

This result is from Dixie its Awesome Thankyou ♥

♥ Girl Power ♥

To View Tag In Proper Size Click On The Tag
Supplies Needed
Scrapkit Emo Lost By Tootypup Here
Tube of choice im using ©Keith Garvey to purchase tubes go to PTE Here
All my tubes are a guide if the tubes i select are unavailble please use another tube of your liking thankyou
Mask WSL_Mask310 & Wordart at weescotslass Here
Font of choice or the one im using is Mon Amour Script Alt
Lets Get Started
Open new image 650x550
Drop Shadow used in this tut is 6,6,45.10.15
Open tp-paper-4 copy paste as new layer apply mask merge group
Open tp-frameFansy-1 copy paste as new layer resize 45 percent with magic wand click in frames selection modify expand by 5
Open tp-paper-12 copy paste as new layer invert delete on keyboard drag under frame keep selected
open tube copy paste as new layer delete on keyboard drag under frame blend mode hard light
Open tp-flower-1 copy paste as new layer resize 60 percent add drop shadow
canvas size 600x600
open tube copy paste as new layer add drop shadow
Open wordart copy paste as new layer add gradient glow & add drop shadow
Add your name Font Mon Amour Script Alt forground #ffffff background #000000 add drop shadow
Add your copyright info
resize & save your tag
If you like this Tut check the boxes below Love to see your results please email to me
Thankyou ♥
Written by ©Lyn(akaAngel) 27th January 2012, any similarity to any other tutorial is purely coincidental!
♥ Summer Dreams ♥

To View Tag In Proper Size Click On The Tag
Supplies Needed
Scrapkit Summer Dreams By Designed by Stina Here
Tube of choice im using © ©Elias Chatzoudis to purchase tubes go to PTE Here
All my tubes are a guide if the tubes i select are unavailble please use another tube of your liking thankyou
Mask WSL_Mask309 at weescotslass Here
Font of choice or the one im using is Do I like Stripes?
Lets Get Started
Open new image 650x550
Drop Shadow used in this tut is 10,10,45.10.15
Open DBS_Paper7 copy paste as new layer apply mask merge group
Open DBS_Frame01 copy paste as new layer resize 80 percent with magic wand click in frames selection modify expand by 5
Open DBS_Paper12 copy paste as new layer invert delete on keyboard drag under frame keep selected
open tube copy paste as new layer delete on keyboard drag under frame
Open DBS_Palm02 copy paste as new layer invert delete on keyboard drag under frame select none add drop shadow
Open DBS_Sun copy paste as new layer resize 65 percent drag under frame
Open DBS_Ribbon02 copy paste as new layer resize 65 percent add drop shadow
Open DBS_Strawberries copy paste as new layer resize 70 percent add drop shadow
Add your name Font Do I like Stripes? forground #f64f3c background #ffffff add gradient glow & add drop shadow
Add your copyright info
resize & save your tag
If you like this Tut check the boxes below Love to see your results please email to me
Thankyou ♥
Written by ©Lyn(akaAngel) 27th January 2012, any similarity to any other tutorial is purely coincidental!
♥ Have a Nice Day ♥

To View Tag In Proper Size Click On The Tag
Supplies Needed
Scrapkit Have a Nice Day By Sweet cravings Scraps this is PTU Here
Tube of choice im using © ©Elias Chatzoudis to purchase tubes go to PTE Here
All my tubes are a guide if the tubes i select are unavailble please use another tube of your liking thankyou
Mask5a By Me Here
Font of choice or the one im using is A&S Snapper Script
Lets Get Started
Open new image 650x500
Open SCS_HaveANiceDay_Paper8 copy paste as new layer apply mask merge group
Open SCS_HaveANiceDay_Glitter2 copy paste as new layer
Open SCS_HaveANiceDay_Frame8 copy paste as new layer resize 55 percent with magic wand click in frames selection modify expand by 7
Open SCS_HaveANiceDay_Paper4 copy paste as new layer invert delete on keyboard drag under frame keep selected open tube copy paste as new layer delete on keyboard drag under frame select none lower opacity 71 percent add drop shadow to frame & tube add blend mode burn to tube
Open SCS_HaveANiceDay_FlowerStem2 copy paste as new layer resize 55 percent mirror add drop shadow
Open SCS_HaveANiceDay_Grapes copy paste as new layer resize 60 percent add drop shadow
Open SCS_HaveANiceDay_FlowerDoodle copy paste as new layer mirror add drop shadow
open tube copy paste as new layer mirror add drop shadow
Open SCS_HaveANiceDay_Butterfly2 copy paste as new layer resize 20 percent image rotate 20 right mirror add drop shadow
Add your name Font A&S Snapper Script forground #cf9700 background #783630 add drop shadow
Add your copyright info
resize & save your tag
If you like this Tut check the boxes below Love to see your results please email to me
Thankyou ♥
Written by ©Lyn(akaAngel) 19th January 2012, any similarity to any other tutorial is purely coincidental!
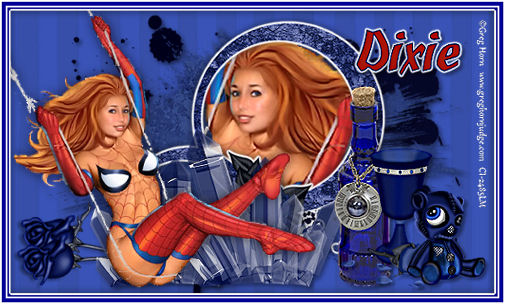
♥ Spider Girl ♥

To View Tag In Proper Size Click On The Tag
Supplies Needed
Scrapkit by Randy's Sin called Always Blue this is FTU Here
Tube of choice im using © ©Elias Chatzoudis to purchase tubes go to PTE Here
All my tubes are a guide if the tubes i select are unavailble please use another tube of your liking thankyou
Mask WSL_Mask38 at weescotslass Here
Font of choice or the one im using is KoblenzSerial-Xbold
Lets Get Started
Open new image 600x350
Open rs_8 copy paste as new layer
Open rs_splatters1 copy paste as new layer resize 75 percent add drop shadow
Open rs_12 copy paste as new layer apply mask merge group duplicate merge down
Open rs_clusterframe2 copy paste as new layer resize 45 percent click in frame with magic wand selection modify by 4
open tube copy paste as new layer delete on keyboard drag under frame select none add gradient glow & add drop shadow to frame & tube
Open rs_potion1 copy paste as new layer resize 40 percent add drop shadow
Open rs_crystals1 copy paste as new layer resize 40 percent add drop shadow
Open rs_rose2 copy paste as new layer resize 35 percent add drop shadow
open tube copy paste as new layer add drop shadow
Image add border 2 #ffffff
Image add border 2 #1c31a6
Image add border 2 #ffffff
Add your name Font KoblenzSerial-Xbold forground #ffffff background #1c31a6 add drop shadow
Add your copyright info
resize & save your tag
If you like this Tut check the boxes below Love to see your results please email to me
Thankyou ♥
Written by ©Lyn(akaAngel) 15th January 2012, any similarity to any other tutorial is purely coincidental!
This is an awesome result from Lori thankyou ♥

This is an awesome result from Dixie thankyou ♥
This is an awesome result from Kaye thankyou ♥

♥ Believing in Yourself ♥

To View Tag In Proper Size Click On The Tag
Supplies Needed
Scrapkit by Jessica called sunfidulgence this is FTU Here
Tube of choice im using © ©Elias Chatzoudis to purchase tubes go to PTE Here
All my tubes are a guide if the tubes i select are unavailble please use another tube of your liking thankyou
Mask WSL_Mask38 at weescotslass Here
Font of choice or the one im using is Inspiration
Lets Get Started
Open new image 600x550
Open SF_paper 13_JD copy paste as new layer apply mask merge group effects texture effects blinds effects Enhance
Open SF_frame2_JD copy paste as new layer resize 90 percent all layers unchecked with magic wand click in frame selection modify expand by 4
Open SF_paper 11_JD copy paste as new layer invert delete on keyboard drag under frame select none add drop shadow to frame
Open SF_glitterstar_JD copy paste as new layer add drop shadow
Open SF_toothfairyenvelope_JD copy paste as new layer add drop shadow drag under frame
Open SF_ropeheart1_JD copy paste as new layer add drop shadow
Open tube copy paste as new layer add drop shadow
Open SF_wordart1_JD copy paste as new layer resize 85 percent add gradient glow & add drop shadow
Add your name Font Inspiration forground #db5e9e background #77446d add gradient glow & add drop shadow
Add your copyright info
resize & save your tag
If you like this Tut check the boxes below Love to see your results please email to me
Thankyou ♥
Written by ©Lyn(akaAngel) 13th January 2012, any similarity to any other tutorial is purely coincidental!
This is a lovely result from Lori Thankyou ♥

♥ Sweet ♥

To View Tag In Proper Size Click On The Tag
Supplies Needed
Scrapkit by Jessica called Sugar Coated this is FTU Here
Tube of choice im using © ©Elias Chatzoudis to purchase tubes go to PTE Here
All my tubes are a guide if the tubes i select are unavailble please use another tube of your liking thankyou
Mask WSL_Mask84 at weescotslass Here
Font of choice or the one im using is LainieDaySH
Lets Get Started
Open new image 650x550
Open SC_paper3_JD copy paste as new layer apply mask merge group effects texture effects blinds With this setting

effects effects edge effects Enhance
Open SC_frames1_JD copy paste as new layer resize 85 percent all layers unchecked with magic wand click in frames selection modify expand by 4
Open SC_paper2_JD copy paste as new layer invert delete on keyboard drag under frame select none go to left frame with magic wand click in frame modify expand by 4
Open SC_flowers1_JD copy paste as new layer selection invert delete on keyboard select none add drop shadow drag under frame
Go to next frame with magic wand click in it selection modify expand by 4 Open SC_doodle2_JD copy paste as new layer selection invert delete on keyboard select none add drop shadow drag under frame
Go to next frame with magic wand click in it selection modify expand by 4 Open SC_feltheart1_JD copy paste as new layer selection invert delete on keyboard select none add drop shadow drag under frame
Go to next frame with magic wand click in it selection modify expand by 4 Open your tube copy paste as new layer selection invert delete on keyboard select none add drop shadow drag under frame duplicate your tube drag this one under main tube blend mode burn lower opacity 63 percent
Open SC_sparkleflower1_JD copy paste as new layer add drop shadow
Open SC_wordart1_JD copy paste as new layer add drop shadow
Open SC_knottedbow2_JD copy paste as new layer add drop shadow
open SC_swirls2_JD copy paste as new layer send this to bottom add drop shadow duplicate flip mirror
Open SC_doublebow1_JD copy paste as new layer resize 45 percent add drop shadow
Add your name Font LainieDaySH forground #c76b88 background #df8888 add gradient glow & add drop shadow
Add your copyright info
resize & save your tag
If you like this Tut check the boxes below Love to see your results please email to me
Thankyou ♥
Written by ©Lyn(akaAngel) 13th January 2012, any similarity to any other tutorial is purely coincidental!
This lovely result is from Priscie Thankyou ♥

Award Ty
I like to thank Florence from the bottom of my heart for my award
you can go to her site Here while your there dont forget to say hi

This amazing snag was done by Florence you can pick this & more awesome snags on her blog

Thankyou again Florence ♥
Im passing this award onto
Tiki (akabulldustndreamz) shes a very close friend of mine & always there for me you can see her blog Here ♥
♥ Girls Just Wanna Have Fun ♥

To View Tag In Proper Size Click On The Tag
Supplies Needed
Scrapkit by Becky Creations called Buzzy Bees this is FTU Here
template135 by Becky Creations this is FTU Here
Tube of choice im using © ©Elias Chatzoudis to purchase tubes go to PTE Here
All my tubes are a guide if the tubes i select are unavailble please use another tube of your liking thankyou
Font of choice or the one im using is Kristen ITC
Lets Get Started
Open Template duplicate close original delete white background layer & info layer
Open SF_paper 12_JD copy paste as new layer apply mask merge group duplicate merge down duplicate merge down
Go to background text select all float defloat open paper1 copy paste as new layer invert delete on keyboard select none add drop shadow
Go to right square trim select all float defloat Open paper2 copy paste as new layer invert delete on keyboard select none add drop shadow
Go to right black square select all float defloat Open paper7 copy paste as new layer invert delete on keyboard select none add drop shadow
Go to left square trim select all float defloat Open paper2 copy paste as new layer invert delete on keyboard select none add drop shadow
Go to left black square select all float defloat Open paper7 copy paste as new layer invert delete on keyboard select none add drop shadow
Go to left side frame fill select all float defloat Open paper10 copy paste as new layer invert delete on keyboard open tube copy paste as new layer delete on keyboard add drop shadow to tube
Go to left side frame select all float defloat Open paper9 copy paste as new layer invert delete on keyboard select none add drop shadow
Go to right side frame fill select all float defloat Open paper2 copy paste as new layer invert delete on keyboard open tube copy paste as new layer delete on keyboard add drop shadow to tube
Go to right side frame select all float defloat Open paper7 copy paste as new layer invert delete on keyboard select none add drop shadow
Go to girls trim select all float defloat Open paper8 copy paste as new layer invert delete on keyboard select none add drop shadow
Go to girls select all float defloat open paper9 copy paste as new layer invert delete on keyboard select none add drop shadow
Go to fun trim select all float defloat Open paper8 copy paste as new layer invert delete on keyboard select none add drop shadow
Go to fun select all float defloat Open paper9 copy paste as new layer invert delete on keyboard select none add drop shadow
Go to curl bg select all float defloat Open paper2 copy paste as new layer invert delete on keyboard select none
Go to curl select all float defloat Open paper1 copy paste as new layer invert delete on keyboard select none
Go to flower select all float defloat Open paper2 copy paste as new layer invert delete on keyboard select none
Go to right doodle select all float defloat Open paper10 copy paste as new layer invert delete on keyboard select none
Go to left doodle select all float defloat Open paper10 copy paste as new layer invert delete on keyboard select none
Go to just wanna have fun select all float defloat Open paper3 copy paste as new layer invert delete on keyboard select none
Open buzzybee1 copy paste as new layer arrange bring to top add drop shadow
Open stick pin copy paste as new layer rotate by 25 percent erase slightly add drop shadow
Open daisy3 copy paste as new layer add drop shadow
Add your name Font Kristen ITC forground #f4cb2f background #000000 add drop shadow
Add your copyright info
resize & save your tag
Love to see your results please email to me so i can put on my blog
Thankyou ♥
Written by ©Lyn(akaAngel) 9th January 2012, any similarity to any other tutorial is purely coincidental!
This is an awesome result from Lena Thankyou ♥

This is an awesome result from Suzy Thankyou ♥

♥ Lets Be Friends ♥

To View Tag In Proper Size Click On The Tag
Supplies Needed
Scrapkit by Jessica called sunfidulgence this is FTU Here
template134 by Becky Creations this is FTU Here
Tube of choice im using ©Suzanne Woolcott can purchase tubes
Here
Mask WSL_Mask84 at weescotslass Here
Font of choice or the one im using is Voluta Script Pro
Lets Get Started
Open Template duplicate close original delete white background layer & info layer
Open SF_paper 12_JD copy paste as new layer apply mask merge group duplicate merge down duplicate merge down
Go to star select all float defloat open SF_paper 13_JD copy paste as new layer invert delete on keyboard select none add drop shadow
Go to star select all float defloat Open SF_paper 30_JD copy paste as new layer invert delete on keyboard select none add drop shadow
Go to star select all float defloat Open SF_paper 16_JD copy paste as new layer invert delete on keyboard select none add drop shadow
Go to star select all float defloat Open SF_paper 13_JD copy paste as new layer invert delete on keyboard select none add drop shadow
Go to star select all float defloat Open SF_paper 30_JD copy paste as new layer invert delete on keyboard select none add drop shadow
Go to star select all float defloat Open SF_paper 30_JD copy paste as new layer invert delete on keyboard select none add drop shadow
Go to frame fill select all float defloat open SF_paper 11_JD copy paste as new layer invert delete on keyboard select none add drop shadow
Go to frame trim select all float defloat Open SF_paper2_JD copy paste as new layer invert delete on keyboard select none add drop shadow
Go to double frame select all float defloat Open SF_paper5_JD copy paste as new layer invert delete on keyboard select none
click in left frame selection modify by 3 Open tube copy paste as new layer delete on keyboard select none drag under frame add drop shadow
click in right frame selection modify by 3 Open tube copy paste as new layer delete on keyboard select none drag under frame add drop shadow
Go to friends select all float defloat open SF_paper 24_JD copy paste as new layer invert delete on keyboard
Go to forever select all float defloat open SF_paper 14_JD copy paste as new layer invert delete on keyboard
Go to lets be select all float defloat open SF_paper 14_JD copy paste as new layer invert delete on keyboard
Go to circle2 select all float defloat open SF_paper 14_JD copy paste as new layer invert delete on keyboard
Go to circle1 select all float defloat open SF_paper 14_JD copy paste as new layer invert delete on keyboard
Go to Copy of thin strip select all float defloat open SF_paper3_JD copy paste as new layer invert delete on keyboard select none add drop shadow
Go to dash line select all float defloat open SF_paper 14_JD copy paste as new layer invert delete on keyboard
Open SF_butterflydoodle_JD copy paste as new layer resize 75 percent add drop shadow
Open SF_doodle1_JD copy paste as new layer mirror add drop shadow put this above mask layer
Open SF_fairywand_JD copy paste as new layer arrange send to top resize 65 percent add drop shadow
Add your name Font Voluta Script Pro forground #314e56 background #b28cad add gradient glow & add drop shadow
Add your copyright info
resize & save your tag
Love to see your results please email to me so i can put on my blog
Thankyou ♥
Written by ©Lyn(akaAngel) 9th January 2012, any similarity to any other tutorial is purely coincidental!
This is awesome Result from Deb Thankyou ♥

♥ Love ♥

To View Tag In Proper Size Click On The Tag
Supplies Needed
Scrapkit by Jessica called Sugar Coated this is FTU Here
template141 by Becky Creations this is FTU Here
Tube of choice im using ©Elias Chatzoudis can purchase tubes at PTE Here
Mask WSL_Mask178 at weescotslass Here
Font of choice or the one im using is Scriptina
Lets Get Started
Open Template duplicate close original delete white background layer & info layer
Go to Stars resize 95 percent add drop shadow
Go to circle bg select all float defloat open SC_paper5_JD copy paste as new layer invert delete on keyboard select none add drop shadow
Go to circle select all float defloat open SC_paper8_JD copy paste as new layer invert delete on keyboard select none add drop shadow
Go to rectangle bg select all float defloat Open SC_paper1_JD copy paste as new layer invert delete on keyboard select none add drop shadow
Go to rectangle select all float defloat Open SC_paper11_JD copy paste as new layer invert delete on keyboard select none
Open SC_paper10_JD apply mask merge group
Go to frame fill select all float defloat open SC_paper7_JD copy paste as new layer invert delete on keyboard keep selected open tube copy paste as new layer invert delete on keyboard add drop shadow
Go to frame layer select all float defloat open SC_paper10_JD copy paste as new layer invert delete on keyboard select none add drop shadow
Go to Love select all float defloat open SC_paper8_JD copy paste as new layer invert delete on keyboard select none add drop shadow
Go to Is the only true magic add drop shadow
Go to heart shape click in it with magic wand modify expand by 3 Open SC_paper10_JD paper copy paste as new layer invert delete drag under frame Open tube copy paste as new layer delete on keyboard select none add drop shadow to tube
Add your name Font Scriptina forground #4d3d37 background #000000 add gradient glow & add drop shadow
Add your copyright info
resize & save your tag
Love to see your results please email to me so i can put in my show off blog
Thankyou ♥
Written by ©Lyn(akaAngel) 9th January 2012, any similarity to any other tutorial is purely coincidental!
This is an awesome result from Julie Thankyou ♥

This is an awesome result from Vickie Thankyou ♥

♥ Flutterby ♥

To View Tag In Proper Size Click On The Tag
Supplies Needed
Scrapkit Flutterby Valentine_TG by TootyPup This is PTU
Here
Mask WSL_Mask178 at weescotslass
Here
Font of choice or the one im using is Mr Lackboughs
Lets Get Started
Open new image 650x550
Open tp-paper4 copy paste as new layer apply mask merge group
Open tp-vine copy paste as new layer resize 45 percent add drop shadow
Open tp-tree3 copy paste as new layer resize 65 percent add drop shadow
Open tp-Picket fence1 copy paste as new layer resize 75 percent add drop shadow
Open tp-birdie1 copy paste as new layer resize 25 percent mirror duplicate resize this one at 65 percent add drop shadow
Open tp-flowerstem4 copy paste as new layer resize 20 percent duplicate mirror add drop shadow
Open tp-fairy1 copy paste as new layer resize 60 percent add drop shadow
Add your name Font Mr Lackboughs forground #8c4755 background #d34864 add gradient glow & add drop shadow
Add your copyright info
resize & save your tag
If you like this Tut check the boxes below Love to see your results please email to me
Thankyou ♥
Written by ©Lyn(akaAngel) 8th January 2012, any similarity to any other tutorial is purely coincidental!
♥ Chocolate Creme ♥

To View Tag In Proper Size Click On The Tag
Supplies Needed
Scrapkit Designed by Stina Chocolate Creme this is PTU
Here
Mask WSL_Mask84 at weescotslass
Here
Font of choice or the one im using is Miss Le Gatees
Lets Get Started
Open new image 650x550
Open DBS_Paper07 copy paste as new layer apply mask merge group
Open DBS_Frame04 copy paste as new layer resize 75 percent image rotate 90 percent click in frame with magic wand modify expand by 3
open DBS_Paper11 copy paste as new layer invert delete drag under frame select none add drop shadow to frame
Open DBS_ChocMilkshake copy paste as new layer resize 80 percent add drop shadow
Open DBS_CherryChoc copy paste as new layer resize 70 percent then resize again at 70 percent mirror add drop shadow
Open DBS_Roses01 copy paste as new layer resize 50 percent add drop shadow
Open DBS_SSLisa - Cookie - Scarlet - Pink 2 copy paste as new layer resize 76 percent
Go back to DBS_CherryChoc duplicate drag this above scarlet & erase some looks like going in hand see my tag for reference
Go back to Scarlet add drop shadow
Go back to paper under frame selection select all float defloat new raster layer Open DBS_Hearts copy paste as new layer invert delete on keyboard select none
Open DBS_Doggie copy paste as new layer resize 35 percent add drop shadow
Add your name Font Miss Le Gatees forground #4d2b22 background #dc8b88 add drop shadow
Add your copyright info
resize & save your tag
If you like this Tut check the boxes below Love to see your results please email to me
Thankyou ♥
Written by ©Lyn(akaAngel) 7th January 2012, any similarity to any other tutorial is purely coincidental!
♥ Garvalicious ♥

To View Tag In Proper Size Click On The Tag
Supplies Needed
Template By Becky BP_template147 Here
Tube of choice im using ©Keith Garvey to purchase tubes go to PTU Here
All my tubes are a guide if the tubes i select are unavailable please use another tube of your liking thankyou
Mask WSL_Mask84 at weescotslass
Here
Font of choice or the one im using is Yevida
Lets Get Started
Open Tempalete duplicate close original delete background & © image canvas size 700 x 650
Go to blackbg selection select all float defloat new raster layer flood fill #000000 select none delete original layer
Go to pinkbg selection select all float defloat new raster layer flood fill #ee76a4 select none delete original layer effects texture effects with this setting

add drop shadow
Go to left rectangel fill selection select all float defloat new raster layer flood fill #8189a2 select none delete original layer effects texture effects with this setting

select all float defloat open tube copy paste as new layer invert delete add drop shadow to tube
Go to left rectangle bg selection select all float defloat new raster layer flood fill #000000 select none delete original layer
Go to left rectangle selection select all float defloat new raster layer flood fill #000000 select none delete original layer
Go to right rectangle fill selection select all float defloat new raster layer flood fill #8189a2 select none delete original layer effects texture effects with same setting as above
select all float defloat open tube copy paste as new layer invert delete add drop shadow to tube
Go to right rectangle bg selection select all float defloat new raster layer flood fill #000000 select none delete original layer
Go to right rectangle selection select all float defloat new raster layer flood fill #000000 select none delete original layer
Go to square fill selection select all float defloat new raster layer flood fill #8189a2 select none delete original layer effects texture effects with same setting as above
select all float defloat open tube copy paste as new layer invert delete add drop shadow to tube
Go to square bg selection select all float defloat new raster layer flood fill #000000 select none delete original layer
Go to square selection select all float defloat new raster layer flood fill #000000 select none delete original layer add drop shadow
Go to circle fill selection select all float defloat new raster layer flood fill #8189a2 select none delete original layer effects texture effects with same setting as above
select all float defloat open tube copy paste as new layer invert delete add drop shadow to tube
Go to circle bg selection select all float defloat new raster layer flood fill #000000 select none delete original layer
Go to circle selection select all float defloat new raster layer flood fill #000000 select none delete original layer add drop shadow
Go to Garv bg selection select all float defloat new raster layer flood fill #8189a2 select none delete original layer
Go to Garv layer & delete
Go to lg heart selection select all float defloat new raster layer flood fill #8189a2 select none delete original layer effects texture effects with same setting as above
Go to med heart selection select all float defloat new raster layer flood fill #8189a2 select none delete original layer effects texture effects with same setting as above
Go to small heart selection select all float defloat new raster layer flood fill #8189a2 select none delete original layer effects texture effects with same setting as above
Go to lg star trim selection select all float defloat new raster layer flood fill #8189a2 select none delete original layer effects
Go to lg star selection select all float defloat new raster layer flood fill #ee76a4 select none delete original layer effects texture effects with same setting as we did on the pinkbg
Go to med star trim selection select all float defloat new raster layer flood fill #8189a2 select none delete original layer effects
Go to med star selection select all float defloat new raster layer flood fill #ee76a4 select none delete original layer effects texture effects with same setting as we did on the pinkbg
Go to sm star trim selection select all float defloat new raster layer flood fill #8189a2 select none delete original layer effects
Go to sm star selection select all float defloat new raster layer flood fill #ee76a4 select none delete original layer effects texture effects with same setting as we did on the pinkbg
New raster layer flood fill with flood fill #ee76a4 apply texture apply mask merge group duplicate mirror move down slightly merge down send to bottom
Add your name Font Yevida forground #8189a2 background #000000 add drop shadow
Add your copyright info
resize & save your tag
If you like this Tut check the boxes below Love to see your results please email to me
Thankyou ♥
Written by ©Lyn(akaAngel) 7th January 2012, any similarity to any other tutorial is purely coincidental!
This awesome result is from Vickie Thankyou ♥

♥ Fantasy Land ♥

To View Tag In Proper Size Click On The Tag
Supplies Needed
Scrapkit Fantasy Land at Crystals Scrap Creations FTU
Here
Tube of choice im using ©Elias Chatzoudis to purchase tubes go to PTU Here
All my tubes are a guide if the tubes i select are unavailable please use another tube of your liking thankyou
Mask WSL_Mask33 at weescotslass
Here
Font of choice or the one im using is Valeria Script Two
Lets Get Started
Open new image 650x550
Open paper2 copy paste as new layer apply mask merge group
Open blue sparkle copy paste as new layer move to left slightly duplicate mirror move down slightly merge down edge effects enhance
Open pink frame copy paste as new layer resize 45 percent image rotate 90 percent click in frame with magic wand modify expand by 4
open paper4 copy paste as new layer invert delete drag under frame add drop shadow to frame
Open blue flower copy paste as new layer resize 85 percent add drop shadow
Open flowers copy paste as new layer resize 75 percent add drop shadow
Open pink copy paste as new layer resize 25 percent then resize again at 65 percent add drop shadow
Open your tube copy paste as new layer add drop shadow
Add your name Font Valeria Script Two forground #bc39c1 background #eecbcb add drop shadow
Add your copyright info
resize & save your tag
If you like this Tut check the boxes below Love to see your results please email to me
Thankyou ♥
Written by ©Lyn(akaAngel) 7th January 2012, any similarity to any other tutorial is purely coincidental!
This is the lovely results from Kaye Thankyou ♥

Subscribe to:
Posts (Atom)


