♥ Welcome ♥
♥ My Blinkie ♥

Showing posts with label FTU ♥. Show all posts
Showing posts with label FTU ♥. Show all posts
♥ Autumn Breeze ♥

To View Tag In Proper Size Click On The Tag
Supplies Needed
Scrapkit FTU Fall Frenzy By Melissaz Creationz
Tube of choice im using Elias Chatzoudis this is a PTU Tube
Mask5A By Me
FTU Scallop frame by me
FTU Wordart
Font of choice or the one im using is A&S Snapper Script
Lets Get Started
Open new image 650X550
Open Frame copy paste as new layer resize 70 percent select all float defloat Open MC_FallFrenzy_P7 copy paste as new layer delete on keyboard merge down
Open MC_FallFrenzy_P1 copy paste as new layer apply mask 84 merge group resize 90 percent
Go back to frame click in frame with magic wand modify expand by 6
Open MC_FallFrenzy_P5 copy paste as new layer invert delete on keyboard drag paper under frame
Open MC_FallFrenzy_E4 copy paste as new layer add drop shadow
Open MC_FallFrenzy_E40 copy paste as new layer resize 70 percent add drop shadow
Open tube copy paste as new layer duplicate leave this for a minute
Open MC_FallFrenzy_E8 copy paste as new layer resize 60 percent add drop shadow
Open MC_FallFrenzy_E12 copy paste as new layer resize 70 percent add drop shadow drag under frame
Open MC_FallFrenzy_E26 with freehand tool go around the smallest butterfly copy paste as new layer add drop shadow duplicate 2 times
Go back to tube on the duplicate one arrange bring to top erase the leg Go back to bottom tube add drop shadow
Open wordart with selection tool go around wordart copy paste as new layer add gradient glow #eac270
Add your name Font A&S Snapper Script forground #eac270 background #29251f add drop shadow
Add your copyright info
resize & save your tag
If you like this Tut check the boxes below Love to see your results please email to me
Thankyou ♥
Written by ©Lyn(akaAngel) 22nd May 2014, any similarity to any other tutorial is purely coincidental!
This is an awesome tag by Dixie Thankyou ♥

This is an awesome tag by Dixie Thankyou ♥

♥ Spring ♥

To View Tag In Proper Size Click On The Tag
Supplies Needed
Scrapkit FTU spring time By clarez creationz
Here
Tube of choice im using Pinuptoons this is a PTU Tube
Here
Here
Mask WSL_Mask84 at weescotslass
FTU Wordart by Me Spring
Font of choice or the one im using is Dr Carbfred
Lets Get Started
Open new image 650X550
Open PAPER05 copy paste as new layer apply mask 84 merge group
Open FRAME02 copy paste as new layer resize 75 percent click in frame with magic wand modify expand by 6
Open PAPER05 copy paste as new layer invert delete on keyboard drag paper under frame keep selected
Open ST49 copy paste each one delete on keyboard select none drag under frame & the fence
with ST4 still in memory paste again resize 90 percent arrange send to top
Open ST37 copy paste as new layer resize 50 percent add drop shadow
Open ST14 copy paste as new layer mirror add drop shadow
Open ST01 copy paste as new layer resize 30 percent add drop shadow duplicate 2 times arrange on tag
Open ST18 copy paste as new layer resize 50 percent add drop shadow
Open tube copy paste as new layer add drop shadow
Open ST11 copy paste as new layer resize 40 percent add drop shadow duplicate mirror
Open WordArt copy paste as new layer resize 90 percent selection select all float defloat Open PAPER16 copy paste as new layer invert delete on keyboard add gradient glow & drop shadow sharpen
Add your name Font Dr Carbfred forground #e65f51 background #965680 add drop shadow
Add your copyright info
resize & save your tag
If you like this Tut check the boxes below Love to see your results please email to me
Thankyou ♥
Written by ©Lyn(akaAngel) 22nd May 2014, any similarity to any other tutorial is purely coincidental!
This is an Awesome tag by Dixie Thankyou ♥

This is an Awesome tag by Dixie Thankyou ♥
♥ Citrus Heaven ♥

To View Tag In Proper Size Click On The Tag
Supplies Needed
Scrapkit FTU Citrus Heaven By Clarez Creationz
Tube of choice im using Keith Garvey This is a PTU Tube
Mask WSL_Mask84 at weescotslass
Font of choice or the one im using is Valeria Script One
Lets Get Started
Open new image 650X550
Open PAPER04 copy paste as new layer apply mask 84 merge group
Open FRAME01 copy paste as new layer resize 75 percent click in frames with magic wand modify expand by 5
Open PAPER19 copy paste as new layer invert delete on keyboard drag paper under frame keep selected
Open CH08 copy paste each one delete on keyboard select none drag under frame
Open CH12 copy paste as new layer add drop shadow
Open CH24 copy paste as new layer resize 30 percent duplicate image rotate 20 left add drop shadow to both
Open CH03 copy paste as new layer resize 50 percent add drop shadow
Open tube copy paste as new layer add drop shadow
Add your name Font Valeria Script One forground #e7cc40 background #fda52e add drop shadow
Add your copyright info
resize & save your tag
If you like this Tut check the boxes below Love to see your results please email to me
Thankyou ♥
Written by ©Lyn(akaAngel) 21st May 2014, any similarity to any other tutorial is purely coincidental!
♥ Raindrops & Rainbows ♥

To View Tag In Proper Size Click On The Tag
Supplies Needed
Scrapkit FTU Raindrops & Rainbows by Sinfully Creative Scraps
Mask WSL_Mask178 at weescotslass
Font of choice or the ones im using are Fontdinerdotcom Huggable,BickhamScriptFancy2
Lets Get Started
Open new image 650X500
Open RAR_Paper_5 copy paste as new layer apply mask merge group
Open RAR_Frame_3 copy paste as new layer click in frame with magic wand modify expand by 7
Open RAR_Paper_3 copy paste as new layer invert delete on keyboard drag paper under frame select none add drop shadow to frame
Open RAR_Element_15 copy paste as new layer duplicate merge down adjust sharpen then again with sharpen more
Open RAR_Element_22 copy paste as new layer resize 70 percent add drop shadow
Add the words Raindrops & Rainbows Font Fontdinerdotcom Huggable forground #7ba9ad background #e8b828 add gradient glow & add drop shadow
Open RAR_Element_1 copy paste as new layer resize 40 percent add drop shadow
Open RAR_Element_16 copy paste as new layer add drop shadow
Open RAR_Element_12 copy paste as new layer resize 30 percent add drop shadow
Open RAR_Element_8 copy paste as new layer add drop shadow drag this under frame
Open RAR_Element_24 copy paste as new layer resize 80 percent duplicate add drop shadow
Open RAR_Element_26 copy paste as new layer resize 80 percent duplicate add drop shadow
Open RAR_Element_7 copy paste as new layer resize 80 percent add drop shadow
Add your name Font BickhamScriptFancy2 forground #7ba9ad background #e8b828 add gradient glow & add drop shadow
Add your copyright info
resize & save your tag
If you like this Tut check the boxes below Love to see your results please email to me
Thankyou ♥
Written by ©Lyn(akaAngel) 19th May 2014, any similarity to any other tutorial is purely coincidental!
♥ Coffee ♥

To View Tag In Proper Size Click On The Tag
Supplies Needed
ScrapKit FTU Java By My Nerdy Notebook
Tube of choice im using Pinuptoons this is a PTU Tube
Mask WSL_Mask84 at weescotslass
Font of choice or the one im using is Carpenter Script
Lets Get Started
Open new image 650X500
Open NN_paper7 copy paste as new layer apply mask merge group
Open NN_caramel copy paste as new layer add drop shadow
Open NN_frame2 copy paste as new layer resize 90 percent click in frame with magic wand modify expand by 10
Open NN_paper6 copy paste as new layer invert delete on keyboard drag paper under frame keep selected Open NN_Sign copy paste as new layer delete select none add drop shadow to frame
Open NN_cookie copy paste as new layer resize 55 percent image rotate 20 left add drop shadow duplicate resize this one 60 percent
Open NN_Sparkles copy paste as new layer arrange send to top
Open NN_burlap copy paste as new layer resize 60 percent add drop shadow
Open NN_Beans copy paste as new layer add drop shadow
Open NN_Cinnamon copy paste as new layer resize 80 percent add drop shadow
Open NN_stringedheart copy paste as new layer erase bit of the loop so looks like going in through frame add drop shadow
Open tube copy paste as new layer add drop shadow
Open NN_Wordart copy paste as new layer add gradient glow & add drop shadow
Add your name Font Carpenter Script forground #ad9157 background #823927 add gradient glow & add drop shadow
Add your copyright info
resize & save your tag
If you like this Tut check the boxes below Love to see your results please email to me
Thankyou ♥
Written by ©Lyn(akaAngel) 18th May 2014, any similarity to any other tutorial is purely coincidental!
This is an Awesome Tag by Dixie Thankyou ♥

This is an Awesome Tag by Dixie Thankyou ♥
♥ A Little Magic ♥

To View Tag In Proper Size Click On The Tag
Supplies Needed
Scrapkit FTU By The Moonlight
Tube of choice im using
Robin McQuay This is a PTU Tube
Robin McQuay This is a PTU Tube
I brought my tube at Up Yout Art i now see she has her own store at digital chaos you can find it
Mask WSL_Mask38 at weescotslass
Font of choice or the one im using is Before the Rain
Lets Get Started
Open new image 650X500
Open DCD_BTM_Paper06 copy paste as new layer apply mask merge group duplicate merge down
Open DCD_BTM_Frame02 copy paste as new layer resize 90 percent click in frame with magic wand modify expand by 7
Open DCD_BTM_Paper06 copy paste as new layer invert delete on keyboard drag paper under frame keep selected Open DCD_BTM_Fairy Dust copy paste as new layer delete select none add drop shadow to frame
Open DCD_BTM_Moonlight copy paste as new layer sharpen
Open DCD_BTM_Butterfly copy paste as new layer resize 55 percent move to right slightly add drop shadow
Open DCD_BTM_Flower02 copy paste as new layer resize 85 percent drag under frame add drop shadow
Open DCD_BTM_Magic Mushrooms copy paste as new layer resize 30 percent add drop shadow
Open DCD_BTM_Unicorn copy paste as new layer resize 40 percent add drop shadow
Go back to frame with selection tool rectangle go around frame Open your tube copy paste as new layer invert delete select none add drop shadow to tube
Open DCD_BTM_Sparkles copy paste as new layer duplicate
Add your name & the words A Little Magic Font Before the Rain forground #666a7a background #000000 add drop shadow
Add your copyright info
resize & save your tag
If you like this Tut check the boxes below Love to see your results please email to me
Thankyou ♥
Written by ©Lyn(akaAngel) 18th May 2014, any similarity to any other tutorial is purely coincidental!
This Awesome tag is by Dixie Thankyou ♥

This Awesome tag is by Dixie Thankyou ♥
♥ Sweet Treats ♥

To View Tag In Proper Size Click On The Tag
Supplies Needed
FTU W4E Popsicle Parade Blog Train
Tube of choice im using Elias Chatzoudis this is a PTU Tube
Mask WSL_Mask84 at weescotslass
Font of choice or the one im using is Aquarelle
Lets Get Started
Open new image 650X500
Open DCD_PopPa_Paper10 copy paste as new layer apply mask merge group duplicate merge down
Open DCD_PopPa_Frame01 copy paste as new layer resize 70 percent click in frame with magic wand modify expand by 7
Open DCD_PopPa_Paper11 copy paste as new layer invert delete on keyboard drag paper under frame keep selected Open DCD_PopPa_Flower02 copy paste as new layer delete select none add drop shadow to frame & Flower
Open DCD_PopPa_Flags copy paste as new layer resize 60 percent add drop shadow
Open DCD_PopPa_Bottle Cap copy paste as new layer resize 80 percent add drop shadow
Open DCD_PopPa_Rocket Pop copy paste as new layer resize 40 percent image rotate 20 percent left add drop shadow
Open DCD_PopPa_Ice Cream Bar02 copy paste as new layer resize 30 percent add drop shadow
Open DCD_PopPa_Popsicle02 copy paste as new layer resize 30 percent add drop shadow
merge all ice creams together image rotate right 20 percent
Open DCD_PopPa_Sparkles copy paste as new layer
Open tube copy paste as new layer
Open DCD_PopPa_Ice Cream Cart copy paste as new layer resize 70 percent resize again at 80 percent add drop shadow
Open DCD_PopPa_Soft Serve Cone copy paste as new layer resize 30 percent add drop shadow
Add your name & the word Be My Font Aquarelle forground #5c549c background #e06694 add drop shadow
Add your copyright info
resize & save your tag
If you like this Tut check the boxes below Love to see your results please email to me
Thankyou ♥
Written by ©Lyn(akaAngel) 17th May 2014, any similarity to any other tutorial is purely coincidental!
This is an awesome tag by Dixie Thankyou ♥

This is an awesome tag by Dixie Thankyou ♥
♥ Escape to the City ♥

To View Tag In Proper Size Click On The Tag
Supplies Needed
Scrapkit FTU cool Retro By Scottish Butterfly
Template 66 by Becky this is FTU
Tube of choice im using Elias Chatzoudis this is a PTU Tube
Font of choice or the one im using is Filigree
Lets Get Started
Open new image 650X550
Open template duplicate close original delete Tou & white back ground
Go to layer paintbrush select all float defloat Open paper8 copy paste as new layer invert delete on keyboard select none
Go to layer frame background2 select all float defloat Open paper7 copy paste as new layer invert delete on keyboard select none
Go to layer frame background select all float defloat Open Paper5 copy paste as new layer invert delete on keyboard select none
Go to layer frame select all float defloat Open Paper9 copy paste as new layer invert delete on keyboard keep selected open cityscape copy paste as new layer resize 70 percent invert delete select none
Go to layer large flowers select all float defloat Open Paper4 copy paste as new layer invert delete on keyboard select none add drop shadow
Go to layer medium flowers select all float defloat Open Paper3 copy paste as new layer invert delete on keyboard select none add drop shadow
Go to layer small flowers select all float defloat Open Paper1 copy paste as new layer invert delete on keyboard select none add drop shadow
Open Ipod copy paste as new layer resize 70 percent add drop shadow
Open Flower 4 copy paste as new layer resize 60 percent add drop shadow
Open Lipstick copy paste as new layer resize 70 percent add drop shadow
Open Lipgloss copy paste as new layer resize 70 percent add drop shadow
Open NailPolish copy paste as new layer rsize 70 percent add drop shadow
Open tube copy paste as new layer add drop shadow
Add your name Font Filigree forground #000000 background #000000 add gradient glow & add drop shadow
Add your copyright info
resize & save your tag
If you like this Tut check the boxes below Love to see your results please email to me
Thankyou ♥
Written by ©Lyn(akaAngel) 17th May 2014, any similarity to any other tutorial is purely coincidental!
♥ Spring A Ling ♥

To View Tag In Proper Size Click On The Tag
Supplies Needed
FTU Scrapkit Spring A Ling By Vestas Visions
Tube of choice im using Elias Chatzoudis this is a PTU Tube
Mask WSL_Mask124 at weescotslass
Font of choice or the one im using is Aquarelle
Lets Get Started
Open new image 650X500
Open Paper 6 copy paste as new layer apply mask merge group duplicate 3 times this will make it little darker sharpen
Open Frame 5 copy paste as new layer resize 75 percent click in frame with magic wand modify expand by 8
Open Paper 12 copy paste as new layer invert delete on keyboard drag paper under frame select none add drop shadow to frame
Open Ele 25 copy paste as new layer resize 75 percent mirror add drop shadow
Open Ele 43 copy paste as new layer resize 70 percent add drop shadow
Open Ele 24 copy paste as new layer resize 55 percent add drop shadow
Open word art circle copy paste as new layer drag under frame add drop shadow
Open Ele 43 copy paste as new layer resize 55 percent bring this to top add drop shadow
Open Ele 43 with selection tool go around the smallest flowers this is top right right click copy paste as new layer add drop shadow
Open Ele 43 copy paste as new layer resize 70 percent add drop shadow
Open Ele 72 copy paste as new layer resize 30 percent add drop shadow
Open tube copy paste as new layer add drop shadow
Add your name Font Aquarelle forground #287b0a background #e29723 add drop shadow
Add your copyright info
resize & save your tag
If you like this Tut check the boxes below Love to see your results please email to me
Thankyou ♥
Written by ©Lyn(akaAngel) 23rd April 2014, any similarity to any other tutorial is purely coincidental!
♥ Moonlight Dreams ♥

To View Tag In Proper Size Click On The Tag
Supplies Needed
FTU Scrapkit Mid Summer Dreams By Vestas Visions
Tube of choice im using Elias Chatzoudis this is a PTU Tube
Mask WSL_Mask 84 at weescotslass
Font of choice or the one im using is Showcard Gothic,Carlotta
Lets Get Started
Open new image 600X550
Open Paper 7 copy paste as new layer apply mask merge group
Open Frame 1 copy paste as new layer resize 70 percent click in frame with magic wand modify expand by 8
Open Paper 5 copy paste as new layer invert delete on keyboard drag paper under frame select none add drop shadow to frame
Open Ele 18 copy paste as new layer resize 800 percent
Open Ele 53 copy paste as new layer resize 70 percent add drop shadow
Open Ele 35 copy paste as new layer resize 60 percent add drop shadow
Open Ele 39 copy paste as new layer resize 50 percent drag under frame bring slightly down erase add drop shadow
Open Ele 6 copy paste as new layer resize 50 percent bring this to top add drop shadow
Open Ele 42 copy paste as new layer drag this under fence resize 80 percent add drop shadow
Open Ele 34 copy paste as new layer resize 70 percent add drop shadow with Font Ambitsek size 8 forground #7f6797 background #ffffff type in the words Lovers Lane,Kissin Corner,moonlight Meadow.Heart Break Hill.
Add The Words Moonlight Dreams Font Showcard Gothic forground #ffffff background #7f6797 add drop shadow
Add your name Font Carlotta forground #ffffff background #7f6797 add drop shadow
Open tube copy paste as new layer add drop shadow
Add your copyright info
resize & save your tag
If you like this Tut check the boxes below Love to see your results please email to me
Thankyou ♥
Written by ©Lyn(akaAngel) 23rd April 2014, any similarity to any other tutorial is purely coincidental!
♥ Love ♥
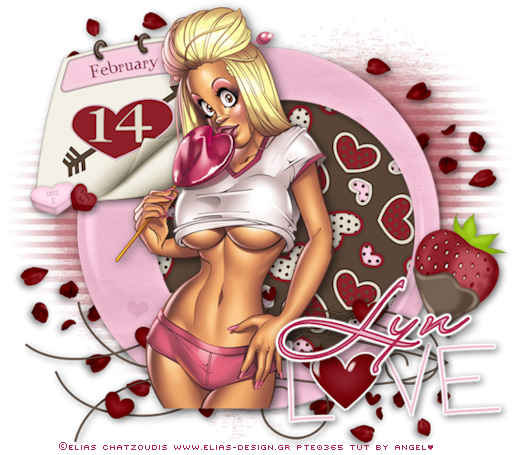
To View Tag In Proper Size Click On The Tag
Supplies Needed
FTU Scrapkit Love Matters By sinfully Creative Dcraps
Tube of choice im using Elias Chatzoudis this is a PTU Tube
Mask WSL_Mask10 at weescotslass
Font of choice or the one im using is LainieDaySH
Lets Get Started
Open new image 750X700
Open LM_Paper_5 copy paste as new layer apply mask merge group duplicate merge down
Open LM_Element_28 copy paste as new layer duplicate image flip mirror add drop shadow to both
Open LM_Frame_4 copy paste as new layer click in frame with magic wand modify expand by 4
Open LM_Paper_1 copy paste as new layer invert delete on keyboard drag paper under frame select none add drop shadow to frame
Open LM_Element_18 copy paste as new layer resize 55 percent mirror add drop shadow
Open LM_Element_8 copy paste as new layer add drop shadow
Open LM_Element_15 copy paste as new layer resize 55 percent add gradient glow & add drop shadow
Open LM_Element_25 copy paste as new layer resize 45 percent add drop shadow
Open tube copy paste as new layer add drop shadow
Add your name Font LainieDaySH forground #af274a background #ecbacf add gradient glow & add drop shadow
Add your copyright info
resize & save your tag
If you like this Tut check the boxes below Love to see your results please email to me
Thankyou ♥
Written by ©Lyn(akaAngel) 1st Feburary 2014, any similarity to any other tutorial is purely coincidental!
this awesome tag is from Dixie Thankyou ♥

this awesome tag is from Dixie Thankyou ♥
♥ Merry Christmas ♥

To View Tag In Proper Size Click On The Tag
Supplies Needed
This is my last christmas tut for 2013 i want to wish everyone a
Very Merry Christmas ♥
Very Merry Christmas ♥
FTU Scrapkit Jingle Bells By dzines by melz
Tube of choice im using Keith Garvey This is a PTU Tube
Mask WSL_Mask84 at weescotslass
Font of choice or the one im using is Aquarelle
Lets Get Started
Open new image 750x700
Open Paper2 copy paste as new layer apply mask merge group
Open candy frame1 copy paste as new layer with magic wand click in frame selection modify expand by 4
Open Paper8 copy paste as new layer selection invert delete on keyboard keep selected
Open tube copy paste as new layer delete on keyboard lower opacity 36
Copy main tube as new layer add drop shadow
Open Sparkle2 copy paste as new layer drag this under frame
Open candle decor 4 copy paste as new layer resize 80 percent add drop shadow
Open tree copy paste as new layer resize add drop shadow
Open gift copy paste as new layer resize 45 percent duplicate resize this one at 65 percent add drop shadow
Open teddy copy paste as new layer resize 45 percent add drop shadow
Open ornament2 copy paste as new layer resize 65 percent add drop shadow
Open Banner copy paste as new layer resize 65 percent adjust sharpen add drop shadow
Add your name Font Aquarelle forground #000000 background #ed142d add gradient glow & add drop shadow
Add your copyright info
resize & save your tag
If you like this Tut check the boxes below Love to see your results please email to me
Thankyou ♥
Written by ©Lyn(akaAngel) 21st December 2013, any similarity to any other tutorial is purely coincidental!
♥ Tropical Tequila ♥

To View Tag In Proper Size Click On The Tag
Supplies Needed
FTU Scrapkit Tequila By kittzkreationz
Tube of choice im using Jamie Kidd this is a PTU Tube
Font of choice or the one im using is Snickles
Lets Get Started
Open new image 750x700
Open T-34 copy paste as new layer resize 80 percent duplicate dlip mirror merge down duplicate
Open T-11 copy paste as new layer resize 85 percent with magic wand click in frame selection modify expand by 11
Open T-P3 copy paste as new layer selection invert delete on keyboard select none drag paper under frame give frame a drop shadow
Open T-54 copy paste as new layer add drop shadow
Open T-40 copy paste as new layer add drop shadow
Open T46A copy paste as new layer add drop shadow
Open T46 copy paste as new layer resize 65 percent add drop shadow
Open T-45 copy paste as new layer add drop shadow
Open T-44 copy paste as new layer resize 55 percent image rotate 20 percent right add drop shadow
Open tube copy paste as new layer mirror drag this under frame duplicate send this one to top erase slightly go back to bottom tube add drop shadow
Add your name & the words Tropical Tequila Font Snickles forground #fffd47 background #ff6640 add drop shadow
Add your copyright info
resize & save your tag
If you like this Tut check the boxes below Love to see your results please email to me
Thankyou ♥
Written by ©Lyn(akaAngel) 22nd December 2013, any similarity to any other tutorial is purely coincidental!
♥ Merry Christmas ♥

To View Tag In Proper Size Click On The Tag
Supplies Needed
FTU Scrapkit called Frosty Snowman
Template 31 by scrapznstuff
Tube of choice im using Keith Garvey This is a PTU Tube
Font of choice or the one im using is CapriceBQ
Lets Get Started
Open template duplicate close original on the duplicate resize 600 x 600 pixels delete Tou layer
Go to foto left selection select all float defloat Open DmsMDFrostyTheSnowmanPaper07 copy paste as new layer invert delete on keyboard keep selected Open Tube copy paste as new layer delete on keyboard select none add drop shadow to tube
Go to frame left's Drop Shadow add drop shadow
Go to frame left selection select all float defloat Open DmsMDFrostyTheSnowmanPaper05 copy paste as new layer invert delete on keyboard select none add drop shadow
Go to foto middle selection select all float defloat Open DmsMDFrostyTheSnowmanPaper07 copy paste as new layer invert delete on keyboard keep selected Open Tube copy paste as new layer delete on keyboard select none add drop shadow to tube
Go to frame middle Drop Shadow add drop shadow
Go to frame middle selection select all float defloat Open DmsMDFrostyTheSnowmanPaper05 copy paste as new layer invert delete on keyboard select none add drop shadow
Go to foto right selection select all float defloat Open DmsMDFrostyTheSnowmanPaper07 copy paste as new layer invert delete on keyboard keep selected Open Tube copy paste as new layer delete on keyboard select none add drop shadow to tube
Go to frame middle Drop Shadow add drop shadow
Go to frame middle selection select all float defloat Open DmsMDFrostyTheSnowmanPaper05 copy paste as new layer invert delete on keyboard select none add drop shadow
Go to cloth line's Drop Shadow add drop shadow
Go to cloth line selection select all float defloat Open DmsMDFrostyTheSnowmanPaper08 copy paste as new layer invert delete on keyboard select none add drop shadow
Go to cloth-pin right's Drop Shadow add drop shadow
Go to cloth-pin right selection select all float defloat Open DmsMDFrostyTheSnowmanPaper01 copy paste as new layer invert delete on keyboard select none add drop shadow
Go to cloth-pin middle's Drop Shadow add drop shadow
Go to cloth-pin right selection select all float defloat Open DmsMDFrostyTheSnowmanPaper01 copy paste as new layer invert delete on keyboard select none add drop shadow
Go to cloth-pin left's Drop Shadow add drop shadow
Go to cloth-pin left selection select all float defloat Open DmsMDFrostyTheSnowmanPaper01 copy paste as new layer invert delete on keyboard select none add drop shadow
Go to santa´s slay selection select all float defloat Open DmsMDFrostyTheSnowmanPaper02 copy paste as new layer invert delete on keyboard select none add drop shadow
Go to landscape's Drop Shadow add drop shadow
Go to Trees add drop shadow
Go to Christmas's Drop Shadow add drop shadow
Go to Christmas selection select all float defloat Open DmsMDFrostyTheSnowmanPaper04 copy paste as new layer invert delete on keyboard select none add drop shadow
Go to merry's Drop Shadow add drop shadow
Go to Merry selection select all float defloat Open DmsMDFrostyTheSnowmanPaper04 copy paste as new layer invert delete on keyboard select none add drop shadow
Open DmsMDFrostyTheSnowmanSnowman02 copy paste as new layer drag this under the word art resize 65 percent add drop shadow
Open DmsMDFrostyTheSnowmanSnowman01 copy paste as new layer drag this under the word art resize 40 percent add drop shadow
resize all layers 80 percent merge all visible
apply filters unlimited with this setting

Add your name Font CapriceBQ forground #cbc6c6 background #cbc6c6 add gradient glow & add drop shadow
Add your copyright info
resize & save your tag
If you like this Tut check the boxes below Love to see your results please email to me
Thankyou ♥
Written by ©Lyn(akaAngel) 14th December 2013, any similarity to any other tutorial is purely coincidental!
this is awesome result from Dixie Thankyou ♥

this is awesome result from Dixie Thankyou ♥

♥ Cowgirls Ride ♥

To View Tag In Proper Size Click On The Tag
Supplies Needed
FTU Scrapkit By Sweet Cravings Scrap called Happy Trails
Template_01 By simply4u this is FTU
Tube of choice im using Elias Chatzoudis this is a PTU Tube
Mask WSL_Mask10 at weescotslass
Filters Unlimited
Font of choice or the one im using is WesternSlant
Lets Get Started
Open Template duplicate close Original template Delete Tou Layer
Go to background layer new raster layer select all open SCS_JRBT_HappyTrails_Paper4 copy paste into selection select none apply mask merge group duplicate merge down
Go to Large Circle select all float defloat Open SCS_JRBT_HappyTrails_Paper2 copy paste as new layer invert delete on keyboard select none add drop shadow
Go to Small Circle select all float defloat Open SCS_JRBT_HappyTrails_Paper8 copy paste as new layer invert delete on keyboard
keep selected Open SCS_JRBT_HappyTrails_DesertOverlook delete on keyboard select none add drop shadow
Go to Rectangle select all float defloat Open SCS_JRBT_HappyTrails_Paper9 copy paste as new layer invert delete on keyboard select none add gradient glow #ffffff add drop shadow
Go to Stars select all float defloat Open SCS_JRBT_HappyTrails_Paper5 copy paste as new layer invert delete on keyboard select none add drop shadow
Go to Wordart select all float defloat Open SCS_JRBT_HappyTrails_Paper2 copy paste as new layer invert delete on keyboard select none add gradient glow #ffffff add drop shadow
Open SCS_JRBT_HappyTrails_DriedGrass copy paste as new layer drag this under the stars layer
Open SCS_JRBT_HappyTrails_Fence copy paste as new layer resize 75 percent drag this under rectangle layer add drop shadow
Open SCS_JRBT_HappyTrails_Horseshoe1 copy paste as new layer resize 35 percent add drop shadow
Open tube copy paste as new layer move this above dotted circle layer add drop shadow
Go to white background layer add new raster layer select all Open SCS_JRBT_HappyTrails_Paper2 copy paste into selection select none effects filter unlimited
with this setting

Add your name Font WesternSlant forground #4f4e6d background #daa370 add drop shadow
Add your copyright info
delete white background layer & resize & save your tag
If you like this Tut check the boxes below Love to see your results please email to me
Thankyou ♥
Written by ©Lyn(akaAngel) 14th December 2013, any similarity to any other tutorial is purely coincidental!
♥ Looking Through ♥
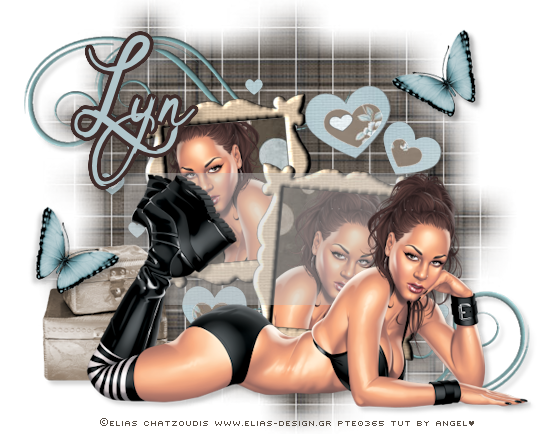
FTU Scrapkit Scrap #40 By Becky
Template 05 By Becky
Mask WSL_Mask84 at weescotslass
Font of choice or the one im using is Filigree
Lets Get Started
Open template duplicate close the original
Delete layers white background & credits
on the template canvas size 650x650
Go to left frame fill selections select all float defloat open paper4 copy paste as new layer invert delete on keyboard keep selected
Open Tube copy paste as new layer delete on keyboard select none add drop shadow to frame
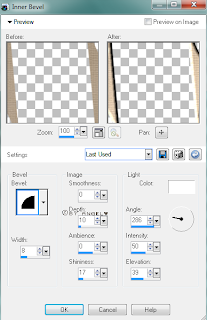
Go to left frame selections select all float defloat open paper7 invert select none add innerbevel with this setting

Go to right frame fill selections select all float defloat open paper4 copy paste as new layer invert delete on keyboard keep selected
Open Tube copy paste as new layer delete on keyboard select none add drop shadow to frame
Go to right frame selections select all float defloat open paper7 invert select none add innerbevel with same setting as before
Go to gray heart1 selections select all float defloat open paper6 copy paste as new layer invert delete on keyboard select none add drop shadow
Go to gray heart2 selections select all float defloat open paper6 copy paste as new layer invert delete on keyboard select none add drop shadow
Go to gray heart3 selections select all float defloat open paper6 copy paste as new layer invert delete on keyboard select none add drop shadow
Go to sm. gray heart1 selections select all float defloat open paper6 copy paste as new layer invert delete on keyboard select none add drop shadow
Go to sm. gray heart2 selections select all float defloat open paper6 copy paste as new layer invert delete on keyboard select none add drop shadow
Go to sm. gray heart1 selections select all float defloat open paper6 copy paste as new layer invert delete on keyboard select none add drop shadow
Go to tiny gray heart1 selections select all float defloat open paper6 copy paste as new layer invert delete on keyboard select none add drop shadow
Go to tiny gray heart2 selections select all float defloat open paper6 copy paste as new layer invert delete on keyboard select none add drop shadow
Go to tiny gray heart3 selections select all float defloat open paper6 copy paste as new layer invert delete on keyboard select none add drop shadow
Go to lg. white heart1 selections select all float defloat open paper1 copy paste as new layer invert delete on keyboard select none add drop shadow
Go to lg. white heart2 selections select all float defloat open paper1 copy paste as new layer invert delete on keyboard select none add drop shadow
Go to lg. white heart3 selections select all float defloat open paper1 copy paste as new layer invert delete on keyboard select none add drop shadow
Go to tiny white heart1 selections select all float defloat open paper5 copy paste as new layer invert delete on keyboard select none add drop shadow
Go to tiny white heart2 selections select all float defloat open paper5 copy paste as new layer invert delete on keyboard select none add drop shadow
Go to black heart selections select all float defloat open paper5 copy paste as new layer invert delete on keyboard select none add drop shadow
Open jewlery cases resize 80 percent add drop shadow
open butterfly with pick tool hold shift key down move the butterfly down a bit add drop shadow duplicate mirror
new raster layer select all Open paper3 copy paste into selection select none apply mask merge group arrange send to bottom
Open curslyswirl1 copy paste as new layer image rotate 90 percent drag to above mask layer move over duplicate mirror flip merge down on top one add drop shadow
Add your name Font Filigree forground #b1c6cb background #574e45 add gradient glow #3f2c2a add drop shadow
Add your copyright info
resize & save your tag
If you like this Tut check the boxes below Love to see your results please email to me
Thankyou ♥
Written by ©Lyn(akaAngel) 12th December 2013, any similarity to any other tutorial is purely coincidental!
♥ Just Beachy ♥

To View Tag In Proper Size Click On The Tag
Supplies Needed
FTU Scrapkit Just Beachy By Pink's Poetic Scraps
FTU Template 32 By Becky
Mask WSL_Mask84 at weescotslass
Font of choice or the one im using is OldGlory
Lets Get Started
Open all papers from the kit duplicate each one & resize 650X600 pixels
Open template duplicate close the original
Delete layers white background & credits
on the template canvas size 650x650
Go to bottom rectangle selections select all float defloat bring up paper JB_P5 copy paste as new layer invert delete on keyboard select none add gradient glow add drop shadow
Go to middle rectangle selections select all float defloat bring up paper JB_P4 copy paste as new layer invert delete on keyboard select none add gradient glow add drop shadow
Go to middle rectangle selections select all float defloat bring up paper JB_P7 copy paste as new layer invert delete on keyboard select none add gradient glow add drop shadow
Go to frame bg selections select all float defloat bring up paper JB_P10 copy paste as new layer invert delete on keyboard select none add gradient glow add drop shadow
Go to frame fill selections select all float defloat bring up paper JB_P8 copy paste as new layer invert delete on keyboard select none add gradient glow add drop shadow
Go to frames selections select all float defloat bring up paper JB_P9 copy paste as new layer invert delete on keyboard select none add gradient glow add drop shadow
Go to bottom blocks selections select all float defloat bring up paper JB_P3 copy paste as new layer invert delete on keyboard select none add gradient glow add drop shadow
Go to top blocks selections select all float defloat bring up paper JB_P6 copy paste as new layer invert delete on keyboard select none
Open PPS_JB6 resize 30 percent add drop shadow
Open PPS_JB18 copy paste as new layer resize 25 percent then resize again at 80 percent add drop shadow
Open PPS_JB1 copy paste as new layer resize 20 percent then resize 50 percent add drop shadow
Open PPS_JB19 copy paste as new layer resize 30 percent then resize 65 percent add drop shadow
Open PPS_JB4 copy paste as new layer resize 20 percent then resize 40 percent add drop shadow
Open PPS_JB7 copy paste as new layer resize 30 percent then again 45 percent add drop shadow
Open PPS_JB7 copy paste as new layer resize 20 percent then resize 40 percent add drop shadow
Open PPS_JB9 copy paste as new layer mirror resize 20 percent then resize 40 percent add drop shadow
Open PPS_JB14 copy paste as new layer resize 20 percent then resize 40 percent add drop shadow
new raster layer select all Open JB_P1 copy paste into selection select none apply mask merge group arrange send to bottom
Add your name Font OldGlory forground #8bd5d8 background #ffffff add drop shadow
Add your copyright info
resize & save your tag
If you like this Tut check the boxes below Love to see your results please email to me
Thankyou ♥
Written by ©Lyn(akaAngel) 12th December 2013, any similarity to any other tutorial is purely coincidental!
♥ Dancing to the Beat ♥

To View Tag In Proper Size Click On The Tag
Supplies Needed
FTU Scrapkit A Girls Winter By Sweet Cravings Scrap
Music Word Art
Mask WSL_Mask38 at weescotslass
Font of choice or the one im using is Before the Rain
Lets Get Started
Open new image 650X550
Open SCS_SYHO_AGirlsWinter_Paper6 copy paste as new layer apply mask duplicate
Open SCS_SYHO_AGirlsWinter_Frame2 copy paste as new layer resize 70 percent click in middle of frame with magic wand modify expand by 2
Open SCS_SYHO_AGirlsWinter_Paper6 copy paste as new layer selection invert delete on keyboard seletion none drag paper under frame add drop shadow to frame
Open SCS_SYHO_AGirlsWinter_Glitter copy paste as new layer resize 75 percent add drop shadow
Open SCS_SYHO_AGirlsWinter_Stars copy paste as new layer resize 65 percent add drop shadow
Open SCS_SYHO_AGirlsWinter_FrozenPond copy paste as new layer resize 65 percent add drop shadow
Open SCS_SYHO_AGirlsWinter_Snowman copy paste as new layer resize 70 percent add drop shadow
Open SCS_SYHO_AGirlsWinter_Penguin copy paste as new layer resize 30 percent add drop shadow
Open SCS_SYHO_AGirlsWinter_Flower2 copy paste as new layer resize 65 percent add drop shadow
Open SCS_SYHO_AGirlsWinter_IceSkatingGirl copy paste as new layer resize 65 percent add drop shadow
Open SCS_SYHO_AGirlsWinter_MusicNote1 copy paste as new layer resize add drop shadow
Open SCS_SYHO_AGirlsWinter_MusicNote2 copy paste as new layer resize add drop shadow
Open Word Art select all float defloat Open SCS_SYHO_AGirlsWinter_Paper4 selection invert delete on keyboard select none go back to the original layer add gradient glow & add drop shadow
Add your name Font Before the Rain forground #ffffff background #ffffff select all float defloat Open SCS_SYHO_AGirlsWinter_Paper4 selection invert delete on keyboard select none go back to the original layer add gradient glow & add drop shadow
Add your copyright info
resize & save your tag
If you like this Tut check the boxes below Love to see your results please email to me
Thankyou ♥
Written by ©Lyn(akaAngel) 12th December 2013, any similarity to any other tutorial is purely coincidental!
♥ Me Naughty Never ♥

To View Tag In Proper Size Click On The Tag
Supplies Needed
FTU Scrapkit Silver By Scrappy Bit Of Fun
Word Art
Tube of choice im using Keith Garvey This is a PTU Tube
Font of choice or the one im using is Filigree
Lets Get Started
Open new image 650X550
Open LH_Silver_Scatter-004 copy paste as new layer duplicate flip mirror
Open LH_Silver_Element-003 copy paste as new layer resize 60 percent mirror add drop shadow
Open LH_Silver_Frame-011 copy paste as new layer resize 75 percent click in frame with magic wand modify expand by 7
Open LH_Silver_Paper-005 copy paste as new layer selection invert delete on keyboard select none add drop shadow to frame
Open LH_Silver_Frame-006 copy paste as new layer resize 70 percent mirror image rotate 20 percent right drag this under last frame click in frame with magic wand modify expand by 7
Open LH_Silver_Paper-005 copy paste as new layer selection invert delete on keyboard select none add drop shadow to frame
Open LH_Silver_Element-017 copy paste as new layer resize 80 percent add drop shadow
Open LH_Silver_Element-003 copy paste as new layer resize 60 percent mirror add drop shadow
Open LH_Silver_Element-016 copy paste as new layer sharpen add drop shadow
Open LH_Silver_Element-019 copy paste as new layer resize 55 percent add drop shadow
Open the wordArt you will find this in Jascie folder copy paste as new layer add drop shadow
Open tube copy paste as new layer add drop shadow
Add your name Font Filigree forground #000000 background #000000 add gradient glow #ffffff add drop shadow
Add your copyright info
resize & save your tag
If you like this Tut check the boxes below Love to see your results please email to me
Thankyou ♥
Written by ©Lyn(akaAngel) 10th December 2013, any similarity to any other tutorial is purely coincidental!
♥ Christmas Magic ♥

To View Tag In Proper Size Click On The Tag
Supplies Needed
Scrapkit Magical Times by scrappy bit of fun this is FTU
word art FTU from scrappy bit of fun this is FTU
Tube of choice im using Elias Chatzoudis this is a PTU Tube
Mask WSL_Mask84 at weescotslass
Font of choice or the one im using is MrBlaketon
Lets Get Started
Open new image 650x550
Open MagicalTimes-LgP3 copy paste as new layer apply mask merge group duplicate merge down
Open Simone_MagicalTimes_element0018 copy paste as new layer add drop shadow
Open Simone_MagicalTimes_element0043 copy paste as new layer drag under frame
Open Simone_MagicalTimes_element0044 copy paste as new layer
Open Simone_MagicalTimes_element0006 copy paste as new layer go to frame click in frame with magic wand selection modify expand by 5 invert delete on keyboard select none drag under frame
Open Simone_MagicalTimes_element0009 copy paste as new layer add drop shadow
Open Simone_MagicalTimes_element0010 copy paste as new layer add drop shadow
Open Simone_MagicalTimes_element0019 copy paste as new layer resize 45 percent add drop shadow
Open Simone_MagicalTimes_element0007 copy paste as new layer resize 55 percent add drop shadow
Open SSLH-Joy2TheWorld-tube copy paste as new layer select all float defloat
Open MagicalTimes-LgP1 copy paste as new layer invert delete on keyboard select none add gradient glow & add drop shadow
Open your tube copy paste as new layer add drop shadow
Add your name Font MrBlaketon forground #ffffff background #ffffff select all float defloat Open MagicalTimes-LgP1 copy paste invert delete on keyboard select none add gradient glow & add drop shadow
Add your copyright info
resize & save your tag
If you like this Tut check the boxes below Love to see your results please email to me
Thankyou ♥
Written by ©Lyn(akaAngel) 10th December 2013, any similarity to any other tutorial is purely coincidental!
Subscribe to:
Posts (Atom)