♥ Welcome ♥
♥ My Blinkie ♥

Showing posts with label No Scrap ♥. Show all posts
Showing posts with label No Scrap ♥. Show all posts
♥ Mother Earth ♥


To View Tag In Proper Size Click On The Tag
Supplies Needed
Tube of choice from same artist im using ©Keith Garvey to purchase tubes go
All my tubes are a guide if the tubes i select are unavailble please use another tube of your liking thankyou
Font of choice or the one im using is Copperplate Gothic Bold
Filters Unlimited 2.0
Lets Get Started
The Tag
Open new image 550x220
Flood fill with #000000
New layer flood fill with ##bd8d77 effects texture effect with this setting

New layer flood fill with #fffff
effects texture effect weave with this setting

Lower opacity 34
Open tube copy paste as new layer add drop shadow duplicate mirror lower opacity 32
Font Copperplate Gothic Bold Forground #000000 background #bd8d77 Add the words Honor the sacred Honor the Earth our Mother.~~~~~~~ add drop shadow
Add your name Font Copperplate Gothic Bold Forground #000000 background #bd8d77 add drop shadow
Add blinds to your name with this setting

Add new layer apply filters unlimited with this setting

Add your copyright info
merge all visible sharpen save your tag as png
The Avaitar
Open 150x150 new image
Flood fill with #000000
New layer flood fill with ##bd8d77 effects texture with above tag setting
New layer flood fill with #fffff
effecte texture effect weave with above tag setting
Lower opacity 34
Open tube copy paste as new layer add drop shadow
Add your first Initials of your name Font Copperplate Gothic Bold Forground #000000 background #bd8d77 add drop shadow
Add blinds to your initial with above tag setting
Add new layer apply filters unlimited with above tag setting
Add your copyright info
merge all visible sharpen save your tag as png
If you like this Tut check the boxes below Love to see your results please email to me
Thankyou ♥
Written by ©Lyn(akaAngel) 16th September 2012, any similarity to any other tutorial is purely coincidental!

♥ Garvalicious ♥

To View Tag In Proper Size Click On The Tag
Supplies Needed
Template By Becky BP_template147 Here
Tube of choice im using ©Keith Garvey to purchase tubes go to PTU Here
All my tubes are a guide if the tubes i select are unavailable please use another tube of your liking thankyou
Mask WSL_Mask84 at weescotslass
Here
Font of choice or the one im using is Yevida
Lets Get Started
Open Tempalete duplicate close original delete background & © image canvas size 700 x 650
Go to blackbg selection select all float defloat new raster layer flood fill #000000 select none delete original layer
Go to pinkbg selection select all float defloat new raster layer flood fill #ee76a4 select none delete original layer effects texture effects with this setting

add drop shadow
Go to left rectangel fill selection select all float defloat new raster layer flood fill #8189a2 select none delete original layer effects texture effects with this setting

select all float defloat open tube copy paste as new layer invert delete add drop shadow to tube
Go to left rectangle bg selection select all float defloat new raster layer flood fill #000000 select none delete original layer
Go to left rectangle selection select all float defloat new raster layer flood fill #000000 select none delete original layer
Go to right rectangle fill selection select all float defloat new raster layer flood fill #8189a2 select none delete original layer effects texture effects with same setting as above
select all float defloat open tube copy paste as new layer invert delete add drop shadow to tube
Go to right rectangle bg selection select all float defloat new raster layer flood fill #000000 select none delete original layer
Go to right rectangle selection select all float defloat new raster layer flood fill #000000 select none delete original layer
Go to square fill selection select all float defloat new raster layer flood fill #8189a2 select none delete original layer effects texture effects with same setting as above
select all float defloat open tube copy paste as new layer invert delete add drop shadow to tube
Go to square bg selection select all float defloat new raster layer flood fill #000000 select none delete original layer
Go to square selection select all float defloat new raster layer flood fill #000000 select none delete original layer add drop shadow
Go to circle fill selection select all float defloat new raster layer flood fill #8189a2 select none delete original layer effects texture effects with same setting as above
select all float defloat open tube copy paste as new layer invert delete add drop shadow to tube
Go to circle bg selection select all float defloat new raster layer flood fill #000000 select none delete original layer
Go to circle selection select all float defloat new raster layer flood fill #000000 select none delete original layer add drop shadow
Go to Garv bg selection select all float defloat new raster layer flood fill #8189a2 select none delete original layer
Go to Garv layer & delete
Go to lg heart selection select all float defloat new raster layer flood fill #8189a2 select none delete original layer effects texture effects with same setting as above
Go to med heart selection select all float defloat new raster layer flood fill #8189a2 select none delete original layer effects texture effects with same setting as above
Go to small heart selection select all float defloat new raster layer flood fill #8189a2 select none delete original layer effects texture effects with same setting as above
Go to lg star trim selection select all float defloat new raster layer flood fill #8189a2 select none delete original layer effects
Go to lg star selection select all float defloat new raster layer flood fill #ee76a4 select none delete original layer effects texture effects with same setting as we did on the pinkbg
Go to med star trim selection select all float defloat new raster layer flood fill #8189a2 select none delete original layer effects
Go to med star selection select all float defloat new raster layer flood fill #ee76a4 select none delete original layer effects texture effects with same setting as we did on the pinkbg
Go to sm star trim selection select all float defloat new raster layer flood fill #8189a2 select none delete original layer effects
Go to sm star selection select all float defloat new raster layer flood fill #ee76a4 select none delete original layer effects texture effects with same setting as we did on the pinkbg
New raster layer flood fill with flood fill #ee76a4 apply texture apply mask merge group duplicate mirror move down slightly merge down send to bottom
Add your name Font Yevida forground #8189a2 background #000000 add drop shadow
Add your copyright info
resize & save your tag
If you like this Tut check the boxes below Love to see your results please email to me
Thankyou ♥
Written by ©Lyn(akaAngel) 7th January 2012, any similarity to any other tutorial is purely coincidental!
This awesome result is from Vickie Thankyou ♥

♥ You Look Like Lunch ♥

To View Tag In Proper Size Click On The Tag
Supplies Needed
Template By Savage You look like Lunch
Here
Tube of choice im using ©SkyScraps Designs
Here
All my tubes are a guide if the tubes i select are unavailable please use another tube of your liking thankyou
Mask WSL_Mask 178 at weescotslass
Here
Font of choice or the one im using is CRAMPS
Lets Get Started
Open new Template duplicate close original delete credits & Layer 1 canvas size 950 x 850 we will resize later
Go to rectangle back select all float defloat new raster layer flood fill #657288 select none add drop shadow
Go to rectangle select all float defloat new raster layer flood fill #6a0e11 select none effects texture effects Blinds with this setting 4 10 #000000 both boxes checked effects inner bevel with this setting

Go to bars select all float defloat new raster layer flood fill #6a0e11 select none inner bevel same setting as before add drop shadow
Go to circle back select all float defloat new raster layer flood fill #7a090c select none add drop shadow
Go to circle select all float defloat new raster layer flood fill #acc0d6 select none effects texture effects with this setting below

Open the close up tube copy paste erase part of the hair that is overlapping add drop shadow
Go to square 1 back select all float defloat new raster layer flood fill #acc0d6 select none effects blinds same as before add drop shadow
Go to square 1 select all float defloat new raster layer flood fill #6a0e11 select none effects blinds same as before add drop shadow
Go to square 2 back select all float defloat new raster layer flood fill #acc0d6 select none effects blinds same as before add drop shadow
Go to square 2 select all float defloat new raster layer flood fill #6a0e11 select none effects blinds same as before select all float defloat add tube copy paste as new layer invert delete on keyboard
Go to square 3 back select all float defloat new raster layer flood fill #acc0d6 select none effects blinds same as before add drop shadow
Go to square 3 select all float defloat new raster layer flood fill #6a0e11 select none effects blinds same as before add drop shadow
Go to bats add drop shadow
Go to blood add drop shadow
Go to lips with fangs add drop shadow
Go to I Think back add drop shadow
Go to LUNCH back add drop shadow
Go to You Look Like back add drop shadow
Go to Bats duplicate mirror
New raster layer flood fill apply mask merge group arrange send to bottom
Add your name Font CRAMPS forground #6a0e11 background #6a0e11 add gradient glow #ffffff & add drop shadow
Add your copyright info
resize & save your tag
If you like this Tut check the boxes below Love to see your results please email to me
Thankyou ♥
Written by ©Lyn(akaAngel) 13th October 2011, any similarity to any other tutorial is purely coincidental!
This result from Dana J this is awesome thankyou ♥

Melinda made this for her friend this is great Thankyou ♥

This result is from Sue this is Awesome Thankyou ♥

This result is from Kortney this is Awesome Thankyou ♥

This result is from Vickie this is Awesome Thankyou ♥

♥ Paint Girl ♥

To View Tag In Proper Size Click On The Tag
Supplies Needed
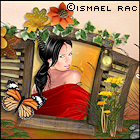
Tube of choice I am using ©Ismael Rac this is in the FTU section Here
Template57 by Becky Here
Muries Master Filter google for this plugin
Mask WSL_Mask38 at weescotslass Here
Font of choice or the one im using is Do I like Stripes?
Lets Get Started
Open Template duplicate close preview layer & Tou layer & white background layer canvas size 650x550
Go to dot set 2 select all float defloat new raster layer flood fill #ec9c55 select none add drop shadow delete original layer
Go to large dark circle layer select all float defloat new raster layer flood fill #dd105d select none add drop shadow delete original layer
Go to large light circle select all float defloat new raster layer flood fill #f58a12 select none effects texture effects weave with this setting 4 4 20 #000000 in both boxes filled gaps checked add drop shadow delete original layer
Go to large dash circle add gradient glow & add drop shadow
Go to dot set 1 layer select all float defloat new raster layer flood fill #fe2a77 select none add drop shadow delete original layer
Go to rectangle dash add gradient glow & add drop shadow
Go to dark rectangle layer select all float defloat new raster layer flood fill #040303 select none add drop shadow delete original layer
Go to light rectangle layer select all float defloat new raster layer flood fill #f69773 select none effects texture effects Texture with this setting

add drop shadow delete original layer
Go to small dark circle layer add drop shadow
Go to small light circlelayer select all float defloat new raster layer flood fill #b94169 keep selected delete original layer
Open new image 400x400 add the words paint girl font Ambitsek size 10 forground null background #000000 apply
Murias master copies with this setting

copy the words paste as new layer delete on keyboard add drop shadow
Go to small circle dash add gradient glow & add drop shadow
Open your tube copy paste as new layer add drop shadow
Open the paint cans from the tube add drop shadow
Open new raster layer flood fill #60c8e1 apply mask merge group duplicate merge down duplicate merge down arrange send this to bottom
Add your name Font Do I like Stripes? forground #000000 background #fe2a77 add gradient glow & add drop shadow
Add your copyright info
resize & save your tag
Love to see your results please email them to me
Thankyou ♥
Written by ©Lyn(akaAngel) 11th September 2011, any similarity to any other tutorial is purely coincidental!
This is result from Katy this is awesome thankyou ♥

Dixie thankyou this Result is awesome dont you just love this i think its so cute ♥

Vickie thankyou this is awesome ♥

♥ Spring Fashion ♥

Supplies Needed
Template04 by Me this is FTU you will find this
Here
Tube of choice im using ©Elias Chatzoudis he is no longer selling at MPT this is where i brought hes art work & my license
But you can find all hes tubes PSP Tubes Emporium
Here
Font of choice or the one im using is Valeria Script One & Bilbo
Lets Get Started
Open Template Duplicate close original delete ©Angel Layer
Go to Raster 1 layer selection select all float defloat new raster layer flood fill #49712a invert delete on keyboard select none apply inner bevel with this setting

add gradient glow & drop shadow delete original layer
Go to Raster 2 layer selection select all float defloat new raster layer flood fill #e3ec9a select none effects weave with this setting

Go to Raster 3 layer selection select all float defloat new raster layer flood fill #2a441e select none add drop shadow
Go to raster 4 Effects Enhance add drop shadow
Go to Raster 5 layer selection select all float defloat new raster layer flood fill #b8da60 select none delete original layer effects inner bevel same setting as before add gradient glow & add drop shadow
Repeat layer 6 as you did layer 5
Repeat layer 7 as you did layer 6 & 5
Repeat layer 8 as you did layer 7 & 6 & 5
Go to Raster 9 layer selection select all float defloat flood fill #c56a80 select none delete original layer
Go to Raster 10 layer selection select all float defloat flood fill #c56a80 select none delete original layer
Go to Raster 11 layer selection select all float defloat new raster layer flood fill #f9c9d5 select none apply same inner bevel as before add gradient glow & drop shadow
Go to Raster 12 layer selection select all float defloat new raster layer flood fill #f9c9d5 select none apply same inner bevel as before add gradient glow & drop shadow
Open tube copy paste as new layer add drop shadow
Add the words Spring Fashion Font Bilbo forground #587e39 background #bedf68 add gradient glow & add drop shadow
Add your name Font Valeria Script One forground #587e39 background #bedf68 add gradient glow & add drop shadow
Add your copyright info
resize & save your tag
Love to see your results please email to me so i can put in my show off blog
Thankyou ♥
Written by ©Lyn(akaAngel) 18th March 2011, any similarity to any other tutorial is purely coincidental!
♥ Hush ♥

Supplies Needed
Tube of choice im using ©Keith Garvey to purchase tubes go
Here
All my tubes are a guide if the tubes i select are unavailable please use another tube of your liking thankyou
Hush TEMPLATE BY CRYS FTU you will find this
Here
Mask WSL_Mask 178 at weescotslass Here
Xero - Porcelain
Here
eye candy 4000 - Gradient Glow
Font of choice or the one im using is Magical Mystery Tour
Lets Get Started
Open Template Duplicate canvas size 750x750
Go to Raster 2 layer selection select all float defloat Open new raster layer flood fill #fce2e8 invert delete on keyboard select none effects texture effect weave with this setting

add gradient glow with this setting


add drop shadow
Go to Raster 8 layer selection select all float defloat Open new raster layer flood fill #e2909d invert delete on keyboard select none effects texture effect weave same setting as before add drop shadow
Go to Copy of Raster 8 layer selection select all float defloat Open new raster layer flood fill #e2909d invert delete on keyboard select none effects texture effect weave same setting as before add drop shadow
Go to Raster 9 layer selection select all float defloat Open new raster layer flood fill #e2909d invert delete on keyboard select none effects texture effect weave same setting as before add drop shadow
Go to Raster 2 layer selection select all float defloat Open new raster layer flood fill #fce2e8 invert delete on keyboard select none effects texture effect weave with this setting
Go to Copy of Raster 2 layer selection select all float defloat Open new raster layer flood fill #c49589 invert delete on keyboard select none effects texture effect tiles with this setting

add drop shadow
Go to raster 7 add drop shadow
Go to Copy of Raster 7 layer selection select all float defloat Open new raster layer flood fill #f25783 Open tube copy paste as new layer invert delete on keyboard select none go back to layer we filled apply effects texture effect weave same setting as before
Go to Copy (2) of Raster 7 layer selection select all float defloat Open new raster layer flood fill #f25783 Open tube mirror copy paste as new layer invert delete on keyboard select none go back to layer we filled apply effects texture effect weave same setting as before
Go to Copy of Raster 7 layer selection select all float defloat Open new raster layer flood fill #f25783 Open tube copy paste as new layer invert delete on keyboard select none go back to layer we filled apply effects texture effect weave same setting as before
Go to Raster 3 layer selection select all float defloat Open new raster layer flood fill #ebc7ca effects texture effect weave same setting as before add gradient glow same as earlier add drop shadow
Go to Raster 4 layer selection select all float defloat Open new raster layer flood fill #ffffff add drop shadow
Go to Raster 5 layer selection select all float defloat Open new raster layer flood fill #ffffff add drop shadow
Go to Raster 4 layer selection select all float defloat Open new raster layer flood fill #ffffff add drop shadow
Go to Raster 11 layer selection select all float defloat Open new raster layer flood fill #e02241 add drop shadow
New raster layer flood fill #da7983 apply mask merge group duplicate 2 times merge down with pick tool bring out on all sides apply texture effects weave same as before send to bottom
resize your tag 594x551
Copy your main tube paste as new layer add drop shadow
Merge all visible apply porcelain with this setting

Add your name Font Magical Mystery Tour forground #b61429 background #000000 apply inner bevel with this setting

add drop shadow
Add your copyright info
resize & save your tag
Love to see your results please email to me so i can put in my show off blog
Thankyou ♥
Written by ©Lyn(akaAngel) 5th March 2011, any similarity to any other tutorial is purely coincidental!
♥ Country Girl ♥

Supplies Needed
Tube of choice im using ©Jason Patterson you can purchase From PTE Here
Freebie Template Country Girl this is FTU you will find this Here
Mask WSL_Mask 38 at weescotslass Here
Font of choice or the one im using is Inspiration
Lets Get Started
Open Template Duplicate canvas size 750x700 open the raster 3 & copy raster 3
New raster layer flood fill #ac1718 apply mask merge send to bottom add remove noise uniform 68 monochrome checked duplicate merge down
Go to Raster 3 layer selection select all float defloat new raster layer flood fill #37516d invert delete on keyboard select none add gradient glow
Go to copy of Raster 3 layer selection select all float defloat new raster layer flood fill #37516d invert delete on keyboard select none add gradient glow
Go to Raster 2 layer selection select all float defloat new raster layer flood fill #7f9199 invert delete on keyboard select none add gradient glow & add drop shadow
Go to Raster 1 layer selection select all float defloat new raster layer flood fill #831310 invert delete on keyboard select none apply penta.com dots and crosses default setting add gradient glow & add drop shadow
Go to Merged layer selection select all float defloat new raster layer flood fill #46718b invert delete on keyboard select none lower opacity 79 percent add gradient glow & add drop shadow
Go to Merged layer selection select all float defloat new raster layer flood fill #742f27 invert delete on keyboard select none effects inner bevel with this setting
add gradient glow add drop shadow
Go to Copy of Merged layer layer selection select all float defloat new raster layer flood fill #742f27 invert delete on keyboard select none effects inner bevel same setting as before add gradient glow add drop shadow
Go to Raster 4 layer selection select all float defloat new raster layer flood #f1c8aa invert delete on keyboard select none add drop shadow
Go to Copy of Raster 4 layer selection select all float defloat new raster layer flood #f1c8aa invert delete on keyboard select none add drop shadow
Copy your tube paste as new layer add drop shadow
Add your name Inspiration forground #000000 background #9b3230 add gradient glow #99312e & add drop shadow
Add your copyright info
resize & save your tag
Love to see your results please email to me so i can put in my show off blog
Thankyou ♥
Written by ©Lyn(akaAngel) 3rd March 2011, any similarity to any other tutorial is purely coincidental!
♥ I Have My Own ♥

Supplies Needed
Tube of choice im using ©Popeye Wong Here
Mask WSL_Mask 38 at weescotslass Here
Font of choice or the one im using is Blueberry & Cocktail Script
Lets Get Started
Open new image 650x550
Flood fill new raster layer with #485fa2 apply mask merge group duplicate
with your preset tool set to eclipse line style solid width 4 forground #4f6ab6 background null make circle in middle of your image
click in circle with magic wand new raster layer selection modify 2 flood fill #a1baff select none drag under circle apply penta.com dots & crosses default setting
add gradient glow & drop shadow to circle
Open your tube copy paste as new layer resize 80 percent add drop shadow
With your preset tool set to rectangle line style solid width 7 forground #485fa2 background null make rectangle
click in rectangle with magic wand new raster layer selection modify 2 flood fill #a1baff select apply penta.com dots & crosses default setting
add gradient glow & drop shadow to rectangle open your tube copy paste as new layer erase parts over lapping drag under rectangle blend mode hard light lower opacity 49
With your preset tool set to circle line style solid width 7 forground #485fa2 background null make cirlce
click in circle with magic wand new raster layer selection modify 2 flood fill #a1baff select apply penta.com dots & crosses default setting
add gradient glow & drop shadow to circle open your tube copy paste as new layer erase parts over lapping drag under rectangle blend mode hard light lower opacity 49
Add the words i have my own get your own Font Blueberry size 48 pixels forground #485fa2 background #a1baff apply penta.com Jeans add gradient glow & add drop shadow
Add your name Font Cocktail Script forground #485fa2 background #a1baff add gradient glow & add drop shadow
Add your copyright info
resize & save your tag
Love to see your results please email to me so i can put in my show off blog
Thankyou ♥
Written by ©Lyn(akaAngel) 29th January 2011, any similarity to any other tutorial is purely coincidental!
♥ Summer Time ♥

Supplies Needed
Tube of choice im using ©Elias Chatzoudis he is no longer selling at MPT this is where i brought hes art work & my license
But you can find all hes tubes PSP Tubes Emporium
Mask WSL_Mask 38 at weescotslass Here
Font of choice or the one im using is Copperplate Gothic Light & Mr Lackboughs
Lets Get Started
Open new image 650x550
new raster layer flood fill with #bf6995 apply mask merge group duplicate merge down
Go to eclipse tool forground #bf6995 background #76174e width 9 make circle in middle of layer convert to raster layer apply penta.com jeans default setting add gradient glow & add drop shadow
with magic wand i clicked in the circle see my preview below

I did this till the end of the circle open new image flood fill #000000 copy paste as new layer on your tag invert delete merge down
Go to rectangle tool forground #bf6995 background #76174e width 2 linestyle dash dots make rectangle in middle of layer convert to raster layer add drop shadow
Go to rectangle tool forground #bf6995 background #76174e width 2 linestyle dash dots make smaller rectangle in middle of layer convert to raster layer add drop shadow
Add the words Summer Time Font Copperplate Gothic Light Forground #bf6995 background #000000 add gradient glow & drop shadow
Add tube copy paste as new layer duplicate drag this under the rectangle close of the top tube erase the bottom part of the tube go back to top tube erase bottom part of tube
Add new layer i used the tubes that come with psp (ball thongs tube)size 66 click on layer blend mode overlay
Add new layer i used the tubes that come with psp (butterfly)size 100 click on layer image rotate 80 right colourize hue 212 saturation 255 resize 80 percent add drop shadow duplicate mirror resize this one 46 percent arrange on tag
Add your name Font Mr Lackboughs Forground #bf6995 background #000000 add gradient glow & drop shadow
Add your copyright info
resize & save your tag
Love to see your results please email to me so i can put in my show off blog
Thankyou ♥
Written by ©Lyn(akaAngel) 8th December 2010, any similarity to any other tutorial is purely coincidental!
♥ Cheeky ♥

Supplies Needed
Template 57 by Becky you can download from Here
Mask WSL_Mask84 at weescotslass Here
Tube of choice im using ©Elias Chatzoudis he is no longer selling at MPT this is where i brought hes art work & my license
But you can find all hes tubes PSP Tubes Emporium
Here
Fonts of choice or the ones i have used Inspiration & Ambitsek
Animation from peachies can download from Here
Animation Shop
Eye candy 3.1 Swirl
Eye Candy 4000
Lets get started
Open template duplicate close original delete preview copyright & white background layer
Go to dot set 2 select all float defloat new raster layer flood fill #8f3756 select none add gradient glow then add drop shadow close off original
Go to large dark circle select all float defloat new raster layer flood fill #597c2b select none add drop shadow close off original
Go to large light circle select all float defloat new raster layer flood fill #b4c736 eye candy 3.1 Swirl with this setting

select none add drop shadow close off original
Go to large dash circle add gradient glow white then add drop shadow
Go to dot set 1 select all float defloat new raster layer flood fill #82aa24 effects texture effects Blinds this setting

select none add white gradient glow close off original
Go to rectangle dash add white gradient glow then add drop shadow
Go to dark rectangle select all float defloat new raster layer flood fill #8f3756 select none add drop shadow close off original
Go to light rectangle select all float defloat new raster layer flood fill #df9baa select none add Blinds same setting as before add drop shadow close off original
Go back to the layer you just made select select all
now on a separate image 650x550
Font Ambitsek size 10 pixels forground null background #ffffff write the word Cheeky
effects Muras filter meister copies with this setting

copy this as new layer onto your tag invert delete on keyboard select none layer opacity 72
Go to small dark circle select all float defloat new raster layer flood fill #6a942c select none add drop shadow close off original
Go to small light circle select all float defloat new raster layer flood fill #adcf28 apply eye candy 3.1 Swirl same setting as above select none add drop shadow close off original
Go to small circle dash add gradient glow then add drop shadow
Add your tube add drop shadow
Add your name Font Inspiration Forground #a0004c Background #adcf28
Add new rasterlayer flood fill #82aa24 apply mask merge group then add Swirl same setting as before
Add your copyright
save your tag if not wanting to do Animation
Continue for Animation
Copy merge take this into Animation
Open your gif file see how many frames it has thats what we want on our tag so go back to your tag click in frame duplicate do this until you have the correct ammount of frames
select all go back to the gif file click in first frame select all drag this to your first frame of your tag let go the gif file should be now on your tag
repeat this 2 more times
View Animation resize save as gif
Love to see your results please email to me so i can put in my show off blog
Thankyou ♥
Written by ©Lyn(akaAngel) 29th April 2010, any similarity to any other tutorial is purely coincidental!
♥ Chilly ♥

Supplies Needed
Tube of choice the one im using ©Keith Garvey can be purchased Here
Mask WSL_Mask84 at weescotslass Here
Font of choice or the one i have used Impact & LainieDaySH
Lets Start
Open new image 650 x 650 transparent
Open your tube pick two colours one dark one light i used forground #b05670 background #e37b9b
go to your preset shape rectangle line width 6 draw one rectangle convert to raster layer duplicate mirror
go back to your preset shape circle line width 6 draw a circle convert to raster layer merge these layers together duplicate
on the original gaussian blur 15 texture effects Mosiac antique default settings give top layer drop shadow
with your magic wand click in circle selection modify contract by 2 copy your close up tube paste as new layer resize by 80 selection invert delete on keyboard
Add drop shadow luminance legacy opacity 60
Do the same with the rectangle layers but resize the tube 60 percent & mirror see my tag for reference
Go back to your frame layer texture effect blinds 2,18 black horizontal & light from left to right both ticked
merge both rectangle tubes
go back to frame xero fritillary settings 5.30.100.33 click ok
Open main tube copy paste add drop shadow
Font of choice or the one im using Impact write the word Chilly forground #b05670 background #e37b9b Apply xero fritillary settings 5.30.100.33 click ok add gradient glow then add drop shadow
New raster layer flood fill with forground #b05670 apply mask merge group drag this to bottom
Add your name font of choice or one i have used LainieDaySH forground #b05670 background #e37b9b add gradient glow then add drop shadow
Crop resize tag
Add your copyright
Love to see your results please email them to me i will put on my show off page
Thankyou♥
♥ Luscious ♥

Supplies Needed
Template_78_Beth_09 by Beth you can download
Here
Tube of choice im using ©Keith Garvey to purchase tubes go
Here
All my tubes are a guide if the tubes i select are unavailable please use another tube of your liking thankyou
Mask WSL_Mask38 at weescotslass
Here
Font of choice or the one i have used MrBlaketon
Lets get started
Open Template duplicate close original delete copyright & white background layer
canvas size 700x650
Go to layer 3 select all selection float defloat new raster layer flood fill #c583a9 select none add drop shadow delete original layer
Repeat with layers 2 & 1
Go to lg frame bg select all selection float defloat new raster layer flood fill lg frame bg delete original layer open tube paste as new layer delete on keyboard effects texture effects weave 2 15 3 black in both boxes fill gaps checked select none add drop shadow to tube
Go to small frame 2 bg select all selection float defloat new raster layer flood fill #fa88c2 texture weave same settings as before
Repeat with small rect frame bg 1
New raster layer flood fill #e36395 apply mask merge group send to bottom i gave this some texture
lg frame small frame 2 small rect frame 1 give these each a gradient glow white
dots 2 dots 1 give these each a gradient glow white
Add your name font of choice or one i have used MrBlaketon forground #000000 background #000000 add gradient glow then add drop shadow
Go to wordArt add drop shadow
Crop resize tag
Add your copyright
Love to see your results please email them to me i will put on my show off page
Thankyou♥
This is a great result thankyou Mickey ♥

♥ Crazy In Love ♥

Supplies Needed
Template 8 by Beth you can download
Here
Tube of choice im using ©Keith Garvey he is no longer selling at MPT this is where i brought hes art work & my license
But you can find all hes tubes PSP Tubes Emporium
Here
Love wordart by beth you can download
Here
Mask WSL_Mask178 at weescotslass
Here
Font of choice or the one i have used Miss Le Gatees
Lets get started
Open template duplicate close original
Delete white background & copyright
Canvas size 700x 650
image rotate 90 percent left all layers checked
Go to heart3 image rotate 90 percent right take off all layers checked repeat this for heart 2 & 1
Open wordart Crazy in Love copy post as new layer add gradient glow
New raster layer send to bottom flood fill #ab363d apply mask merge group effects texture effect weave 2 15 3 black fill gaps checked colour black
with magic want click in frame 3 flood fill #ab363d effects texture effects fine leather with this setting
colour black blur 100 transparancy 255 number of furrows 130 length of furrows 3 angle 80 select none
repeat with other frames change colours from your tube
Go to heart3 select all new raster layer flood fill #fdb99e delete original heart add gradient glow add drop shadow
repeat with all hearts change colours then add blinds effect to them
add your tube add drop shadow
Go to dash1 select all float defloat new raster layer flood fill with #000000 repeat dash 2 dash 3 then add gradient glow white
Go back to each frame with selection tool copy tube paste as new layer luminance opacty 37 add drop shadow
Add your name font Miss Le Gatees forground #000000 background #8d2c31
Crop resize tag
Add your copyright
Love to see your results please email them to me i will put on my show off page
Thankyou♥
♥ Get This Party Started ♥

Supplies Needed
Template158 by Beth you can download Here
3 Tube of choice im using ©Elias Chatzoudis he is no longer selling at MPT this is where i brought hes art work & my license
But you can find all hes tubes PSP Tubes Emporium
Here
Mask WSL_Mask178 at weescotslass Here
Font of choice or the one i have used Inspiration
Lets get Started
Open Template duplicate close original
remove the copyright layer & the BG Layer
On the stars layer selection all select float defloat fill with #76b2ce add gradient glow & drop shadow add remove noise with this setting uniform 31 monochrome checked delete original stars
On GRAY STRIP2 selection all select float defloat fill with #76b2ce add gradient glow & drop shadow add remove noise with this setting uniform 31 monochrome checked delete original grey stripe 2 layer
Repeat as above with GRAY STRIPE
Go to WHITE BG selection select all float defloat new raster layer fill with #7ba529 while still selected effects weave with this setting 2 15 3 black in both boxes fill gaps checked delete original layer select none
Go to GRAY SQUARE 2 selection select all float defloat new raster layer fill with #cad6eb while still selected effects weave with this setting 2 15 3 white in both boxes fill gaps checked open your tube
copy paste as new layer invert delete on kleyboard delete original layer select none
Repeat with GREY SQUARE
Go to BLUE FRAME 2 add gradient glow & drop shadow
Repeat with BLUE FRAME
New raster layer drag this to bottom flood fill with #236a7f apply maske merge group effects texture effects with same setting as before go back to top layer
open your main tube copy paste as new layer bring this under the FILMSTRIP duplicate bring to tp erase parts of tube then go back to bottom tube erase parts over lapping add drop shadow to bottom tube with this setting -14 7 48 8.70 black repeat with this setting 7 -14 48 8.70 black
Add your name font Inspiration forground #000000 background #000000 add gradient glow white select all adjust add remove noise with this setting random 100 monochrome checked add drop shadow 2 2 23 4.35 black
Crop & add your copywirte info
save your tag
Love to see your results please email to me so i can put in my show off blog
Thankyou ♥
Subscribe to:
Posts (Atom)