♥ Welcome ♥

♥ My Blinkie ♥

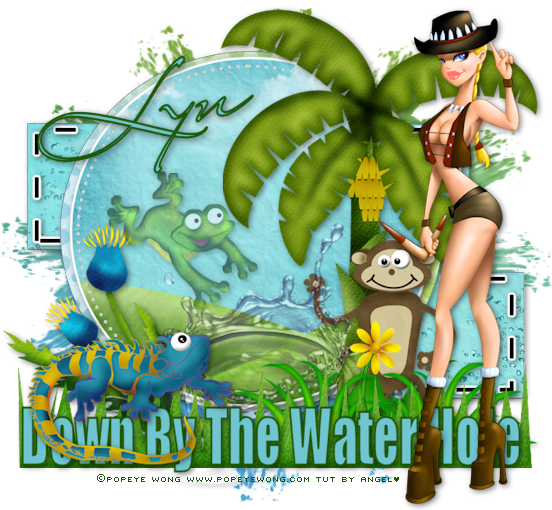
♥ Down By The WaterHole ♥
To View Tag In Proper Size Click On The Tag
Supplies Needed
Scrapkit by Meta Wulandari Design called It's a Happy Time this is FTU Here
Tube of choice im using ©Popeye Wong Here
Template by Me this is FTU you can grab it Here
Mask WSL_Mask178 at weescotslass Here
Font of choice or the one im using is IMpact & Mr Lackboughs
Lets Get Started
Open template duplicate close the original canvas size 650x600 delete raster 7 & copy of raster 7 layers & ©
Go to raster 1 layer
Open MK_Happy_paper001 copy paste as new layer resize 29 percent apply mask merge group
Go To Raster 2 select all float defloat Open MK_Happy_paper002 copy paste as new layer resize 25 percent select invert delete on keyboard select none add drop shadow
Go To Copy of Raster 2 select all float defloat Open MK_Happy_paper002 copy paste as new layer resize 25 percent select invert delete on keyboard select none add drop shadow
Go to Raster 3 add gradient glow & drop shadow
Go to Copy of Raster 3 add gradient glow & drop shadow
Go to Raster 4 select all float defloat Open MK_Happy_paper012 copy paste as new layer resize 25 percent select invert delete on keyboard select none add drop shadow
Go to Raster 5 select all float defloat Open MK_Happy_paper007 copy paste as new layer resize 12 percent select invert delete on keyboard select none add gradient glow & add drop shadow
Open MK_Happy001 copy paste as new layer resize 20 percent add drop shadow
Open MK_Happy011 copy paste as new layer resize 25 percent add drop shadow
Open MK_Happy032 copy paste as new layer resize 25 percent add drop shadow
Open MK_Happy040 copy paste as new layer resize 24 percent lower opacity 57 add drop shadow
Open MK_Happy009 copy paste as new layer resize 15 percent add drop shadow
Open MK_Happy010 copy paste as new layer resize 25 percent duplicate mirror merge down add drop shadow
Open MK_Happy037 copy paste as new layer resize 27 percent lower opacity 52 add drop shadow
Open MK_Happy023 copy paste as new layer resize 33 percent add drop shadow
Open MK_Happy036 copy paste as new layer resize 33 percent with pick tool bring in sides & bring down little add drop shadow
Open tube copy paste as new layer add drop shadow
Add the words Down By The Water Hole Font Impact forground #1d580a background #70c5d0 add drop shadow
Add your name Font Mr Lackboughs forground #1d580a background #70c5d0 add drop shadow
Add your copyright info
resize & save your tag
Love to see your results please email to me so i can put in my show off blog
Thankyou ♥
Written by ©Lyn(akaAngel) 31st May 2011, any similarity to any other tutorial is purely coincidental!

♥ America Beautiful ♥

To View Tag In Proper Size Click On The Tag
Supplies Needed
Scrapkit by Sweet Craving Scraps called America Beautiful this is PTU Here
Tube of choice im using ©Keith Garvey i brought my license & tube at MPT all hes tubes are at PTE Here
Mask WSL_Mask105 at weescotslass Here
Font of choice or the one im using is Carpenter Script
Lets Get Started
Open new image 650x550
Open SCS_AmericaTheBeautiful_Paper15 copy paste as new layer apply mask merge group
Open SCS_AmericaTheBeautiful_Frame1 copy paste as new layer resize 75 percent add drop shadow
Open tube copy paste as new layer duplicate drag one under frame go back to top tube erase any over lapping add drop shadow
Open SCS_AmericaTheBeautiful_Tree copy paste as new layer resize 74 percent add drop shadow
Open SCS_AmericaTheBeautiful_Eagle2 copy paste as new layer resize 45 percent add drop shadow
Open SCS_AmericaTheBeautiful_FlagOnPole copy paste as new layer resize 23 percent add drop shadow
Open SCS_AmericaTheBeautiful_Grass copy paste as new layer resize 70 percent add drop shadow
Open SCS_AmericaTheBeautiful_WordArt1 copy paste as new layer resize 70 percent add gradient glow & add drop shadow
Add your name Font Carpenter Script forground #ffffff background #7778ae add drop shadow
Add your copyright info
resize & save your tag
Love to see your results please email to me so i can put in my show off blog
Thankyou ♥
Written by ©Lyn(akaAngel) 31st May 2011, any similarity to any other tutorial is purely coincidental!
♥ Love ♥

To View Tag In Proper Size Click On The Tag
Supplies Needed
Scrapkit by Sweet Craving Scraps called Its Magic this is PTU Here
Tube of choice im using ©Elias Chatzoudis i brought my license & tube at MPT all hes tubes are at PTE Here
Mask WSL_Mask84 at weescotslass Here
Font of choice or the one im using is BickhamScriptFancy2
Lets Get Started
Open new image 650x550
Open SCS_EndlessLove_Paper3 copy paste as new layer apply mask merge group
Open SCS_EndlessLove_CastleMountain copy paste as new layer resize 67 percent add drop shadow
Open SCS_EndlessLove_Frame3 copy paste as new layer resize 75 percent add drop shadow
Open tube copy paste as new layer resize 65 percent add drop shadow
Open SCS_EndlessLove_TrellisVine copy paste as new layer resize 70 percent add drop shadow
Open SCS_EndlessLove_CattyNineTails copy paste as new layer resize 65 percent then again 85 percent add drop shadow
Open SCS_EndlessLove_Flowers1 copy paste as new layer resize 55 percent then again 85 percent add drop shadow
Open SCS_EndlessLove_Grass copy paste as new layer with pick tool just bring in sides a little add drop shadow
Open SCS_EndlessLove_Mushrooms copy paste as new layer resize 35 percent add drop shadow
Open SCS_EndlessLove_WordArt2 copy paste as new layer resize 55 percent add gradient glow & add drop shadow
Add your name Font BickhamScriptFancy2 forground #ffffff background #766a40 add drop shadow
Add your copyright info
resize & save your tag
Love to see your results please email to me so i can put in my show off blog
Thankyou ♥
Written by ©Lyn(akaAngel) 31st May 2011, any similarity to any other tutorial is purely coincidental!
♥ Its Magic ♥

To View Tag In Proper Size Click On The Tag
Supplies Needed
Scrapkit by Sweet Craving Scraps called Its Magic this is PTU Here
Mask WSL_Mask289 at weescotslass Here
Font of choice or the one im using is Valeria Script One
Lets Get Started
Open new image 650x550
Open SCS_It'sMagic_Paper1 (4) copy paste as new layer apply mask merge group
Open SCS_It'sMagic_Frame6 copy paste as new layer resize 75 percent with magic wand click in frame
Open SCS_It'sMagic_Paper6 copy paste as new layer invert delete on keyboard keep selected Open SCS_It'sMagic_CornerDoilie1 copy paste as new layer delete on keyboard drag paper & doilie under frame add drop shadow to both
Open SCS_It'sMagic_Flower5 copy paste as new layer resize 70 percent add drop shadow
Open SCS_It'sMagic_Flower12 copy paste as new layer resize 55 percent add drop shadow
Open SCS_It'sMagic_MagicSprinkles2 copy paste as new layer resize 67 percent add drop shadow drag under frame
Open SCS_It'sMagic_BumbleBee copy paste as new layer resize 36 percent add drop shadow
Open SCS_It'sMagic_Tree copy paste as new layer resize 62 percent add drop shadow
Open SSLisa - Cookie - Tink 2 copy paste as new layer resize 65 percent add drop shadow
Open Word Art copy paste as new layer resize both at 45 percent line them up merge down resize again at 85 percent add drop shadow
Add your name Font Valeria Script One forground #a8b03e background #ff9080 switching back & forth bettween the two colours & add gradient glow & add drop shadow
Add your copyright info
resize & save your tag
Love to see your results please email to me so i can put in my show off blog
Thankyou ♥
Written by ©Lyn(akaAngel) 31st May 2011, any similarity to any other tutorial is purely coincidental!
♥ Escape To the City ♥

To View Tag In Proper Size Click On The Tag
Supplies Needed
Scrapkit by Sweet Cravings Scraps called Talk About Friendship this is PTU Here
Tube of choice im using ©Elias Chatzoudis i brought my license & tube at MPT all hes tubes are at PTE Here
Mask WSL_Mask84 at weescotslass Here
Font of choice or the one im using is Impact & Valeria Script One
Lets Get Started
Open new image 650x550
Open SCS_TalkAboutFriendship_Paper1 copy paste as new layer apply mask merge group
Open SCS_TalkAboutFriendship_Frame1 copy paste as new layer resize 61 percent image rotate 90 percent left with magic wand click in frame selection modify expand by 4
Open SCS_TalkAboutFriendship_CityScape copy paste as new layer invert delete on keyboard select none drag under frame add drop shadow to frame city scape
Open SCS_TalkAboutFriendship_LeafVine copy paste as new layer resize 65 percent add drop shadow
Open SCS_TalkAboutFriendship_flower1 copy paste as new layer resize 36 percent add drop shadow
Open SCS_TalkAboutFriendship_Trunk copy paste as new layer resize 50 percent mirror add drop shadow
Open SCS_TalkAboutFriendship_MedicineBottle copy paste as new layer resize 45 percent add drop shadow
Open SCS_TalkAboutFriendship_Flower8 copy paste as new layer resize 35 percent image rotate left 90 add drop shadow
Open SCS_TalkAboutFriendship_Cateyeglasses4 copy paste as new layer resize 35 percent image rotate left 20 add drop shadow
Open tube copy paste as new layer add drop shadow
Add the words Escape To The City Font Impact forground #ffffff background #000000 add drop shadow
Add your name Font Valeria Script One forground #ffffff background #000000 add drop shadow
Add your copyright info
resize & save your tag
Love to see your results please email to me so i can put in my show off blog
Thankyou ♥
Written by ©Lyn(akaAngel) 31st May 2011, any similarity to any other tutorial is purely coincidental!
♥ Roll Up Roll Up ♥

To View Tag In Proper Size Click On The Tag
Supplies Needed
Scrapkit by Sweet Cravings Scraps called At The Circus this is PTU Here
Template394 by Mold Papa this is FTU you can grab it Here
Font of choice or the one im using is Mold Papa
Lets Get Started
Open template duplicate close the original delete easter 1 & raster 2 layers
Go To Raster 18 select all float defloat Open SCS_AtTheCircus_Paper9 copy paste as new layer select invert delete on keyboard select none add gradient glow & add drop shadow
Go to Raster 19 select all float defloat Open SCS_AtTheCircus_Paper16 copy paste as new layer select invert delete on keyboard select none add gradient glow & add drop shadow
Go To Raster 24 select all float defloat Open SCS_AtTheCircus_Paper10 copy paste as new layer select invert delete on keyboard select none add drop shadow
Go to raster 23 add drop shadow
Go to Raster 20 select all float defloat Open SCS_AtTheCircus_Paper10 copy paste as new layer select invert delete on keyboard select none add drop shadow
Go to Copy of Raster 18 select all float defloat Open SCS_AtTheCircus_Paper21 copy paste as new layer select invert delete on keyboard select none add gradient glow & add drop shadow
Go to Raster 21 add gradient glow & add drop shadow
Go to Raster 15 add gradient glow & add drop shadow
Go To Copy of Raster 15 add gradient glow & add drop shadow
Go to Copy of Raster 21 add gradient glow & add drop shadow
Delete 22 & Copy of raster 22
Go to Copy of Raster 14 select all float defloat Open SCS_AtTheCircus_Paper17 copy paste as new layer select invert delete on keyboard select none add gradient glow & add drop shadow
Go To Raster 8 select all float defloat Open SCS_AtTheCircus_Paper22 copy paste as new layer select invert delete on keyboard select none add gradient glow & add drop shadow
Open SCS_AtTheCircus_ClownCar copy paste as new layer lower opacity 46
Open SCS_AtTheCircus_Clown1 copy paste as new layer erase add drop shadow
Open SCS_AtTheCircus_Balloon4 copy paste as new layer resize 40 percent add drop shadow
Open SCS_AtTheCircus_Ringmaster copy paste as new layer resize 68 percent add drop shadow
Open SCS_AtTheCircus_Ticket copy paste as new layer resize 35 percent rotate 15 left add drop shadow
Open SCS_AtTheCircus_Magician copy paste as new layer resize 45 percent add drop shadow
Open SCS_AtTheCircus_RabbitHat copy paste as new layer resize 15 percent add drop shadow
Add your name & the words Roll Roll Up Font Mold Papa Forground #f6c314 Background #ffffff add gradient glow & drop shadow
Add your copyright info
resize & save your tag
Love to see your results please email to me so i can put in my show off blog
Thankyou ♥
Written by ©Lyn(akaAngel) 31st May 2011, any similarity to any other tutorial is purely coincidental!
♥ Spring Flair ♥

To View Tag In Proper Size Click On The Tag
Supplies Needed
Scrapkit by ToniePosers A Star called Spring Flair this is PTU Here
2 Tubes of choice im using ©Elias Chatzoudis i brought my license & tube at MPT all hes tubes are at PTE Here
Template407 by Missy this is FTU you can grab it Here
Mask WSL_Mask84 at weescotslass Here
Font of choice or the one im using is Miss Le Gatees
Lets Get Started
Open template duplicate close the original canvas size 650 x 600 delete background layer & by missy layer
Open spring flair paper 10 copy paste as new layer resize 29 percent apply mask merge group
Go To thin rect select all float defloat Open spring flair paper 2 copy paste as new layer select invert delete on keyboard select none add drop shadow
Go To thin rect select all float defloat Open spring flair paper 2 copy paste as new layer select invert delete on keyboard select none add drop shadow
Go square right select all float defloat Open spring flair paper 7 copy paste as new layer select invert delete on keyboard select none add gradient glow & add drop shadow
Go square left select all float defloat Open spring flair paper 7 copy paste as new layer select invert delete on keyboard select none add gradient glow & add drop shadow
Go to rounded rect select all float defloat Open spring flair paper 3 copy paste as new layer select invert delete on keyboard select none add drop shadow
Go to rounded rect select all float defloat Open spring flair paper 3 copy paste as new layer select invert delete on keyboard select none add drop shadow
Go to rounded rect center select all float defloat Open spring flair paper 9 copy paste as new layer arrange paper select invert delete on keyboard select none add gradient glow & add drop shadow
Go to frame back select all float defloat Open spring flair paper 2 copy paste as new layer select invert delete on keyboard select none
Go to frame select all float defloat Open spring flair paper 1 copy paste as new layer select invert delete on keyboard select none add gradient glow & add drop shadow
Go back to frame back select all float defloat open tube copy paste as new layer invert delete i used the same tutbe for the other one just mirror add drop shadow to tube
Open Main Tube copy paste as new layer add drop shadow
Open spring flair bee1 copy paste as new layer resize 15 percent mirror add drop shadow
Open spring flair flowers 5 copy paste as new layer resize 67 percent add drop shadow
Open spring flair snail1 copy paste as new layer resize 36 percent mirror add drop shadow
Open spring flair flower pot3 copy paste as new layer resize 30 percent add drop shadow
Add your name Font Miss Le Gatees forground #ffffff background #f6c314 add gradient glow & add drop shadow
Add your copyright info
resize & save your tag
Love to see your results please email to me so i can put in my show off blog
Thankyou ♥
Written by ©Lyn(akaAngel) 31st May 2011, any similarity to any other tutorial is purely coincidental!
♥ Gingeralicous ♥

To View Tag In Proper Size Click On The Tag
Supplies Needed
Scrapkit by ToniePosers called GingerSpringAlicous Mini kit this is PTU Here
Tube of choice im using ©Suzanne Woolcott you can purchase tube from Here
Mask WSL_Mask84 at weescotslass Here
Font of choice or the one im using is Minstrel Poster NF
Lets Get Started
Open new image 650x550
Open gingerspringalicous paper 10 copy paste as new layer apply mask merge group duplicate move to right slightly merge down
Open gingerspringalicous circle copy paste as new layer resize 70 percent add drop shadow
Open gingerspringalicous ginger house1 copy paste as new layer resize 27 percent lower opacity 56 add drop shadow
Open gingerspringalicous ginger head copy paste as new layer resize 10 percent add drop shadow
open gingerspringalicous gingerbread man9 copy paste as new layer resize 15 percent then resize again at 76 add drop shadow
Open gingerspringalicous choco stick copy paste as new layer resize 35 percent image rotate right 15 duplicate mirror
resize 80 percent all layers
Open tube copy paste as new layer add drop shadow
Add your name Font Minstrel Poster NF forground #a47e59 background #e1c8ad add drop shadow
Add your copyright info
resize & save your tag
Love to see your results please email to me so i can put in my show off blog
Thankyou ♥
Written by ©Lyn(akaAngel) 31st May 2011, any similarity to any other tutorial is purely coincidental!
♥ My Love ♥

To View Tag In Proper Size Click On The Tag
Supplies Needed
Scrapkit by Tonie Posers called Gothalicous Mini Kit this is PTU Here
Tube of choice im using ©Keith Garvey i brought my license & tube at MPT all hes tubes are at PTE Here
Mask WSL_Mask84 at weescotslass Here
Font of choice or the one im using is Impact & Valeria Script One
Lets Get Started
Open new image 650x550
Open gothalicous paper 16 copy paste as new layer apply mask merge group duplicate flip move to right slightly merge down
Open gothalicous frame1 copy paste as new layer with magic wand click in frame selection modify expand by 4
Open gothalicous paper 7 copy paste as new layer invert delete on keyboard select none drag under frame
Open gothalicous bow 1 copy paste as new layer resize 60 percent add drop shadow
Open gothalicous flowers copy paste as new layer resize 54 percent add drop shadow
Open gothalicous heart 1 copy paste as new layer resize 18 percent duplicate mirror add drop shadow
Open male tube copy paste as new layer add drop shadow
Open main tube tube copy paste as new layer duplicate drag this one under frame adjust blur guassian blur 17 then add effects texture effects blinds 10 14 #000000 horizontal & light checked add drop shadow
Add the words My Love Font Impact forground #641e3b background #000000 effects inner bevel add drop shadow
Add your name Font Valeria Script One forground #641e3b background #000000 add drop shadow
Add your copyright info
resize & save your tag
Love to see your results please email to me so i can put in my show off blog
Thankyou ♥
Written by ©Lyn(akaAngel) 30th May 2011, any similarity to any other tutorial is purely coincidental!
♥ Rock Around The Clock ♥

To View Tag In Proper Size Click On The Tag
Supplies Needed
Scrapkit by Tonie Posers called Back to the 50s this is PTU Here
Tube of choice im using ©Elias Chatzoudis i brought my license & tube at MPT all hes tubes are at PTE Here
Mask WSL_Mask84 at weescotslass Here
Font of choice or the one im using is 2Peas Dude
Lets Get Started
Open new image 650x550
Open paper11 copy paste as new layer apply mask merge group duplicate flip move to right slightly merge down
Open frame5 copy paste as new layer resize 60 percent with magic wand click in frame selection modify expand by 4
Open paper8 copy paste as new layer invert delete on keyboard select none drag under frame
Open jukebox1 copy paste as new layer resize 25 percent add drop shadow
Open clock2 copy paste as new layer resize 10 percent then resize 85 percent adjust sharpen add gradient glow & add drop shadow
Open record 1 copy paste as new layer resize 29 percent add drop shadow
Open record 2 copy paste as new layer resize 25 percent add drop shadow
copy record 1 again as new layer resize 25 percent add drop shadow
Open tube copy paste as new layer add drop shadow
Add your name Font 2Peas Dude forground #ffffff background #ed6ba6 add drop shadow
Add your copyright info
resize & save your tag
Love to see your results please email to me so i can put in my show off blog
Thankyou ♥
Written by ©Lyn(akaAngel) 30th May 2011, any similarity to any other tutorial is purely coincidental!
♥ Colour My Life ♥

Supplies Needed
Scrapkit by Tammy Scraps called Boo-Yah this is PTU you can get kit from
Here
Tube of choice im using ©Elias Chatzoudis i brought my license & tube at MPT all hes tubes are at PTE Here
Mask WSL_Mask166 at weescotslass Here
Font of choice or the one im using is Lovesick AOE & Carpenter Script
Lets Get Started
Open new image 650x550
Open Boo-Yah Paper 8 copy paste as new layer apply mask merge group duplicate merge group with pick tool stretch out all sides
Open Boo-Yah_Glitter Doodle 3 copy resize 80 percent mirror flip add gradient glow & add drop shadow
Open Boo-Yah_Branch With Flowers 3 copy resize 60 percent add gradient glow & add drop shadow
Open Boo-Yah_Frame 1 copy paste as new layer resize 60 percent mirror with magic wand click in frame modify expand by 2
open Boo-Yah Paper 25 copy paste as new layer invert delete on keyboard drag paper under frame while still selected open the close up tube you are going to use copy paste as new layer delete on keyboard this should be under the frame add gradient glow & add drop shadow to frame
Open Boo-Yah_Butterfly 1 copy paste as new layer resize 25 percent add drop shadow duplicate 2 times resize as you go arrange on your tag
Open your main tube copy paste as new layer add drop shadow
Add the words Colour My Life With Caos Of Trouble Font Lovesick AOE forground #2990d3 background #efee56 add gradiant glow & add drop shadow
Add your name Font Carpenter Script forground #2990d3 background #efee56 add gradiant glow & add drop shadow
Add your copyright info
resize & save your tag
Love to see your results please email to me so i can put in my show off blog
Thankyou ♥
Written by ©Lyn(akaAngel) 29th May 2011 any similarity to any other tutorial is purely coincidental!
♥ Lets Play ♥

To View Tag In Proper Size Click On The Tag
Supplies Needed
Scrapkit Lets Play Kit by scrapping Mar this is PTU you can purchase at Aussie scrap designs Here
Mask WSL_Mask148 at weescotslass Here
Font of choice or the one im using is 2Peas Chicken Shack Narrow
Lets Get Started
Open new image 650x550
Open LetsPlay_ScrappingMar (4) copy paste as new layer resize 19 percent apply mask merge group add remove noise 47 uniform monochrome checked
Open LetsPlay_ScrappingMar (47) copy paste as new layer resize 20 percent with magic wand click in frame selection modify expand by 4
Open LetsPlay_ScrappingMar (5) copy paste as new layer resize 20 percent invert delete on keyboard keep selected Open LetsPlay_ScrappingMar (51) copy paste as new layer i resized mine to 25 percent before putting on to tag select none drag paper & plane under frame add drop shadow to all
Open LetsPlay_ScrappingMar (12) copy paste as new layer resize 15 percent add drop shadow
Open LetsPlay_ScrappingMar (4) copy paste as new layer resize 16 percent add drop shadow
Open LetsPlay_ScrappingMar (36) copy paste as new layer resize 10 percent add drop shadow
Open LetsPlay_ScrappingMar (37) copy paste as new layer resize 10 percent image rotate 15 left add drop shadow
Open LetsPlay_ScrappingMar (38) copy paste as new layer resize 10 percent image rotate 15 right add drop shadow
Open LetsPlay_ScrappingMar (54) copy paste as new layer resize 10 percent add drop shadow
Open LetsPlay_ScrappingMar (31) copy paste as new layer resize 10 percent duplicate arrange on tag add drop shadow
Open LetsPlay_ScrappingMar (48) copy paste as new layer resize 29 percent add drop shadow
Open LetsPlay_ScrappingMar (57) copy paste as new layer resize 10 percent then resize again at 85 percent add drop shadow
merge all visible sharpen
Add your name Font 2Peas Chicken Shack Narrow forground #f97a0b background #f199ba add gradient glow & add drop shadow
Add your copyright info
resize & save your tag
Love to see your results please email to me so i can put in my show off blog
Thankyou ♥
Written by ©Lyn(akaAngel) 29th May 2011, any similarity to any other tutorial is purely coincidental!
♥ Hot Summer Shades ♥

Scrapkit by Ali called Summer Shade this is FTU
Here
Tube of choice im using ©Keith Garvey he is no longer selling at MPT this is where i brought this tube & my license
you can find all hes tubes PTE Here
Mask WSL_Mask178 at weescotslass Here
Lets Get Started
Open new image 650x550
Open DBA PAPER 8 copy paste as new layer apply mask merge group add remove noise random 15 monochrome checked
Open DBA STAR MESS 1 copy paste as new layer resize 54 percent add drop shadow
Open DBA GREEN PLANT 3 copy paste as new layer resize 60 percent image rotate 15 left add drop shadow
Open DBA COLOURED PLANT 1 copy paste as new layer resize 54 percent image rotate 15 left add drop shadow
Open DBA BOW 1 copy paste as new layer resize 30 percent add drop shadow
Open DBA FLOWER 1 copy paste as new layer resize 49 percent add drop shadow
Open DBA BUTTERFLY 1 copy paste as new layer resize 23 percent duplicate mirror resize this one at 49 percent duplicate this 2 times arrange give all drop shadow
Open tube copy paste as new layer add drop shadow
Add the words Hot Summer Shades Font Fontdinerdotcom Huggable forground #fffe4c background #ea5c1b add drop shadow effects texture effects weave 2 11 4 #fcf746 in both boxes filled gaps checked
Add your name FOnt Copper Alt Caps Expert forground #fffe4c background #ea5c1b add drop shadow
Add your copyright info
resize & save your tag
Love to see your results please email to me so i can put in my show off blog
Thankyou ♥
Written by ©Lyn(akaAngel) 29th May 2011, any similarity to any other tutorial is purely coincidental!
♥ Strawberry Dreams ♥

To View Tag In Proper Size Click On The Tag
Supplies Needed
Scrapkit Strawberry Dreams by Creative Scraps by Crys this is PTU Here
Tube of choice im using ©Keith Garvey he is no longer selling at MPT this is where i brought this tube & my license
you can find all hes tubes PTE Here
Mask WSL_Mask161 at weescotslass Here
Font of choice or the one im using is Impact & Satisfaction
Lets Get Started
Open new image 650x550
Open paper7 copy paste as new layer apply mask merge group
Open vines copy paste as new layer resize 85 percent mirror add drop shadow
Open flowers copy paste as new layer resize 85 percent add drop shadow
Open frame2 copy paste as new layer resize 78 percent click in frame modify expand by 2 open paper10 copy paste as new layer invert delete on keyboard keep selected open tube copy paste as new layer delete on keyboard Luminance (L) on tube add drop shadow to frame & tube
Open strawberry vine copy paste as new layer resize 85 percent add drop shadow
Open main tube copy paste as new layer add drop shadow
Open bucket copy paste as new layer resize 46 percent add drop shadow
Open lady bug copy paste as new layer resize 33 percent image rotate right 25 percent add drop shadow
Open butterfly copy paste as new layer resize 25 percent mirror add drop shadow
Add the words Strawberry Dreams Font Impact forground #be0015 background #f3c521 add drop shadow
Add your name Font Satisfaction forground #be0015 background #f3c521 add drop shadow
Add your copyright info
resize & save your tag
Love to see your results please email to me so i can put in my show off blog
Thankyou ♥
Written by ©Lyn(akaAngel) 28th May 2011, any similarity to any other tutorial is purely coincidental!
♥ Funny Little Hippos ♥

To View Tag In Proper Size Click On The Tag
Supplies Needed
Scrapkit Funny Little Hippos by Creative Scraps by Crys this is PTU Here
Tube of choice im using ©Suzanne Woolcott you can purchase tube from Here
Mask WSL_Mask84 at weescotslass Here
Font of choice or the one im using is JasmineUPC & Blueberry
Lets Get Started
Open new image 650x550
Open paper3 copy paste as new layer apply mask merge group
Open stars2 copy paste as new layer resize 74 percent sharpen add drop shadow
Open frame1 copy paste as new layer resize 82 percent add drop shadow
Open Ladder copy paste as new layer resize 74 percent add drop shadow
Open flower 4 copy paste as new layer resize 36 percent add drop shadow
Open Swing copy as new layer resize 54 percent add drop shadow
Open little hippo2 copy as new layer resize 33 percent image rotate 25 left add drop shadow
open hat4 copy paste as new layer resize 33 mirror image rotate 15 left add drop shadow
Open story book copy paste as new layer resize 35 add drop shadow add the words Funny Little Hippo Font JasmineUPC forground null background #699797 size 30 pixels add gradient glow then lower opacity 60 add drop shadow
Open little hippo3 copy paste as new layer resize 10 percent image rotate 15 left add drop shadow
Open tube copy paste as new layer add drop shadow
Add your name Font Blueberry forground #699797 background #e29999 add drop shadow
Add your copyright info
resize & save your tag
Love to see your results please email to me so i can put in my show off blog
Thankyou ♥
Written by ©Lyn(akaAngel) 28th May 2011, any similarity to any other tutorial is purely coincidental!
♥ Summer Blast ♥

To View Tag In Proper Size Click On The Tag
Supplies Needed
Scrapkit Summer Blast by polka dot scraps this is FTU Here
Tube of choice im using ©Carlos Cartagena From MPT Here
Mask WSL_Mask84 at weescotslass Here
Font of choice or the one im using is Voluta Script Pro
Lets Get Started
Open new image 650x550
Open PDS_SB- paper9 copy paste as new layer apply mask merge group
Open PDS_SB- element47 copy paste as new layer resize 49 percent image rotate 90 percent left add drop shadow duplicate image mirror flip
Open PDS_SB- frame6 copy paste as new layer resize 67 percent add drop shadow
Open PDS_SB- element1 copy paste as new layer add drop shadow
Open PDS_SB- element3 copy paste as new layer add drop shadow
Open PDS_SB- element4 copy paste as new layer resize 49 percent add drop shadow
Open PDS_SB- element49 copy paste as new layer resize 60 percent drag under frame add drop shadow
Open tube copy paste as new layer add drop shadow
Add your name & the words Summer Blast Font Voluta Script Pro forground #ff9743 background #37a5a8 add drop shadow
Add your copyright info
resize & save your tag
Love to see your results please email to me so i can put in my show off blog
Thankyou ♥
Written by ©Lyn(akaAngel) 28th May 2011, any similarity to any other tutorial is purely coincidental!
♥ Down The Rabbit Hole ♥

To View Tag In Proper Size Click On The Tag
Supplies Needed
Scrapkit by Polka Dot Scraps called Down the Rabbit Hole Goodie Train this is FTU Here
Tube of choice im using ©Nolan Worthington i purchased my tube & license From AMI which is no longer avaiable
Mask WSL_Mask84 at weescotslass Here
Font of choice or the one im using is TPF Elephant Here
Lets Get Started
Open new image 650x550
Open PDS_DRH- paper10 copy paste as new layer apply mask merge group
Open copy paste as new layer resize 58 percent duplicate image rotate 20 left duplicate the main layer again image rotate 20 right go back to main layer move this in between the 2 layers as shown below

Merge all add drop shadow 10 10 53 11.59 move cards to left of layer
Open PDS_DRH- frame3 copy paste as new layer resize 90 percent with magic wand click in frame selection modify expand by 4
Open PDS_DRH- paper4 copy paste as new layer invert delete on keyboard select none drag under frame add drop shadow to frame
Open PDS_DRH- element5 copy paste as new layer resize 70 percent effects distortion effect enhance add drop shadow
Open PDS_DRH- element1 copy paste as new layer resize 54 percent image rotate left 20 add drop shadow
Open PDS_DRH- element12 copy paste as new layer mirror add drop shadow
Open PDS_DRH- element27 copy paste as new layer resize 44 percent lower opacity 75 add drop shadow
Open tube copy paste as new layer add drop shadow
Add your name Font TPF Elephant forground #739ec1 background #c80000 inner bevel effects texture weave then add gradient glow & add drop shadow
Add your copyright info
resize & save your tag
Love to see your results please email to me so i can put in my show off blog
Thankyou ♥
Written by ©Lyn(akaAngel) 27th May 2011, any similarity to any other tutorial is purely coincidental!
♥ Pimp My Swag ♥

To View Tag In Proper Size Click On The Tag
Supplies Needed
Pimp My Swag FTU Kit By designs by vaybs Here
Tube of choice im using ©Keith Garvey I purchased this tube & my license from MPT when he was selling there Now you can purchase tube at PTE Here
Mask WSL_Mask95 at weescotslass Here
Font of choice or the one im using is PetraScriptEF-Alternate
Lets Get Started
Open new image 650x550
Open DBV_PimpMySwag_paper (5) copy paste as new layer apply mask merge group duplicate 2 times merge down
Open DBV_PimpMySwag_element (57) copy paste as new layer resize 88 percent click in frames with magic wand modify expanfd by 4
Open DBV_PimpMySwag_paper (10) copy paste as new layer invert delete drag paper under frame select none tecture effects weave 2 11 4 #000000 in both boxes fill gaps checked add drop shadow to frame
Open DBV_PimpMySwag_element (74) copy paste as new layer add drop shadow
Open DBV_PimpMySwag_element (68) copy paste as new layer resize 60 percent add drop shadow
Open DBV_PimpMySwag_element (33) copy paste as new layer drag under frame blend mode Luminace (L) lower opacity 75 add drop shadow
Open DBV_PimpMySwag_element (62) copy paste as new layer add drop shadow
Open tube copy paste as new layer add drop shadow
Add your name Font PetraScriptEF-Alternate forground #dd1c79 background #000000 add gradient glow & add drop shadow
Add your copyright info
resize & save your tag
Love to see your results please email to me so i can put in my show off blog
Thankyou ♥
Written by ©Lyn(akaAngel) 27th May 2011, any similarity to any other tutorial is purely coincidental!
♥ Under The Sea ♥

To View Tag In Proper Size Click On The Tag
Supplies Needed
Under the sea FTU Kit By Laurie Here
Tube of choice im using ©Elias Chatzoudis can purchase tube at PTE Here
Mask WSL_Mask98 at weescotslass Here
Font of choice or the one im using is P22 Da Vinci Forward
Lets Get Started
Open new image 650x550
Open lrundertheseapap 2 copy paste as new layer apply mask merge group duplicate 2 times merge down
Open lrunderthesea 4 copy paste as new layer add drop shadow
Open lrunderthesea 19 copy paste as new layer add drop shadow
Open lrunderthesea 15 copy paste as new layer add drop shadow
Open lrunderthesea 24 copy paste as new layer resize 60 percent add drop shadow
Open lrunderthesea 22 copy paste as new layer mirror add drop shadow
Open lrunderthesea 62 copy paste as new layer drag under frame add drop shadow
Open lrunderthesea 62 copy paste as new layer drag under frame add drop shadow
Open tube copy paste as new layer add drop shadow
Add your name & the words Under the Sea Font P22 Da Vinci Forward forground #943954 background #64c0f6 add gradient glow & add drop shadow
Add your copyright info
resize & save your tag
Love to see your results please email to me so i can put in my show off blog
Thankyou ♥
Written by ©Lyn(akaAngel) 27th May 2011, any similarity to any other tutorial is purely coincidental!
♥ What A Feeling ♥

To View Tag In Proper Size Click On The Tag
Supplies Needed
Scrapkit by Sweet Craving Scraps called What a Feeling this is PTU Here
Font of choice or the one im using is Inspiration
Lets Get Started
Open new image 650x550
Open SCS_WhatAFeeling_Frame2 copy paste as new layer resize 70 percent with magic wand click in frames selection modify expand by 4
Open SCS_WhatAFeeling_Paper13 copy paste as new layer invert delete on keyboard drag under frame keep selected open your 2 female tubes copy each one as new layer arrange them delete each select none add drop shadow to tubes & frame
Open SCS_WhatAFeeling_StrawBike copy paste as new layer drag under frame resize 67 percent blend mode burn
Open SCS_WhatAFeeling_LeafStem copy paste as new layer mirror add drop shadow
Open SCS_WhatAFeeling_CuteOwl copy paste as new layer resize 30 percent add drop shadow
Open SCS_WhatAFeeling_Bench copy paste as new layer resize 75 percent add drop shadow
Open SCS_WhatAFeeling_Flower6 copy paste as new layer resize 60 percent add drop shadow
Open medi_paige2 copy paste as new layer resize 70 percent add drop shadow
Open SCS_WhatAFeeling_StrawBike copy paste as new layer resize 45 percent add drop shadow
Open SCS_WhatAFeeling_Flower5 copy paste as new layer resize 20 percent sit this on basket of bike add drop shadow
Open SCS_WhatAFeeling_Tree copy paste as new layer resize 70 percent add drop shadow drag under the bike duplicate drag this one under frame erase the little bit of the tree that is showing over the frame
Add your name & the words What a Feeling Font Inspiration forground #de7825 background #ffffff add gradient glow & add drop shadow
Add your copyright info
resize & save your tag
Love to see your results please email to me so i can put in my show off blog
Thankyou ♥
Written by ©Lyn(akaAngel) 26th May 2011, any similarity to any other tutorial is purely coincidental!
♥ Sweet Serendipity ♥

To View Tag In Proper Size Click On The Tag
Supplies Needed
Scrapkit by Sweet Craving Scraps called Sweet Serendipity this is PTU Here
Mask WSL_Mask84 at weescotslass Here
Font of choice or the one im using is Mr Keningbeck
Lets Get Started
Open new image 650x550
Open SCS_SweetSerendipity_Paper20 copy paste as new layer apply mask merge group add remove noise random 18 monochrome checked
Open SCS_SweetSerendipity_Flare4 copy paste as new layer duplicate mirror flip merge down add drop shadow
Open SCS_SweetSerendipity_FlowerBranch2 copy paste as new layer resize 67 percent add drop shadow
Open SCS_SweetSerendipity_Frame3 copy paste as new layer resize 60 percent with magic wand click in frames selection modify expand by 4
Open SCS_SweetSerendipity_Paper16 copy paste as new layer invert delete on keyboard drag under frame keep selected Open Open SCS_SweetSerendipity_Cloud1 copy paste as new layer click delete on keyboard drag under frame keep selected
open medi_morningglory3 copy paste as new layer click delete on keyboard drag under frame select none add drop shadow to tube & frame
Open SCS_SweetSerendipity_Lantern copy paste as new layer resize 74 percent mirror add drop shadow
Open SCS_SweetSerendipity_ButterflySwarm copy paste as new layer resize 74 percent add drop shadow
Open SCS_SweetSerendipity_Flower1 copy paste as new layer resize 40 percent add drop shadow
Add your name & the words Sweet Serendipity Font Mr Keningbeck forground #a1b1a8 background #000000 add drop shadow
Add your copyright info
resize & save your tag
Love to see your results please email to me so i can put in my show off blog
Thankyou ♥
Written by ©Lyn(akaAngel) 26th May 2011, any similarity to any other tutorial is purely coincidental!
♥ Welcome ♥

To View Tag In Proper Size Click On The Tag
Supplies Needed
Scrapkit by Sweet Craving Scraps called Only In My Dreams this is PTU Here
Tube of choice im using ©Elias Chatzoudis i brought my license & tube at MPT all hes tubes are at PTE Here
Mask WSL_Mask84 at weescotslass Here
Font of choice or the one im using is BickhamScriptFancy2
Lets Get Started
Open new image 650x550
Open SCS_OnlyInMyDreams_Paper16 copy paste as new layer apply mask merge group add remove noise Random 18 monocrome checked
Open SCS_OnlyInMyDreams_Frame1 copy paste as new layer resize 75 percent add drop shadow
Open SCS_OnlyInMyDreams_Flare2 copy paste as new layer resize 90 percent add drop shadow
Open SCS_OnlyInMyDreams_LightPost copy paste as new layer resize 67 percent add drop shadow
Open SCS_OnlyInMyDreams_FlowerSwag copy paste as new layer resize 85 percent image flip add drop shadow
Open SCS_OnlyInMyDreams_Flower3 copy paste as new layer resize 90 percent add drop shadow
Open your tube copy paste as new layer add drop shadow
Open SCS_OnlyInMyDreams_CuteFairy copy paste as new layer resize 25 percent mirror add drop shadow
Add your name Font BickhamScriptFancy2 forground #8f4c7c background #dbacc8 add drop shadow
Add your copyright info
resize & save your tag
Love to see your results please email to me so i can put in my show off blog
Thankyou ♥
Written by ©Lyn(akaAngel) 26th May 2011, any similarity to any other tutorial is purely coincidental!
♥ Waiting On A Friend ♥

To View Tag In Proper Size Click On The Tag
Supplies Needed
Scrapkit by Sweet Craving Scraps called Monster Mash this is PTU Here
Mask WSL_Mask84 at weescotslass Here
Font of choice or the one im using is BattleLines & Carpenter Script
Lets Get Started
Open new image 650x550
Open SCS_MonsterMash_Paper10 copy paste as new layer apply mask merge group duplicate flip move to right slightly merge down
Open SCS_MonsterMash_Frame1 copy paste as new layer resize 70 percent with magic wand click in frame selection modify expand by 4
Open SCS_MonsterMash_Paper16 copy paste as new layer invert delete on keyboard select none drag under frame add drop shadow to frame
Open SCS_MonsterMash_Fence copy paste as new layer resize 60 percent duplicate 2 times mirror arrange on tag add drop shadow
Open SCS_MonsterMash_Grass copy paste as new layer resize 25 percent duplicate 4 times add drop shadow
Open SCS_MonsterMash_CuteMonster4 copy paste as new layer resize 44 percent add drop shadow
Open SCS_MonsterMash_FlowerPod copy paste as new layer resize 6- percent add drop shadow
Open SCS_MonsterMash_CuteMonster2 copy paste as new layer resize 47 percent add drop shadow
Open SCS_MonsterMash_MonsterFunHouse copy paste as new layer resize 54 percent drag under fence add drop shadow
Open SCS_MonsterMash_CuteMonster10 copy paste as new layer resize 24 percent add drop shadow
Add the words Waiting On A Friend Font BattleLines forground #99a31f background #fac63f add drop shadow 10 10 53 5.80
Add your name Font Carpenter Script forground #fac63f background #99a31f add drop shadow 10 10 53 5.80
Add your copyright info
resize & save your tag
Love to see your results please email to me so i can put in my show off blog
Thankyou ♥
Written by ©Lyn(akaAngel) 26th May 2011, any similarity to any other tutorial is purely coincidental!
♥ In The Still Of The Night ♥

To View Tag In Proper Size Click On The Tag
Supplies Needed
Scrapkit by Sweet Craving Scraps called In The Still Of The Night this is PTU Here
Tube of choice im using ©Keith Garvey i brought my license & tube at MPT all hes tubes are at PTE Here
Mask WSL_Mask148 at weescotslass Here
Font of choice or the one im using is Franklin Gothic Heavy & MrBlaketon
Lets Get Started
Open new image 650x550
Open SCS_ITSOTN_Paper16 copy paste as new layer apply mask merge group
Open SCS_ITSOTN_Tree copy paste as new layer resize 70 percent add drop shadow
Open SCS_ITSOTN_Frame1 copy paste as new layer resize 75 percent with magic wand click in frame selection modify expand by 4
Open SCS_ITSOTN_Paper7 copy paste as new layer invert delete on keyboard drag under frame Open SCS_ITSOTN_Cloud resize 45 percent drag under frame
Open SCS_ITSOTN_NightCat copy paste as new layer resize 45 percent mirror add drop shadow
Open SCS_ITSOTN_Clock copy paste as new layer resize 54 percent add gradient glow #9086b5
Open SCS_ITSOTN_FlowerDoodle3 copy paste as new layer resize 54 percent add gradient glow #9086b5
Add the words In The Still Of The Night Font Franklin Gothic Heavy forground #aa9fc8 background #000000 add gradient glow #9086b5 & add drop shadow
Add your name Font MrBlaketon forground #aa9fc8 background #000000 add gradient glow #9086b5 & add drop shadow
Open your tube copy paste as new layer add drop shadow
Add your copyright info
resize & save your tag
Love to see your results please email to me so i can put in my show off blog
Thankyou ♥
Written by ©Lyn(akaAngel) 25th May 2011, any similarity to any other tutorial is purely coincidental!
♥ Honestly ♥

To View Tag In Proper Size Click On The Tag
Supplies Needed
Scrapkit by Sweet Craving Scraps called Honestly this is PTU Here
Tube of choice im using ©Keith Garvey i brought my license & tube at MPT all hes tubes are at PTE Here
Mask WSL_Mask10 at weescotslass Here
Font of choice or the one im using is Love
Lets Get Started
Open new image 650x550
Open SCS_Honestly_Paper14 copy paste as new layer apply mask merge group
Open SCS_Honestly_Frame5 copy paste as new layer resize 70 percent with magic wand click in frames selection modify expand by 4
Open SCS_Honestly_Paper13 copy paste as new layer invert delete on keyboard drag under frame keep selected open your 2 female tubes copy each one as new layer arrange them delete each select none add drop shadow to tubes & frame
Open SCS_Honestly_Bottle2 copy paste as new layer resize 36 percent add drop shadow
Open SCS_Honestly_FlowerDoodle6 copy paste as new layer resize 65 percent add drop shadow
Open your male tube copy paste as new layer add drop shadow
Add your name & the words Honestly Font Love forground #731c7b background #b483a0 add gradient glow & add drop shadow
Add your copyright info
resize & save your tag
Love to see your results please email to me so i can put in my show off blog
Thankyou ♥
Written by ©Lyn(akaAngel) 25th May 2011, any similarity to any other tutorial is purely coincidental!
♥ Cherry Blossom ♥

To View Tag In Proper Size Click On The Tag
Supplies Needed
Scrapkit by Sweet Craving Scraps called Love Story this is PTU Here
Mask WSL_Mask106 at weescotslass Here
Font of choice or the one im using is LittleRickeyNF
Lets Get Started
Open new image 650x550
Open SCS_LoveStory_Paper12 copy paste as new layer apply mask merge group
Open SCS_LoveStory_Frame3 copy paste as new layer resize 70 percent with magic wand click in frame selection modify expand by 4
Open SCS_LoveStory_Paper5 copy paste as new layer invert delete on keyboard drag under frame Open SCS_LoveStory_DangleHearts2 copy paste as new layer select none add drop shadow
Open SCS_LoveStory_PuffHearts1 copy paste as new layer mirror add drop shadow
Open SCS_LoveStory_CuteButterfly2 copy paste as new layer resize 27 percent duplicate mirror add drop shadow
Open SCS_LoveStory_Ladder copy paste as new layer resize 75 percent add drop shadow
Open SCS_LoveStory_Cherries copy paste as new layer resize 45 percent add drop shadow
Open your tube copy paste as new layer add drop shadow
Add your name & the words Cherry Blossom Font LittleRickeyNF forground #a32623 background #fdd6d7 add gradient glow & add drop shadow
Add your copyright info
resize & save your tag
Love to see your results please email to me so i can put in my show off blog
Thankyou ♥
Written by ©Lyn(akaAngel) 25th May 2011, any similarity to any other tutorial is purely coincidental!
♥ Bee Free ♥

To View Tag In Proper Size Click On The Tag
Supplies Needed
Scrapkit by Sweet Craving Scraps called Honey Bee this is PTU Here
Font of choice or the one im using is Glider Girls
Lets Get Started
Open new image 650x550
Open SCS_HoneyBee_Frame8 copy paste as new layer resize 68 percent with magic wand click in frames selection modify expand by 4
Open SCS_HoneyBee_Paper10 copy paste as new layer invert delete on keyboard drag under frame keep selected Open Open SCS_HoneyBee_Cloud2 copy paste as new layer click delete on keyboard drag under frame keep selected
open SCS_HoneyBee_HoneySpill copy paste as new layer click delete on keyboard drag under frame select none add drop shadow frame
Open SCS_HoneyBee_Tree copy paste as new layer resize 75 percent add drop shadow
Open SCS_HoneyBee_CuteBee1 copy paste as new layer resize 35 percent add drop shadow
Open SSLisa - Cookie - Candy Fae - Butterscotch 2 copy paste as new layer resize 75 percent add drop shadow
Open SCS_HoneyBee_Flower7 copy paste as new layer resize 64 percent mirror duplicate mirror resize 82 percent add drop shadow
Open SCS_HoneyBee_LeafVine copy paste as new layer resize 54 percent add drop shadow
Open SCS_HoneyBee_CuteBee2 copy paste as new layer resize 35 percent add drop shadow
Open SCS_HoneyBee_WordArt3 copy paste as new layer resize 33 percent select all float defloat open SCS_HoneyBee_Paper5 copy paste as new layer invert delete on keyboard add drop shadow
Add your name Font Glider Girls forground #000000 background #000000 select all float defloat open SCS_HoneyBee_Paper5 copy paste as new layer invert delete on keyboard add drop shadow
Add your copyright info
resize & save your tag
Love to see your results please email to me so i can put in my show off blog
Thankyou ♥
Written by ©Lyn(akaAngel) 25th May 2011, any similarity to any other tutorial is purely coincidental!
♥ Even Angels Will Fall ♥

To View Tag In Proper Size Click On The Tag
Supplies Needed
Scrapkit Tiffany and Co Mini Kit this is FTU By P & A Dezigns
Here
Tube of choice im using ©Michael Calandra You can Purchase the tube Here
Mask WSL_Mask226 at weescotslass Here
Font of choice or the one im using is Miss Le Gatees
Lets Get Started
Open new image 650x550
Open paper15 copy paste as new layer apply mask merge group
Open stitchframe1 copy paste as new layer click in frame with magic wand modify expand by 3 Open paper13 copy paste as new layer invert delete on keyboard drag under frame effects texture effects weave with this setting 2 11 4 #ffffff in both boxes add drop shadow to frame
Open stringbow1 copy paste as new layer erase the sides a bit add drop shadow
Open flower4 copy paste as new layer resize 64 percent add drop shadow
Open flower2 copy paste as new layer resize 36 percent duplicate 2 times arrange on tag add drop shadow
Open tube copy paste as new layer add drop shadow
Add your name & the words Even Angels Will Fall Font Miss Le Gatees forground #18b0b2 background #d9cfd0 add gradient glow & add drop shadow
Add your copyright info
resize & save your tag
Love to see your results please email to me so i can put in my show off blog
Thankyou ♥
Written by ©Lyn(akaAngel) 25th May 2011, any similarity to any other tutorial is purely coincidental!
♥ New Beginnings ♥

To View Tag In Proper Size Click On The Tag
Supplies Needed
Scrapkit New Beginnings Mini Kit this is FTU By P & A Dezigns
Here
Tube of choice im using ©Keith Garvey you can purchase the tube PTE Here
Mask WSL_Mask10 at weescotslass Here
Font of choice or the one im using is A&S Black Swan
Lets Get Started
Open new image 650x550
Open Paper1 copy paste as new layer apply mask merge group
Open PAPER 10 copy paste as new layer click in frame with magic wand modify expand by 3 Open paper4 copy paste as new layer invert delete on keyboard drag under frame add drop shadow to frame
Open 22 copy paste as new layer resize 60 percent add drop shadow
Open 28 copy paste as new layer add drop shadow
Open 29 copy paste as new layer resize 29 percent image rotate 20 right duplicate 2 times arrange on tag mirror one of them add drop shadow
Open tube copy paste as new layer drag under frame duplicate send this to top erase any over lapping on both layers add drop shadow
Add your name & the words New Beginnings Font A&S Black Swan forground #c43558 background #f0a6b3 add drop shadow
Add your copyright info
resize & save your tag
Love to see your results please email to me so i can put in my show off blog
Thankyou ♥
Written by ©Lyn(akaAngel) 25th May 2011, any similarity to any other tutorial is purely coincidental!
♥ Spring Dreams ♥

To View Tag In Proper Size Click On The Tag
Supplies Needed
Scrapkit BCS Spring Dreams Kit this is PTU By Babycakes Scraps you can purchase at Aussie Scraps
Here
Tube of choice im using ©Pinuptoons at CDO Here
Mask WSL_Mask223 & 38 at weescotslass Here
Font of choice or the one im using is Yevida Potens
Lets Get Started
Open new image 650x550
Open BCS peach paper copy paste as new layer apply mask223 merge group
Open BCS pink paper copy paste as new layer apply mask38 merge group
Open bcs birdhouse and bird copy paste as new layer resize 64 percent add drop shadow
Open bcs doodle copy paste as new layer duplicate flip duplicate image rotate right 90 duplicate mirror close of mask layer & bottom layer merge all visibile resize 125 percent sharpen add drop shadow
Open BCS floral cluster copy paste as new layer resize 55 percent mirror add drop shadow
Open bcs flowers copy paste as new layer resize 74 percent mirror add drop shadow
Open bfly4 copy paste as new layer resize 55 percent mirror add drop shadow
Open tube copy paste as new layer add drop shadow
Add your name & the words Spring Dreams Font Yevida Potens forground #823437 background #ffd5ba add drop shadow then add gradient glow
Add your copyright info
resize & save your tag
Love to see your results please email to me so i can put in my show off blog
Thankyou ♥
Written by ©Lyn(akaAngel) 25th May 2011, any similarity to any other tutorial is purely coincidental!
♥ A Spring In My Step ♥

To View Tag In Proper Size Click On The Tag
Supplies Needed
Scrapkit A spring in my step Kit this is PTU By Jen's Sweet Temptations you can purchase at Aussie Scraps
Here
Mask WSL_Mask84 at weescotslass Here
Font of choice or the one im using is Maxine Script
Lets Get Started
Open new image 650x550
Open Paper3 copy paste as new layer apply mask merge group
Open flower9 copy paste as new layer add drop shadow
Open Frame3 copy paste as new layer with magic wand click in frame Open Paper7 copy paste as new layer invert delete on keyboard select none drag under frame add drop shadow to frame
Open BFly1 copy paste as new layer add drop shadow
Open Decor4 copy paste as new layer resize 54 percent add drop shadow
Open flower6 copy paste as new layer add drop shadow
Open medi_sunny spring3 copy paste as new layer add drop shadow
Add your name & the words A Spring In My Step Font Maxine Script forground #72c000 background #ffffff add drop shadow
Add your copyright info
resize & save your tag
Love to see your results please email to me so i can put in my show off blog
Thankyou ♥
Written by ©Lyn(akaAngel) 23rd May 2011, any similarity to any other tutorial is purely coincidental!
♥ PS I Love You ♥

To View Tag In Proper Size Click On The Tag
Supplies Needed
Scrapkit by filippok & nigusha called ps i love you this is FTU you can download kit from
Here
Tube of choice im using ©Keith Garvey i brought my tube & licence from MPT which he is no longer selling there you can find all hes tubes at PTE Here
Mask WSL_Mask84 at weescotslass Here
Font of choice or the one im using is MrBlaketon
Lets Get Started
Open new image 650x550
Open FILIPPOK_P.S. I love you_ element (12) copy paste as new layer resize 50 percent add drop shadow
Open FILIPPOK_P.S. I love you_ paper(1) copy paste as new layer apply mask merge group
Open FILIPPOK_P.S. I love you_ element (24) copy paste as new layer resize 60 percent add drop shadow
Open FILIPPOK_P.S. I love you_ element (20) copy paste as new layer resize 65 percent duplicate image flip mirror add drop shadow
Open FILIPPOK_P.S. I love you_ element (16) copy paste as new layer resize 33 percent mirror add drop shadow
Open FILIPPOK_P.S. I love you_ element (6) copy paste as new layer resize 60 percent mirror then resize again at 75 percent add drop shadow
Open FILIPPOK_P.S. I love you_ WA (2) copy paste as new layer resize 30 percent add gradient glow add drop shadow
Open tube copy paste as new layer add drop shadow
Add your name Font MrBlaketon forground Null background #000000 add gradient glow & add drop shadow
Add your copyright info
resize & save your tag
Love to see your results please email to me so i can put in my show off blog
Thankyou ♥
Written by ©Lyn(akaAngel) 23rd May 2011, any similarity to any other tutorial is purely coincidental!
♥ Walk On The Beach ♥

To View Tag In Proper Size Click On The Tag
Supplies Needed
Scrapkit by puddicat creations called Oceans Love this is PTU you can download kit from
Here
Tube of choice im using ©Keith Garvey i brought my licence & this tube at MPT you now can get it at at PTE Here
Font of choice or the one im using is Miss Le Gatees
Lets Get Started
Open new image 650x550
Open pdc_paper7 copy paste as new layer apply mask merge group
Open pdc_frame2 copy paste as new layer resize 70 percent image rotate 90 percent left with magic wand click in frame Open pdc_papers8 copy paste as new layer invert delete on keyboard select none drag under frame add drop shadow to frame
Open pdc_net1 copy paste as new layer resize 75 percent resize again at 90 percent image rotate 90 percent right add drop shadow
Open pdc_ferns1 copy paste as new layer resize 40 percent add drop shadow
Open pdc_boat1 copy paste as new layer resize 60 percent image rotate 10 percent left add drop shadow
Open pdc_palmtree2 copy paste as new layer resize 64 percent add drop shadow
Open pdc_ferns1 copy paste as new layer resize 40 percent mirror add drop shadow
Open pdc_shell2 copy paste as new layer resize 33 percent add drop shadow
Open pdc_bird1 copy paste as new layer resize 24 percent duplicate mirror resize 65 percent add drop shadow
Open pdc_starfish1 copy paste as new layer resize 67 percent add drop shadow
Open tube copy paste as new layer add drop shadow
Add your name & the words Walk Along The Beach Font Miss Le Gatees forground #ffffff background #ffffff add drop shadow
Add your copyright info
resize & save your tag
Love to see your results please email to me so i can put in my show off blog
Thankyou ♥
Written by ©Lyn(akaAngel) 23rd May 2011, any similarity to any other tutorial is purely coincidental!
♥ Shooting Star ♥

To View Tag In Proper Size Click On The Tag
Supplies Needed
Sweet Cravings Scraps called Shooting Star Here
Tube of choice im using ©Keith Garvey i brought my license & tube at MPT all hes tubes are at PTE Here
Mask WSL_Mask84 at weescotslass Here
Font of choice or the one im using is Miss Lankfort
Lets Get Started
Open new image 650x550
Open SCS_ShootingStar_Paper13 copy paste as new layer apply mask merge group duplicate mirror flip
Open SCS_ShootingStar_Frame2 copy paste as new layer resize 75 percent with magic wand click in frame Open SCS_ShootingStar_Paper12 copy paste as new layer invert delete on keyboard select none drag under frame add drop shadow to frame
Open SCS_ShootingStar_FlowerSprigs2 copy paste as new layer resize 85 percent add drop shadow
Open SCS_ShootingStar_PaperStars1 copy paste as new layer drag under frame add drop shadow
Open SCS_ShootingStar_Glitter2 copy paste as new layer drag under frame add drop shadow
Open SCS_ShootingStar_Bow2 copy paste as new layer resize 55 percent add drop shadow
Open SCS_ShootingStar_FlowerGarland copy paste as new layer add drop shadow
Open tube copy paste as new layer duplicate drag this one under the frame go to top tube & erase add drop shadow to bottom tube
Add your name Font Miss Lankfort forground #7171e6 background #dd91e7 add drop shadow & add gradient glow
Add your copyright info
resize & save your tag
Love to see your results please email to me so i can put in my show off blog
Thankyou ♥
Written by ©Lyn(akaAngel) 20th May 2011, any similarity to any other tutorial is purely coincidental!
♥ I'm Yours ♥

To View Tag In Proper Size Click On The Tag
Supplies Needed
Scrapkit by babsbitzybeez called Whats Up this is FTU
Here
Tube of choice im using ©Elias Chatzoudis to purchase tubes go Here
All my tubes are a guide if the tubes i select are unavailble please use another tube of your liking thankyou
Mask WSL_Mask84 at weescotslass Here
Font of choice or the one im using is Mon Amour Script Alt
Lets Get Started
Open new image 650x550
Open BBD_WU_PAPER_08 copy paste as new layer apply mask merge group duplicate flip move to right slightly merge down
Open BBD_WU_FRAME_03 copy paste as new layer image rotate 90 percent resize 85 percent with magic wand click in frames selection modify expand by 6
Open BBD_WU_PAPER_04 copy paste as new layer invert delete on keyboard select none drag under frame adjust add remove noise Random 15 Monochrome checked
Open your tube copy paste as new layer duplicate tube drag this one under frame adjust blur guassian blur 16 add drop shadow to tube & frame
Open BBD_WU_FLOWER_05 copy paste as new layer drag under frame add drop shadow
Open BBD_WU_HEARTCHARM_01 copy paste as new layer resize 70 percent add drop shadow
Open BBD_WU_BOW_01 copy paste as new layer resize 50 percent add drop shadow
Open BBD_WU_FLOWER_05 copy paste as new layer resize 50 percent add drop shadow
Add your name & the words I'm Yours Font Mon Amour Script Alt forground #8e0000 background #5a0000 add gradient glow & add drop shadow
Add your copyright info
resize & save your tag
Love to see your results please email to me so i can put in my show off blog
Thankyou ♥
Written by ©Lyn(akaAngel) 14th May 2011, any similarity to any other tutorial is purely coincidental!
♥ Its My Party ♥

To View Tag In Proper Size Click On The Tag
Supplies Needed
Scrapkit by Randyssin called Surprise Party this is FTU Here
Tube of choice im using ©Elias Chatzoudis i brought my license & tube at MPT all hes tubes are at PTE Here
Mask WSL_Mask84 at weescotslass Here
Font of choice or the one im using is Bumbazoid
Lets Get Started
Open new image 650x550
Open rs_pap2 copy paste as new layer apply mask merge group duplicate flip move to right slightly merge down
Open rs_sparklez4 copy paste as new layer resize 75 percent add drop shadow
Open rs_frame8 copy paste as new layer resize 69 percent mirror with magic wand click in frames selection modify expand by 6
Open rs_pap15 copy paste as new layer invert delete on keyboard select none drag under frame add drop shadow frame
Open rs_gift2 copy paste as new layer resize 30 percent add drop shadow
Open rs_animal3 copy paste as new layer resize 25 percent add drop shadow
Open rs_balloonbunch2 copy paste as new layer resize 70 percent add drop shadow
Open rs_gift1 copy paste as new layer resize 25 percent add drop shadow
Open your tube copy paste as new layer add drop shadow
Add your name & the words It's My Party Font Bumbazoid forground #ae9bbb background #e89196 apply effects inner bevel add gradient glow & add drop shadow
Add your copyright info
resize & save your tag
Love to see your results please email to me so i can put in my show off blog
Thankyou ♥
Written by ©Lyn(akaAngel) 14th May 2011, any similarity to any other tutorial is purely coincidental!
Subscribe to:
Posts (Atom)


