♥ Welcome ♥
♥ My Blinkie ♥

Showing posts with label Autumn. Show all posts
Showing posts with label Autumn. Show all posts
♥ Autumn♥

To View Tag In Proper Size Click On The Tag
Supplies Needed
Scrapkit by disyasdigitalsdesigns called FANTASY PLACES OF FALL KIT this is PTU
Mask Vix Mask221 Here
Font of choice or the one im using is Freestyle Script
Lets Get Started
Open new image 665x677
Open Disyas_FantasyPF_P7 copy paste as new layer apply mask merge group duplicate merge down duplicate again merge down
Open Disyas_FantasyPF_Fr7 copy paste as new layer click in frames with magic wand expand modify by 5
Open Disyas_FantasyPF_P11 copy paste as new layer invert delete on keyboard select none drag under frame select none give frame a drop shadow
Open Disyas_FantasyPF_E46 copy paste as new layer click in each window with magic wand modify expand by 4
Open Disyas_FantasyPF_P9 copy paste as new layer invert delete on keyboard select none lower opacity 65 percent give window a drop shadow
Open Disyas_FantasyPF_E76 copy paste as new layer resize 45 percent add drop shadow
Open Disyas_FantasyPF_E16 copy paste as new layer resize 65 percent add drop shadow
Open Disyas_FantasyPF_E47 copy paste as new layer resize 75 percent add drop shadow
Open Disyas_FantasyPF_E90 copy paste as new layer resize 45 percent add drop shadow
Open Gemini_Apple_07 copy paste as new layer resize 75 percent mirror add drop shadow
Open Disyas_FantasyPF_E2 copy paste as new layer resize 35 percent add drop shadow
Add your name Font Freestyle Script forground #92471d background #f1cb76 add drop shadow
Add your copyright info
resize & save your tag
If you like this Tut check the boxes below Love to see your results please email to me
Thankyou ♥
Written by ©Lyn(akaAngel) 12th October 2012, any similarity to any other tutorial is purely coincidental!

♥ Autumn Is Here ♥

To View Tag In Proper Size Click On The Tag
Supplies Needed
Scrapkit Autumn Is Here by Vickies Scraps this is PTU Here
Mask WSL_Mask253 at weescotslass
Tubes of choice im using ©Elias Chatzoudis to purchase tubes go Here
All my tubes are a guide if the tubes i select are unavailble please use another tube of your liking thankyou
Font of choice or the one im using is Whisper
Lets Get Started
Open AIH_Paper12_VS copy paste as new layer apply mask merge group
Open AIH_Frame3_VS copy paste as new layer resize 80 percent with magic wand click in frame modify expand by 5
Open Tube copy paste as new layer delete on keyboard add drop shadow
Open AIH_Vine_VS copy paste as new layer resize 55 percent add drop shadow
Open AIH_Flower4_VS copy paste as new layer resize 75 percent flip add drop shadow
Open AIH_Flower9_VS copy paste as new layer resize 25 percent then resize 60 percent drag this one above the grass add drop shadow
Open AIH_Grass2_VS copy paste as new layer add drop shadow
Open AIH_WordArt2_VS copy paste as new layer resize 75 percent add gradient glow add drop shadow
Open AIH_Butterfly_VS copy paste as new layer resize 30 percent add drop shadow
Open AIH_Lantern_VS copy paste as new layer resize 30 percent erase seemy tag for reference add drop shadow
Add your name font Whisper forground #7f6c60 background #f6a228 add drop shadow
Add your copyright info
resize & save your tag
If you like this Tut check the boxes below Love to see your results please email to me
Thankyou ♥
Written by ©Lyn(akaAngel) 8th October 2012, any similarity to any other tutorial is purely coincidental!
♥ Autumn Fair ♥

To View Tag In Proper Size Click On The Tag
Supplies Needed
Scrapkit Autumn Fair by tootypup this is PTU
Mask WSL_Mask84 at weescotslass
Filters Unlimited
Xero Porcelain
Font of choice or the one im using is Biscotti Regular
Lets Get Started
Open new image 650x550
Open TP_Ferris Wheel_01 copy paste as new layer resize 65 percent mirror add drop shadow
Open TP_BigTop_01 copy paste as new layer resize 60 percent add drop shadow
Open TP_AutumnLeaves_01 copy paste as new layer
Open TP_ParkBench_01 copy paste as new layer resize 25 percent add drop shadow
Open TP_AutumnFair_05 copy paste as new layer resize 30 percent add drop shadow
Open TP_AutumnFair_12 copy paste as new layer resize 25 percent add drop shadow
Open TP_AutumnFair_15 copy paste as new layer resize 60 percent add drop shadow
Open TP_FeelTheMusic_03 copy paste as new layer resize 30 percent add drop shadow
Open TP_AutumnFair_01 copy paste as new layer resize 40 percent mirror add drop shadow
Open TP_Background_03 copy paste as new layer arrange send to bottom play around with this paper to suit how you like it
Merge all visible
Apply filters unlimited with theis setting

Apply Xero Porcelain with this setting

Open new image 650 x550
Copy the tag we did paste as new layer resize 65 percent
image rotate 15 right add drop shadow
image rotate 15 right add drop shadow
Open TP_AutumnLeaves_01 copy paste as new layer
Open TP_Bow_01 copy paste as new layer resize 25 percent add drop shadow
Open TP_Paper_08 copy paste as new layer Apply mask merge group Arrange send to bottom
Open TP_AutumnFair_01 copy paste as new layer resize 65 percent add drop shadow
Add your name & the words Autumn Fair Font Biscotti Regular forground #643321 background #c68643 add drop shadow
Add your copyright info
resize & save your tag
If you like this Tut check the boxes below Love to see your results please email to me
Thankyou ♥
Written by ©Lyn(akaAngel) 28th September 2012, any similarity to any other tutorial is purely coincidental!
♥ Hint Of Fall ♥
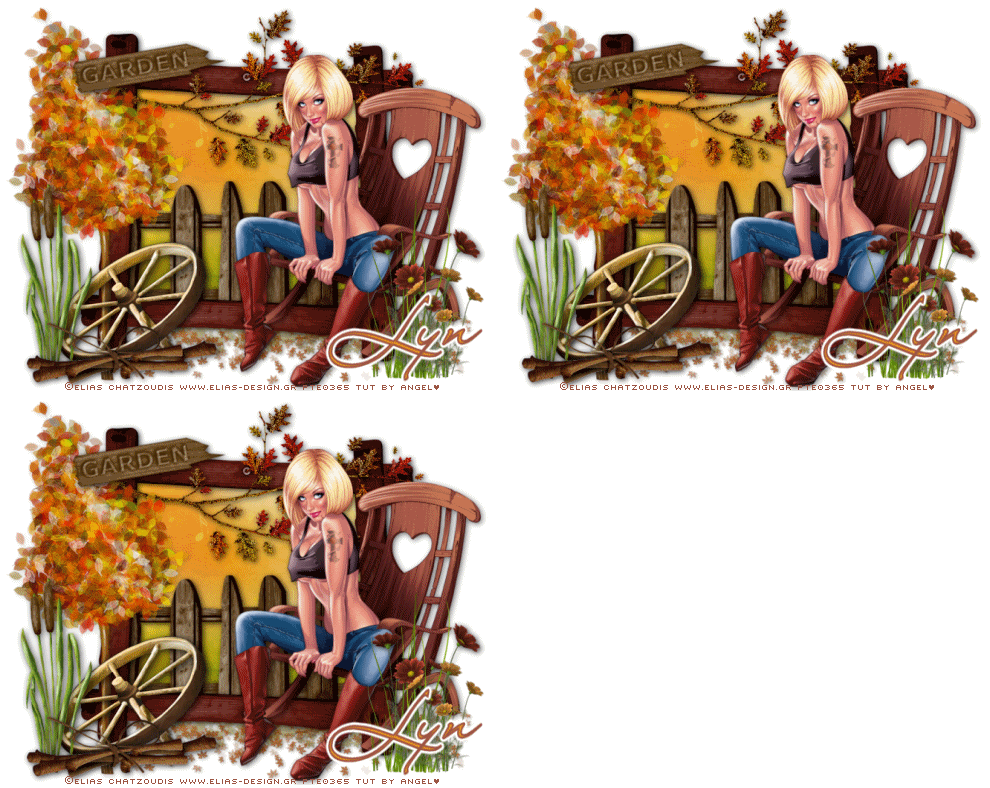
To View Tag In Proper Size Click On The Tag
Supplies Needed
Scrapkit Hint of Fall TS By Creative Scraps by Crys Here
Tubes of choice im using ©Elias Chatzoudis to purchase tubes go Here
All my tubes are a guide if the tubes i select are unavailble please use another tube of your liking thankyou
Font of choice or the one im using is LainieDaySH
DSB Flux Bright Noise
Lets Get Started
Open 650x650 new image
Open HC_Paper_12 copy paste as new layer apply mask merge group
Open HOF_Frame_1 copy paste as new layer resize 75 percent click in frame with magic wand expand modify expand 6
Open HOF_Paper_1 copy paste as new layer selection invert delete on keyboard drag under frame select none
Open HOF_Element_60 copy paste as new layer resize 65 percent drag this under frame add drop shadow
Open HOF_Element_31 copy paste as new layer resize 74 percent flip add drop shadow
Open tube copy paste as new layer add drop shadow
Open HOF_Element_32 copy paste as new layer resize 80 percent add drop shadow
Open HOF_Element_18 copy paste as new layer resize 50 percent add drop shadow
Open HOF_Element_7 copy paste as new layer copy paste as new layer resize 45 percent add drop shadow
Open HOF_Element_6 copy paste as new layer resize 34 percent add drop shadow
Open HOF_Element_19 copy paste as new layer resize 25 percent add drop shadow
Open HOF_Element_17 copy paste as new layer resize 45 percent add drop shadow
Open HOF_Element_5 copy paste as new layer resize 45 percent add drop shadow image rotate 10 percent left
Open HOF_Element_45 copy paste as new layer resize 55 percent mirror add drop shadow
Open HOF_Element_68 copy paste as new layer resize 55 percent drag this under frame add drop shadow
Add your name Font LainieDaySH forground #9e5644 background #e48c22 add drop shadow
Add your copyright info
we now be doing the Animation
Go back to HOF_Element_31 apply dsb bright noise with this setting

Right click on tag copy merge open animation shop
Copy paste as new layer
Go back to psp
undo bright noise redo bright noise click in darkness 2 times
right click on tag copy merge take back to animation shop paste after currant layer
Go back to Psp
Go back to psp
undo bright noise redo bright noise click in darkness 3 times
right click on tag copy merge take back to animation shop paste after currant layer
view animation
resize your tag save your tag as gif here is one without Animation

If you like this Tut check the boxes below Love to see your results please email to me
Thankyou ♥
Written by ©Lyn(akaAngel) 28th September 2012, any similarity to any other tutorial is purely coincidental!
♥ Autumn Cowgirl ♥

To View Tag In Proper Size Click On The Tag Animated Tag is at end of Tut
Supplies Needed
Scrapkit Wishing Well This is FTU By artelfs Here
Tube of choice im using Keith Garvey This is a PTU Tube Here
if tube are unavaiable please use another tube
Mask WSL_Mask5 at weescotslass Here
Font of choice or the one im using is AL Sandra
Plugin VM Toolbox Brightness Noise
Animation Shop
Lets Get Started
Open new image 650x550
Open paper3WW-ScrapElf copy paste as new layer resize 25 percent apply mask merge group (duplicate merge) down repeat()
Open frame1WW-ScrapElf copy paste as new layer resize 25 percent with magic wand click in frame selection modify expand by 5
Open paper1WW-ScrapElf copy paste as new layer selection invert delete on ketboard drag under frame add drop shadow to frame
Open potpurri4WW-ScrapElf copy paste as new layer resize 30 percent add drop shadow drag under frame
Open frame3WW-ScrapElf copy paste as new layer resize 15 percent with magic wand click in frame selection modify expand by 5
Open paper5-ScrapElf copy paste as new layer selection invert delete on ketboard drag under frame keep selected Open Tube copy paste as new layer delete on keyboard select none add drop shadow to frame
Open string2WW-ScrapElf copy paste as new layer resize 15 percent add drop shadow
Open potpurri2WW-ScrapElf copy paste as new layer resize 20 percent add drop shadow
Open leaf2WW-ScrapElf copy paste as new layer resize 20 percent add drop shadow
Open flower4WW-ScrapElf copy paste as new layer resize 20 percent image rotate 90 percent repeat rotate 20 percent right add drop shadow
Open ribbon2WW-ScrapElf copy paste as new layer resize 20 percent add drop shadow
Add your name Font AL Sandra forground #3c1d12 background #dbbf64 add drop shadow
Add your copyright info
Onto Animate
merge all visible
with magic wand click in leaves apply
this setting

select none copy take in animation shop
paste as new image
go back to psp edit under select non undo noise
repeat noise with this setting

select none take back into animation shop paste after current frame
go back to psp edit under select non undo noise
repeat noise with this setting

select none take back into animation shop paste after current frame
resize your tag & save
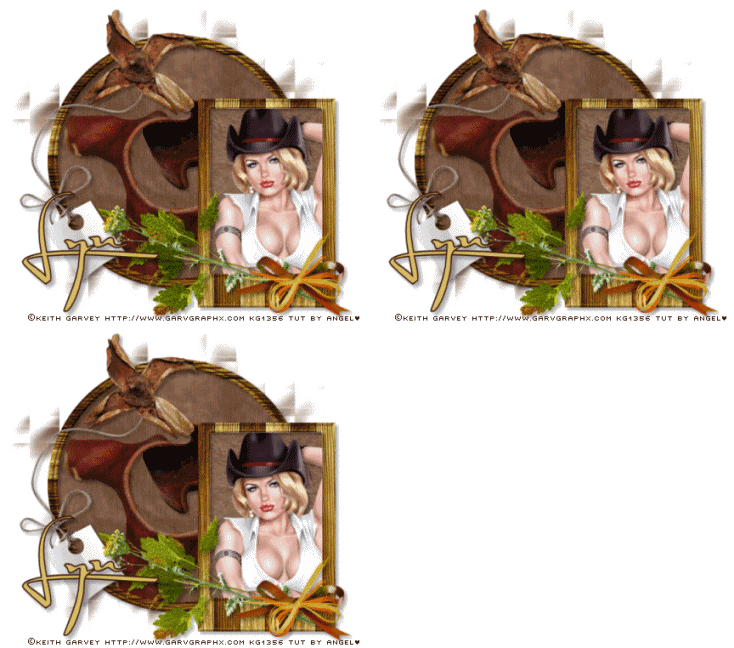
Animated Tag
If you like this Tut check the boxes below Love to see your results please email to me
Thankyou ♥
Written by ©Lyn(akaAngel) 21st August 2012, any similarity to any other tutorial is purely coincidental!
This is an awesome result from Dixie Thankyou ♥


♥ Autumn Time ♥

To View Tag In Proper Size Click On The Tag
Supplies Needed
Scrapkit Autumn Friends FTU By Angies Tuts N Tags
Tube of choice im using ©Elias Chatzoudis to purchase tubes go to PTE
All my tubes are a guide if the tubes i select are unavailble please use another tube of your liking thankyou
Mask WSL_Mask38 at weescotslass
Font of choice or the one im using is Fontdinerdotcom Huggable & Inspiration
Lets Get Started
Open new image 650x600
Open paper7 copy paste as new layer apply mask merge group
Open frame9 copy paste as new layer resize 80 percent with magic wand click in frame selection modify expand by 5
Open paper13 copy paste as new layer invert delete on keyboard select none drag under frame add drop shadow to frame
Open element1 copy paste as new layer resize 50 percent then resize 60 percent add drop shadow duplicate resize 75 percent
Open owl2 copy paste as new layer resize 15 percent resize again at 75 percent add drop shadow
Open element11 copy paste as new layer resize 5 percent duplicate mirror move back near first one add drop shadow merge down duplicate 3 times arrange on tag see my tag for reference
Open tube copy paste as new layer mirror add drop shadow
Open crow copy paste as new layer resize 15 percent add drop shadow
Add the words Autumn Time Font Fontdinerdotcom Huggable forground #000000 background #a20017 add drop shadow
Add your name Font Inspiration forground #000000 background #a20017 add drop shadow
Add your copyright info
Resize & save your tag
If you like this Tut check the boxes below Love to see your results please email to me
Thankyou ♥
Written by ©Lyn(akaAngel) 18th May 2012, any similarity to any other tutorial is purely coincidental!
This is an awesome result from Lyn Marie ..aka dustyrose thankyou ♥

♥ Autumn Mysteries ♥

To View Tag In Proper Size Click On The Tag
Supplies Needed
Scrapkit Autumn Mysteries By Creative Scraps by Crys This is PTU
Here
Tube of choice im using the Poser that is supplied in the Kit
Font of choice or the one im using is Valeria Script One
Lets Get Started
Open new image 600x600
Open AM_Element_55 copy paste as new layer duplicate image mirror flip merge down resize 95 percent add drop shadow
Open AM_Frame_5 copy paste as new layer resize 75 percent with magic wand click in frame selection modify expand by 5
Open AM_Paper_16 copy paste as new layer invert delete on keyboard drag under frame add drop shadow to frame
Open AM_Element_50 copy paste as new layer resize 70 percent arrange on tag duplicate mirror merge down add drop shadow
Open AM_Element_7 copy paste as new layer resize 76 percent add drop shadow
Open AM_Element_46 copy paste as new layer
Open AM_Element_3 copy paste as new layer erase add drop shadow
Open AM_Element_62 copy paste as new layer add drop shadow
Open AM_Element_43 copy paste as new layer resize 37 percent add drop shadow
Add your name Font Valeria Script One forground #8a5113 background #f8b061 add gradient glow & add drop shadow
Add your copyright info
resize & save your tag
If you like this Tut check the boxes below Love to see your results please email to me
Thankyou ♥
Written by ©Lyn(akaAngel) 4thth February 2012, any similarity to any other tutorial is purely coincidental!
♥ Harvest ♥

To View Tag In Proper Size Click On The Tag
Supplies Needed
Scrapkit New Autumn's Glory by Randys Sin this is FTU Here
Tube of choice im using ©Popeye Wong FTU Tube Here
All my tubes are a guide if the tubes i select are unavailble please use another tube of your liking thankyou
Mask WSL_Mask84 at weescotslass Here
Font of choice or the one im using is Voluta Script Pro
Lets Get Started
Open new image 650x600
Open paper9 copy paste as new layer apply mask merge group
Open rs_frame1 copy paste as new layer click in frame with magic wand modify expand by 3
Open paper2 copy paste as new layer invert delete on keyboard drag under frame select none
Open rs_deadgrass1 copy paste as new layer resize 35 percent add drop shadow
Open rs_cornpatch1 copy paste as new layer resize 65 percent add drop shadow
Open rs_acorns1 copy paste as new layer resize 25 percent add drop shadow
Open rs_scarecrow2 copy paste as new layer resize 70 percent add drop shadow
Open rs_crow1 copy paste as new layer resize 35 percent mirror add drop shadow
Open your tube copy paste as new layer add drop shadow
Open rs_wagon1 copy paste as new layer resize 45 percent add drop shadow with selection tool go around opening of wagon Open rs_leafpile2 copy place as new layer invert delete on keyboard
Open rs_harvestsign1 copy paste as new layer resize 56 percent add drop shadow
Add your name Font Voluta Script Pro forground #8d2e10 background #ec8547 Add gradient glow & add drop shadow
Add your copyright info
resize & save your tag
If you like this Tut check the boxes below Love to see your results please email to me
Thankyou ♥
Written by ©Lyn(akaAngel) 28th November 2011, any similarity to any other tutorial is purely coincidental!
This is an awesome result from Julie Thankyou ♥

This is an awesome result from Ruby Thankyou ♥

♥ Autumn Is A Second Spring ♥

To View Tag In Proper Size Click On The Tag
Supplies Needed
Scrapkit by creative Scraps by crys called Harvest Of Memories this is FTU Here
Mask WSL_Mask97 at weescotslass Here
Font of choice or the one im using is MrsVonEckley
Lets Get Started
Open new image 650x550
Open HOM_Paoer_2 copy paste as new layer apply mask merge group with pick tool bring out on all sides add drop shadow
Open HOM_Frame_4 copy paste as new layer resize 76 percent click in the frame with magic wand modify expand by 5
Open HOM_Paoer_4 copy paste as new layer invert delete on keyboard keep selected drag paper under frame open HOM_Element_9 copy paste as new layer delete on keyboard add drop shadow to frame
Open HOM_Element_30 copy paste as new layer resize 75 percent add drop shadow
Open HOM_Element_12 copy paste as new layer resize 75 percent add drop shadow
Open HOM_Element_34 copy paste as new layer resize 30 percent add drop shadow
Open HOM_Element_36 copy paste as new layer resize 25 percent mirror add drop shadow
Open HOM_Element_35 copy paste as new layer resize 25 percent add drop shadow
Open HOM_Element_11 copy paste as new layer add drop shadow
Open HOM_Element_14 copy paste as new layer resize 75 percent add drop shadow
Open HOM_Element_28 copy paste as new layer resize 55 percent add drop shadow
Add your name & the words Autumn is a second spring when every leaf is a flower Font MrsVonEckley forground #000000 background #000000 add gradient glow ##e95c01 & add drop shadow
Add your copyright info
resize & save your tag
If you like this Tut check the boxes below Love to see your results please email to me
Thankyou ♥
Written by ©Lyn(akaAngel) 6th November 2011, any similarity to any other tutorial is purely coincidental!
this result it from vickie i love it thanlyou ♥

♥ An Autumn Romance ♥

To View Tag In Proper Size Click On The Tag
Supplies Needed
Scrapkit Designed by Stina called An Autumn Romance this is PTU Here
Tube of choice im using ©Keith Garvey to purchase tubes go to PTE Here
All my tubes are a guide if the tubes i select are unavailble please use another tube of your liking thankyou
Mask WSL_Mask178 at weescotslass Here
Font of choice or the one im using is Valeria Script One
Lets Get Started
Open new image 650x550
Open DBS_Paper02 copy paste as new layer apply mask merge group
Open DBS_Frame07 copy paste as new layer resize 78 percent mirror click in the frame with magic wand modify expand by 10
Open DBS_Paper08 copy paste as new layer invert delete on keyboard select none drag paper under frame effects texture effects blinds add drop shadow to frame
Open DBS_Lantern copy paste as new layer resize 55 percent add drop shadow
Open DBS_Wine copy paste as new layer resize 54 percent add drop shadow
Open DBS_Roses01 copy paste as new layer resize 40 percent add drop shadow
Open tube copy paste as new layer add drop shadow
Add your name Font Valeria Script One forground #be3325 background #dcbe7d add drop shadow
Add your copyright info
resize & save your tag
If you like this Tut check the boxes below Love to see your results please email to me
Thankyou ♥
Written by ©Lyn(akaAngel) 6th November 2011, any similarity to any other tutorial is purely coincidental!
♥ Autumn Flyer ♥

To View Tag In Proper Size Click On The Tag
Supplies Needed
Scrapkit Designed by Stina called An Autumn Romance this is PTU Here
Mask WSL_Mask84 at weescotslass Here
Font of choice or the one im using is Affair
Lets Get Started
Open new image 650x550
Open DBS_Paper08 copy paste as new layer apply mask merge group
Open DBS_Frame08 copy paste as new layer image rotate 90 percent right resize 85 percent click in the frame with magic wand modify expand by 3
Open DBS_Paper03 copy paste as new layer invert delete on keyboard select none drag paper under frame add drop shadow to frame
Open DBS_HeartScatter03 copy paste as new layer resize 80 percent add drop shadow
Open DBS_Foilage copy paste as new layer resize 70 percent add drop shadow
Open DBS_Basket copy paste as new layer resize 45 percent add drop shadow
Open DBS_Mushroom02 copy paste as new layer resize 45 percent add drop shadow
Open DBS_Tag02 copy paste as new layer resize 45 percent image rotate 20 percent left add drop shadow
Open DBS_medi_gracie10 copy paste as new layer resize 75 percent add drop shadow
Add your name Font Affair forground #722902 background #e28c35 add drop shadow
Add your copyright info
resize & save your tag
If you like this Tut check the boxes below Love to see your results please email to me
Thankyou ♥
Written by ©Lyn(akaAngel) 6th November 2011, any similarity to any other tutorial is purely coincidental!
♥ Autumn Surprises ♥

To View Tag In Proper Size Click On The Tag
Supplies Needed
Scrapkit by Sharon called Autumn Surprises this is FTU
Here
Mask WSL_Mask38 at weescotslass Here
Font of choice or the one im using is Mr Lackboughs
Lets Get Started
Open new image 650x550
Open CBS-AS-Paper 24 copy paste as new layer apply mask merge group duplicate merge down add remove noise 47 random monochrome checked
Open CBS-AS-Leaf 3 copy paste as new layer duplicate mirror add drop shadow
Open CBS-AS-Fence 2 copy paste as new layer resize 75 percent add drop shadow
Open CBS-AS-Bird 4 copy paste as new layer resize 75 percent add drop shadow
Open CBS-AS-Swirl 4 copy paste as new layer duplicate mirror add drop shadow
Open CBS-AS-Leaf Cluster 3 copy paste as new layer resize 75 percent add drop shadow
Open CBS-AS-Fairy 1 copy paste as new layer add drop shadow
Open CBS-AS-Mushrooms 1 copy paste as new layer resize 55 percent add drop shadow
Add your name Font Mr Lackboughs forground #a71f22 background #30a0dd effects inner bevel texture effects weave add gradient glow & add drop shadow
Add your copyright info
resize & save your tag
Love to see your results please email to me so i can put in my show off blog
Thankyou ♥
Written by ©Lyn(akaAngel) 16th June 2011, any similarity to any other tutorial is purely coincidental!
This result is from Deb thankyou its Awesome ♥

♥ Autumn ♥

To View Tag In Proper Size Click On The Tag
Supplies Needed
Scrapkit By stefs scrapkits called Autumn is Coming This is PTU Here
SSLisa - Cookie - Babydoll Fae - Green By SSLisa at sophisticatedscraps This is FTU you will find the cookie in the mixture pack
Here
Mask WSL_Mask84 at weescotslass Here
Font of choice or the one im using is Valeria Script One
Lets Get Started
Open new image 650x600
Open pap01_Autumniscoming_Stef'sScrapkits copy paste as new layer apply mask merge group
Open ele52_Autumniscoming_Stef'sScrapkits copy paste as new layer resize 87 percent with magic wand click in frame selection modify expand by 4
Open pap04_Autumniscoming_Stef'sScrapkits copy paste as new layer invert delete on keyboard select none drag under frame add drop shadow to frame
Open ele70_Autumniscoming_Stef'sScrapkits copy paste as new layer mirror flip move to top of frame add drop shadow
Open ele04_Autumniscoming_Stef'sScrapkits copy paste as new layer resize 64 percent add drop shadow
Open ele02_Autumniscoming_Stef'sScrapkits copy paste as new layer resize 39 percent add drop shadow
Open ele49_Autumniscoming_Stef'sScrapkits copy paste as new layer resize 52 percent add gradient glow & add drop shadow
Open ele19_Autumniscoming_Stef'sScrapkits copy paste as new layer add drop shadow
Open SSLisa - Cookie - Babydoll Fae - Green copy paste as new layer resize add drop shadow
Add your name Font Valeria Script One forground #4b3526 background #e0c074 add gradient glow & add drop shadow
Add your copyright info
resize & save your tag
Love to see your results please email to me so i can put in my show off blog
Thankyou ♥
Written by ©Lyn(akaAngel) 10th September 2011, any similarity to any other tutorial is purely coincidental!
This is Result from Vickie Thankyou this is awesome ♥

♥ Autumn Mysteries ♥

To View Tag In Proper Size Click On The Tag
Supplies Needed
Scrapkit by Creative Scraps by Crys Autumn Mysteries
Here
Tube of choice im using ©Pinuptoons i brought my license & tube at CILM all hes tubes are at CDO
Here
Font of choice or the one im using is Miss Le Gatees
Lets Get Started
Open new image 650x550
Open AM_Element_55 copy paste as new layer
Open AM_Frame_6 copy paste as new layer resize 64 percent with magic wand click in frame selection modify expand by 2
Open AM_Paper_15 copy paste as new layer invert delete on keyboard select none drag under frame add drop shadow to frame
Open AM_Element_10 copy paste as new layer drag under frame add drop shadow
Open AM_Element_18 copy paste as new layer resize 45 percent add drop shadow
Open AM_Element_19 copy paste as new layer resize 55 percent add drop shadow
Open AM_Element_7 copy paste as new layer resize 80 percent add drop shadow
Open AM_Element_62 copy paste as new layer add drop shadow
Open AM_Element_46 copy paste as new layer add drop shadow
Open AM_Element_43 copy paste as new layer resize 70 percent add drop shadow
Open AM_Element_50 copy paste as new layer resize 65 percent add drop shadow
Open tube copy paste as new layer add drop shadow
Add your name Font Miss Le Gatees forground #a2611a background #fcb869 add drop shadow
Add your copyright info
resize & save your tag
Love to see your results please email to me so i can put in my show off blog
Thankyou ♥
Written by ©Lyn(akaAngel) 2nd September 2011, any similarity to any other tutorial is purely coincidental!
This is a Result from Vickie this is awesome Thankyou ♥

♥ Subtle Autumn ♥

To View Tag In Proper Size Click On The Tag
Supplies Needed
Scrapkit By Wilma4Ever called Subtle Autumn (Tagger Size) This is PTU Here
Tube of choice im using ©Suzanne Woolcott can purchase Tube
Here
Mask WSL_Mask84 at weescotslass
Here
Font of choice or the one im using is Mr Dafoe
Lets Get Started
Open new image 650x550
Open Wilma4ever_SubtleAutumn_PP04 copy paste as new layer resize 80 percent apply mask merge group
Open Wilma4ever_SubtleAutumn_EL18 copy paste as new layer resize 85 percent add drop shadow Go around frame with selection tool Open Wilma4ever_SubtleAutumn_PP10 copy paste as new layer invert press delete on keyboard drag paper under frame
Open Wilma4ever_SubtleAutumn_EL49 copy paste as new layer resize 88 percent add drop shadow
Open Wilma4ever_SubtleAutumn_EL11 copy paste as new layer resize 75 percent add drop shadow
Open Wilma4ever_SubtleAutumn_EL09 copy paste as new layer resize 45 percent add drop shadow
Open Wilma4ever_SubtleAutumn_EL05 copy paste as new layer resize 75 percent drag under frame add drop shadow
Open Wilma4ever_SubtleAutumn_EL19 copy paste as new layer resize 75 percent add drop shadow
Open Wilma4ever_SubtleAutumn_EL24 resize 55 percent add drop shadow
Open Wilma4ever_SubtleAutumn_EL25 resize 35 percent image free rotate 20 percent right add drop shadow
Open Wilma4ever_SubtleAutumn_EL37 copy paste as new layer resize 32 percent add drop shadow
Open tube copy paste as new layer add drop shadow
Add your name & the words Subtle Autumn Font Mr Dafoe forground #dedecf background #906b34 add gradient glow & add drop shadow
Add your copyright info
resize & save your tag
Love to see your results please email to me so i can put in my show off blog
Thankyou ♥
Written by ©Lyn(akaAngel) 31st August 2011, any similarity to any other tutorial is purely coincidental!
♥ Autumn is Coming ♥

To View Tag In Proper Size Click On The Tag
Supplies Needed
Scrapkit By stefs scrapkits called Autumn is Coming This is PTU Here
Tube of choice im using ©pinup toons i brought my license & tube at Cilm all the tubes are at CDO Here
Mask WSL_Mask84 at weescotslass Here
Font of choice or the one im using is Mr Lackboughs
Lets Get Started
Open new image 650x600
Open pap04_Autumniscoming_Stef'sScrapkits copy paste as new layer apply mask merge group
Open ele53_Autumniscoming_Stef'sScrapkits copy paste as new layer with magic wand click in frame selection modify expand by 4
Open pap05_Autumniscoming_Stef'sScrapkits copy paste as new layer invert delete on keyboard select none drag under frame add drop shadow to frame
Open ele71_Autumniscoming_Stef'sScrapkits copy paste as new layer resize 65 percent add drop shadow
Open ele03_Autumniscoming_Stef'sScrapkits copy paste as new layer resize 40 percent add drop shadow
Open ele64_Autumniscoming_Stef'sScrapkits copy paste as new layer resize 47 percent add drop shadow
Open ele41_Autumniscoming_Stef'sScrapkits copy paste as new layer resize 55 percent add drop shadow
Open ele34_Autumniscoming_Stef'sScrapkits copy paste as new layer resize 55 percent add drop shadow
Open ele67_Autumniscoming_Stef'sScrapkits copy paste as new layer drag this under frame add drop shadow
right click copy merge paste this as new layer
open tube copy paste as new layer add drop shadow with magic wand click in the canvas of the tube go back to the merge layer we made copy paste into selection of the tube select none
Add your name & the words Autumn is Coming Font Mr Lackboughs forground #250400 background #cc985a effects add drop shadow
Add your copyright info
resize & save your tag
Love to see your results please email to me so i can put in my show off blog
Thankyou ♥
Written by ©Lyn(akaAngel) 29th August 2011, any similarity to any other tutorial is purely coincidental!
Result from Vickie isnt it Awesome Thankyou ♥

♥ Autumn Days ♥

To View Tag In Proper Size Click On The Tag
Supplies Needed
Scrapkit by sharon called Autumn Days this is FTU Here
Tube of choice im using ©Elias Chatzoudis i brought my license & tube at MPT all hes tubes are at PTE Here
Font of choice or the one im using is MrBlaketon
Lets Get Started
Open new image 650x600
Open CBS-Autumn Days Frame 5 copy paste as new layer resize 75 percent with magic wand click in frame selection modify expand by 4
Open CBS-Autumn Days Paper 8 copy paste as new layer invert delete on keyboard select none drag under frame add drop shadow to frame
Open CBS-Autumn Days Fence 1 copy paste as new layer resize 71 percent add drop shadow
Open CBS-Autumn Days Tree 2 copy paste as new layer resize 90 percent add drop shadow
Open CBS-Autumn Days Bird 4 copy paste as new layer add drop shadow
Open CBS-Autumn Days Log 1 copy paste as new layer resize 70 percent mirror add drop shadow
Open CBS-Autumn Days Butterfly Swarm 1 copy paste as new layer add drop shadow
Open CBS-Autumn Days Ivy 1 copy paste as new layer add drop shadow duplicate mirror move next to first one
Open tube copy paste as new layer add drop shadow
Add your name Font MrBlaketon forground #ab5e26 background #cc9c7a add gradient glow & add drop shadow
Add your copyright info
resize & save your tag
Love to see your results please email to me so i can put in my show off blog
Thankyou ♥
Written by ©Lyn(akaAngel) 28th August 2011, any similarity to any other tutorial is purely coincidental!
Vickie has done a result of my tut this is awesome Thankyou ♥

♥ Vintage Autumn ♥

To View Tag In Proper Size Click On The Tag
Supplies Needed
Scrapkit by Babycakes Scraps called Vintage Autumn Here
Tube of choice im using ©Suzanne Woolcott Here
Mask WSL_Mask38 at weescotslass Here
Template117 by Becky FTU Here
Font of choice or the one im using is Valeria Script Two
Lets Get Started
Open Template duplicate close original delete info layer & white background layer canvas size 650 x 500
Go to rectangle2 background layer select all float defloat open bcs_paper_six copy paste as new layer invert delete on keyboard select none add drop shadow
Go to top rectangle2 layer select all float defloat open bcs_paper_one copy paste as new layer invert delete on keyboard select none
Go to rectangle1 background layer select all float defloat open bcs_paper_six copy paste as new layer invert delete on keyboard select none add drop shadow
Go to rectangle1 layer select all float defloat open bcs_paper_six copy paste as new layer invert delete on keyboard select none
Go to square2 background layer select all float defloat open bcs_paper_ten copy paste as new layer invert delete on keyboard select none add drop shadow
Go to square2 layer select all float defloat open bcs_paper_four copy paste as new layer invert delete on keyboard open bcs_berry_cluster resize 50 percent delete on keyboard add drop shadow
Go to square1 background layer select all float defloat open bcs_paper_ten copy paste as new layer invert delete on keyboard select none add drop shadow
Go to square2 layer select all float defloat open bcs_paper_four copy paste as new layer invert delete on keyboard open bcs_leaf_cluster resize 50 percent delete on keyboard add drop shadow
Go to frame fill select all float defloat open bcs_paper_twenty copy paste as new layer invert delete on keyboard keep selected open bce_lace_butterfly copy paste as new layer resize 80 percent delete on keyboard select none add drop shadow
Go to frame layer select all float defloat open bcs_paper_seventeen copy paste as new layer invert delete on keyboard
Open bcs_birdhouse Copy paste as new layer resize 50 percent add drop shadow
Open bcs_flourish Copy paste as new layer resize 55 percent arrange send to bottom image flip add drop shadow
Open bcs_brown_bow_two Copy paste as new layer resize 52 percent image rotate 25 left add drop shadow
Open bcs_nut_cluster Copy paste as new layer resize 30 percent add drop shadow
Open bcs_small_leaf_cluster Copy paste as new layer arrange send to bottom duplicate flip mirror merge down add drop shadow
Open bcs_paper_six copy paste as new layer send to bottom apply mask merge group
Add your name Font Valeria Script Two forground #673e23 background #bd7323 add drop shadow & add gradient glow
Add your copyright info
resize & save your tag
Love to see your results please email to me so i can put in my show off blog
Thankyou ♥
Written by ©Lyn(akaAngel) 8th August 2011, any similarity to any other tutorial is purely coincidental!
♥ Little Bit Country ♥

To View Tag In Proper Size Click On The Tag
Supplies Needed
Scrapkit by Tonie Posers called Autumn Falls this is PTU Here
Tube of choice im using ©Popeye Wong this is a FTU Tube Here
Mask WSL_Mask84 at weescotslass Here
Font of choice or the one im using is P22Broadwindsor
Lets Get Started
Open new image 650x550
Open autumn falls paper 2 copy paste as new layer apply mask merge group
Open autumn falls frame 6 copy paste as new layer resize 64 percent with magic wand click in frame selection modify expand by 4
Open autumn falls paper 18 copy paste as new layer invert delete on keyboard select none drag under frame add drop shadow to frame
Open autumn falls wheel copy paste as new layer resize 65 percent add drop shadow
Open autumn falls trelis copy paste as new layer resize 67 percent add drop shadow
Open open autumn falls butterflys1 copy paste as new layer add drop shadow
Open autumn falls bridge copy paste as new layer resize 44 percent drag under frame add drop shadow
Open autumn falls basket 2 copy paste as new layer resize 55 percent
Open autumn falls rocker copy paste as new layer resize 75 percent add drop shadow
Open tube copy paste as new layer add drop shadow
Add your name Font P22Broadwindsor forground #593213 background #a37d4e add drop shadow
Add your copyright info
resize & save your tag
Love to see your results please email to me so i can put in my show off blog
Thankyou ♥
Written by ©Lyn(akaAngel) 11th July 2011, any similarity to any other tutorial is purely coincidental!
♥ Autumn Is Here ♥

To View Tag In Proper Size Click On The Tag
Supplies Needed
Scrapkit by Sweet Cravings Scrap called Yesterdays Gone this is PTU Here
Font of choice or the one im using is Do I like Stripes?
Lets Get Started
Open new image 650x550
Open SCS_YesterdaysGone_Frame5 copy paste as new layer resize 75 percent click in frame with magic wand select all float defloat Open SCS_YesterdaysGone_Grass1 copy paste as new layer invert delete on keyboard dont deselect Open SCS_YesterdaysGone_Paper8 delete on keyboard drag under frame select none add drop shadow to frame
Open SCS_YesterdaysGone_AutumnVine2 copy paste as new layer resize 80 percent adjust add remove noise guassian 52 monochrome checked add drop shadow
Open SCS_YesterdaysGone_Leaves3 copy paste as new layer resize 75 percent mirror adjust add remove noise guassian 52 monochrome checked add drop shadow
Open SCS_YesterdaysGone_Mushroom2 copy paste as new layer resize 55 percent add drop shadow
Open SCS_YesterdaysGone_AutumnDecor2 copy paste as new layer resize 65 percent add drop shadow
Open SCS_YesterdaysGone_Scarecrow copy paste as new layer resize 70 percent add drop shadow
Open medi_carnelia7 copy paste as new layer resize 80 percent add drop shadow
Open SCS_YesterdaysGone_WordArt copy paste as new layer resize 40 percent add gradient glow & add drop shadow
Add your name Font Do I like Stripes? forground #de4900 background #af6820 add drop shadow
Add your copyright info
resize & save your tag
Love to see your results please email to me so i can put in my show off blog
Thankyou ♥
Written by ©Lyn(akaAngel) 1st July 2011, any similarity to any other tutorial is purely coincidental!
Subscribe to:
Posts (Atom)