♥ Welcome ♥

♥ My Blinkie ♥

♥ Happy Birthday ♥

To View Tag In Proper Size Click On The Tag
Supplies Needed
PTU Scrapkit Birthday Girl By Black Widow Creationz
Tube of choice im using Elias Chatzoudis this is a PTU Tube
Mask WSL_Mask178 at weescotslass
Font of choice or the one im using is Carpenter Script
Lets Get Started
Open new image 650X600
Open BWC_BirthdayGirl_PP6 copy paste as new layer apply mask merge group
Open BWC_BirthdayGirl_EL24 copy paste as new layer
Open BWC_BirthdayGirl_EL16 copy paste as new layer resize 75 percent click in frame with magic wand modify expand by 7
Open BWC_BirthdayGirl_PP1 copy paste as new layer invert delete on keyboard drag paper under frame select none add drop shadow to frame
Open BWC_BirthdayGirl_EL32 copy paste as new layer drag under frame add drop shadow
Open BWC_BirthdayGirl_EL26 copy paste as new layer resize 40 percent add drop shadow
Open tube copy paste as new layer add drop shadow
Open BWC_BirthdayGirl_EL5 copy paste as new layer resize 45 percent add drop shadow
Open BWC_BirthdayGirl_EL4 copy paste as new layer add drop shadow
Open BWC_BirthdayGirl_EL12 copy paste as new layer add drop shadow
Add your name Font Carpenter Script forground #000000 background #b11212 add drop shadow
Add your copyright info
resize & save your tag
If you like this Tut check the boxes below Love to see your results please email to me
Thankyou ♥
Written by ©Lyn(akaAngel) 11th Feburary 2014, any similarity to any other tutorial is purely coincidental!

♥ Be My Love ♥

To View Tag In Proper Size Click On The Tag
Supplies Needed
PTU Scrapkit Birthday Girl By Black Widow Creationz
Tube of choice im using Keith Garvey This is a PTU Tube
Mask WSL_Mask178 at weescotslass
Font of choice or the one im using is Verticalization
Lets Get Started
Open new image 650X500
Open BWC_BirthdayGirl_PP2 copy paste as new layer apply mask merge group
Open BWC_BirthdayGirl_EL8 copy paste as new layer flip duplicate add drop shadow
Open BWC_BarbieCandyTunic_EL39 copy paste as new layer add drop shadow
Open BWC_BirthdayGirl_EL7 copy paste as new layer resize 75 percent click in frame with magic wand modify expand by 7
Open BWC_BirthdayGirl_PP1 copy paste as new layer invert delete on keyboard drag paper under frame select none add drop shadow to frame
Open BWC_BirthdayGirl_EL3 copy paste as new layer resize 80 percent image rotate 20 percent left add drop shadow
Open BWC_BirthdayGirl_EL19 copy paste as new layer add drop shadow
Open BWC_BirthdayGirl_EL11 copy paste as new layer add drop shadow
Open BWC_BirthdayGirl_EL41 copy paste as new layer resize 70 percent image rotate left 90 percent add drop shadow
Open BWC_BirthdayGirl_EL28 copy paste as new layer resize 65 percent add drop shadow
Open tube copy paste as new layer duplicate move this under rose go back to top tube erase slightly add drop shadow to bottom tube
Add your name & the word Be My Font Verticalization forground #ffffff background #910b0b add drop shadow
Add your copyright info
resize & save your tag
If you like this Tut check the boxes below Love to see your results please email to me
Thankyou ♥
Written by ©Lyn(akaAngel) 11th Feburary 2014, any similarity to any other tutorial is purely coincidental!
♥ Girls Night Out ♥

To View Tag In Proper Size Click On The Tag
Supplies Needed
PTU Scrapkit Dorianne By Black Widow Creationz
Tube of choice im using Keith Garvey This is a PTU Tube
Mask WSL_Mask84 at weescotslass
Font of choice or the one im using is PetraScriptEF-Alternate
Lets Get Started
Open new image 650X600
Open BWC_Dorianne_PP1 copy paste as new layer apply mask merge group
Open BWC_Dorianne_EL35 copy paste as new layer duplicate mirror flip
Open BWC_Dorianne_EL19 copy paste as new layer click in frame with magic wand modify expand by 7
Open BWC_Dorianne_PP6 copy paste as new layer invert delete on keyboard drag paper under frame select none add drop shadow to frame
Open tube copy paste as new layer drag this under frame duplicate brin to top erase on both tubes add drop shadow to bottom tube
Open BWC_Dorianne_EL7 copy paste as new layer resize 70 percent mirror add drop shadow
Open BWC_Dorianne_EL17 copy paste as new layer resize 70 percent add drop shadow
Open BWC_Dorianne_EL13 copy paste as new layer resize 75 percent add drop shadow
Open BWC_Dorianne_EL10 copy paste as new layer resize 50 percent add drop shadow
Open BWC_Dorianne_EL15 copy paste as new layer resize 45 percent add drop shadow
Open BWC_Dorianne_EL16 copy paste as new layer resize 55 percent add drop shadow
Open BWC_Dorianne_EL31 copy paste as new layer drag under frame add drop shadow
Open BWC_Dorianne_EL30 copy paste as new layer resize 45 percent add drop shadow
Open BWC_Dorianne_EL29 copy paste as new layer resize 75 percent add drop shadow
Add your name Font PetraScriptEF-Alternate forground #801985 background #ffffff add gradient glow & add drop shadow
Add your copyright info
resize & save your tag
If you like this Tut check the boxes below Love to see your results please email to me
Thankyou ♥
Written by ©Lyn(akaAngel) 10th Feburary 2014, any similarity to any other tutorial is purely coincidental!
♥ Candy Girl ♥

To View Tag In Proper Size Click On The Tag
Supplies Needed
PTU Scrapkit Barbie Candy Tunic By Black Widow Creationz
Tube of choice im using Keith Garvey This is a PTU Tube
Mask WSL_Mask78 at weescotslass
Font of choice or the one im using is LittleRickeyNF
Lets Get Started
Open new image 750X700
Open BWC_BarbieCandyTunic_PP9 copy paste as new layer apply mask merge group
Open BWC_BarbieCandyTunic_EL39 copy paste as new layer add drop shadow
Open BWC_BarbieCandyTunic_EL19 copy paste as new layer click in frame with magic wand modify expand by 7
Open BWC_BarbieCandyTunic_PP4 copy paste as new layer invert delete on keyboard drag paper under frame keep selected
Open BWC_BarbieCandyTunic_EL5 delete on keyboard select none add drop shadow to frame #000000 give heart drop shadow #ffffff
Open BWC_BarbieCandyTunic_EL15 copy paste as new layer add drop shadow
Open BWC_BarbieCandyTunic_EL24 copy paste as new layer resize 54 percent add drop shadow
Open BWC_BarbieCandyTunic_EL13 copy paste as new layer add drop shadow
Open BWC_BarbieCandyTunic_EL11 copy paste as new layer resize 70 percent image rotate 20 percent right add drop shadow
Open BWC_BarbieCandyTunic_EL25 copy paste as new layer resize 70 percent image rotate 20 percent left add drop shadow
Open BWC_BarbieCandyTunic_EL1 copy paste as new layer resize 50 percent add drop shadow
Open BWC_BarbieCandyTunic_EL3 copy paste as new layer resize 56 percent add drop shadow
Open BWC_BarbieCandyTunic_EL2 copy paste as new layer resize 45 percent add drop shadow
Open tube copy paste as new layer add drop shadow
Add the word Girl Font LittleRickeyNF forground null background #ffffff add drop shadow
Add your name Font LittleRickeyNF forground #ed76a5 background #ffffff add drop shadow
Add your copyright info
resize & save your tag
If you like this Tut check the boxes below Love to see your results please email to me
Thankyou ♥
Written by ©Lyn(akaAngel) 10th Feburary 2014, any similarity to any other tutorial is purely coincidental!
♥ Under The Sea ♥

To View Tag In Proper Size Click On The Tag
Supplies Needed
PTU Scrapkit Under The Sea By Creative Scraps by Crys
Tube of choice im using Elias Chatzoudis this is a PTU Tube
Mask WSL_Mask38 at weescotslass
Font of choice or the one im using is Lamplighter Script
Lets Get Started
Open new image 750X700
Open UTS_Papers_12 copy paste as new layer apply mask merge group
Open UTS_Frame_5 copy paste as new layer image rotate 90 percent right click in frame with magic wand modify expand by 5
Open UTS_Papers_4 copy paste as new layer invert delete on keyboard drag paper under frame keep selected
Open UTS_Element_11 delete on keyboard select none add drop shadow to frame
Open UTS_Element_51 copy paste as new layer resize 70 percent add drop shadow
Open UTS_Element_12 copy paste as new layer
Open UTS_Element_32 copy paste as new layer drag under frame add drop shadow
Open UTS_Element_3 copy paste as new layer resize 35 percent add drop shadow
Open UTS_Element_6 copy paste as new layer resize 30 percent add drop shadow
Open UTS_Element_5 copy paste as new layer resize 25 percent add drop shadow
Open UTS_Element_8 copy paste as new layer resize 75 percent add drop shadow
Open UTS_Element_44 copy paste as new layer resize 65 percent image flip mirror add drop shadow
Open UTS_Element_54 copy paste as new layer resize 65 percent image flip mirror add drop shadow
Open tube copy paste as new layer add drop shadow
Add your name Font Lamplighter Script forground #ffffff background #2a6c9b add drop shadow
Add your copyright info
resize & save your tag
If you like this Tut check the boxes below Love to see your results please email to me
Thankyou ♥
Written by ©Lyn(akaAngel) 9th Feburary 2014, any similarity to any other tutorial is purely coincidental!
♥ Country Meets City ♥

To View Tag In Proper Size Click On The Tag
Supplies Needed
PTU Scrapkit Country Meets City By Creative Scraps by Crys
Mask WSL_Mask84 at weescotslass
Font of choice or the one im using is Ambiance BT Swash
Lets Get Started
Open new image 750X700
Open paper 11 copy paste as new layer apply mask merge group
Open frame 6 copy paste as new layer image rotate 90 percent right click in frame with magic wand modify expand by 5
Open paper 15 copy paste as new layer invert delete on keyboard drag paper under frame keep selected
Open buildings delete on keyboard select none add drop shadow to frame & buildings
Open bush 2 copy paste as new layer drag under frame add drop shadow duplicate drag this to top erase slightly
Open flowers copy paste as new layer resize 65 percent add drop shadow duplicate merge down
Open light post 2 copy paste as new layer add drop shadow
Open porche copy paste as new layer add drop shadow
Open horse copy paste as new layer resize 70 percent add drop shadow
Open medi_toddie5 copy paste as new layer resize 65 percent add drop shadow
Open medi_jesaka5 copy paste as new layer resize 65 percent add drop shadow
Open Word art copy paste as new layer resize 70 percent add gradient glow & drop shadow
Open word art 2 copy paste as new layer resize 70 percent add gradient glow & drop shadow
Add your name Font Ambiance BT Swash forground #ffffff background #862033 add drop shadow
Add your copyright info
resize & save your tag
If you like this Tut check the boxes below Love to see your results please email to me
Thankyou ♥
Written by ©Lyn(akaAngel) 9th Feburary 2014, any similarity to any other tutorial is purely coincidental!
♥ Deep Blue ♥

To View Tag In Proper Size Click On The Tag
Supplies Needed
PTU Scrapkit Shelia By Black Widow Creationz
Tube of choice im using Elias Chatzoudis this is a PTU Tube
Mask WSL_Mask84 at weescotslass
Font of choice or the one im using is a_NoterCmDn
Lets Get Started
Open new image 750X700
Open BWC_Shelia_PP3 copy paste as new layer apply mask merge group
Open BWC_Shelia_EL41 copy paste as new layer click in frame with magic wand modify expand by 5
Open BWC_Shelia_PP7 copy paste as new layer invert delete on keyboard drag paper under frame select none add drop shadow to frame
Open BWC_Shelia_EL24 copy paste as new layer add drop shadow
Open BWC_Shelia_EL4 copy paste as new layer add drop shadow
Open BWC_Shelia_EL12 copy paste as new layer resize 80 percent add drop shadow
Open BWC_Shelia_EL36 copy paste as new layer mirror add drop shadow
Open BWC_Shelia_EL15 copy paste as new layer resize 85 percent add drop shadow
Open BWC_Shelia_EL34 copy paste as new layer resize 85 percent add drop shadow
Open BWC_Shelia_EL16 copy paste as new layer resize 80 percent add drop shadow
Open BWC_Shelia_EL35 copy paste as new layer resize 75 percent add drop shadow
Open BWC_Shelia_EL7 copy paste as new layer click in frame with magic wand modify expand by 5
Open BWC_Shelia_PP1 copy paste as new layer invert delete on keyboard drag paper under frame keep selected
open tube copy paste as new layer select none drag tube under frame add drop shadow to frame & tube
Open BWC_Shelia_EL27 copy paste as new layer resize 55 percent add drop shadow
Open tube copy paste as new layer add drop shadow
Add the words Deep Blue Font a_NoterCmDn forground #84b5e1 background #ffffff add drop shadow
Add your name Font Before the Rain forground #84b5e1 background #ffffff add drop shadow
Add your copyright info
resize & save your tag
If you like this Tut check the boxes below Love to see your results please email to me
Thankyou ♥
Written by ©Lyn(akaAngel) 8th Feburary 2014, any similarity to any other tutorial is purely coincidental!
♥ Days Past ♥

To View Tag In Proper Size Click On The Tag
Supplies Needed
PTU Scrapkit by Vickie Days Past
FTU Template 7
Tube of choice im using Elias Chatzoudis this is a PTU Tube
Mask WSL_Mask38 at weescotslass
Font of choice or the one im using is BlackChancery
Lets Get Started
Open template duplicate close original delete Credits
Go to Gray rectangle selection select all float defloat Open LMD_Paper_11 copy paste as new layer invert delete on keyboard select none add drop shadow
Go to Black Strip selection select all float defloat Open DP_pp9_VS copy paste as new layer invert delete on keyboard select none add drop shadow
Go to Gray Back 1 selection select all float defloat Open DP_pp6_VS copy paste as new layer invert delete on keyboard select none
Go to Frame 1 selection select all float defloat Open DP_pp14_VS copy paste as new layer invert delete on keyboard select none add gradient glow #747a88 add drop shadow
Go to Gray Back 2 selection select all float defloat Open DP_pp17_VS copy paste as new layer invert delete on keyboard select none add drop shadow
Go to Frame 2 selection select all float defloat Open DP_pp14_VS copy paste as new layer invert delete on keyboard select none add gradient glow #747a88 add drop shadow
Go to Gray Back 3 selection select all float defloat Open DP_pp1_VS copy paste as new layer invert delete on keyboard keep selected Open DP_el82VS selete on keyboard select none add drop shadow
Go to Frame 3 selection select all float defloat Open DP_pp14_VS copy paste as new layer invert delete on keyboard keep selected delete on keyboard select none add gradient glow #747a88 add drop shadow
Open DP_el114_VS copy paste as new layer resize 75 percent add drop shadow
Open DP_el4_VS copy paste as new layer add drop shadow
Open DP_el57_VS copy paste as new layer rotate 30 percent right add drop shadow
Open DP_el69_VS copy paste as new layer resize 70 percent add drop shadow
Merge all visible resize 85 percent ( making sure all layers not checked )add drop shadow
Open tube copy paste as new layer add drop shadow
Open DP_pp16_VS copy paste as new layer apply maske merge group arrange send to bottom
Add your name Font BlackChancery forground #3e261a background #7c4416 add drop shadow & add gradient glow same as before
Add your copyright info
resize & save your tag
If you like this Tut check the boxes below Love to see your results please email to me
Thankyou ♥
Written by ©Lyn(akaAngel) 7 th Feb 2014, any similarity to any other tutorial is purely coincidental!
♥ Days Gone By ♥

To View Tag In Proper Size Click On The Tag
Supplies Needed
PTU Scrapkit by Vickie Days Past
Tube of choice im using Keith Garvey This is a PTU Tube
Mask WSL_Mask84 at weescotslass
Font of choice or the one im using is LainieDaySH
Lets Get Started
Open new image 750X700
Open DP_pp16_VS copy paste as new layer apply mask merge group
Open DP_el15_VS copy paste as new layer add drop shadow
Open DP_el124_VS copy paste as new layer add drop shadow
Open DP_el13_VS copy paste as new layer resize 70 percent add drop shadow
Open DP_el97_VS copy paste as new layer click in frame with magic wand modify expand by 4
Open DP_pp10_VS copy paste as new layer invert delete on keyboard drag paper under frame keep selected
Open 3 tubes copy each tube paste as new layers delete on keyboard drag each under frame select none add drop shadow to frame
Open DP_el135_VS copy paste as new layer resize 55 percent add drop shadow
Open Main tube copy paste as new layer add drop shadow
Add your name & the words Days Gone By Font LainieDaySH forground #7c98ae background #a89d52 add gradient glow & add drop shadow
Add your copyright info
resize & save your tag
If you like this Tut check the boxes below Love to see your results please email to me
Thankyou ♥
Written by ©Lyn(akaAngel) 7th Feb 2014, any similarity to any other tutorial is purely coincidental!
♥ Wrapped In Love ♥

To View Tag In Proper Size Click On The Tag
Supplies Needed
PTU Scrapkit Wrapped In Love TS By Creative Scraps by Crys
Tube of choice im using Elias Chatzoudis this is a PTU Tube
Mask WSL_Mask10 at weescotslass
Font of choice or the one im using is Valeria Script One
Lets Get Started
Open new image 750X700
Open WIL_Paper_12 copy paste as new layer apply mask merge group duplicate
Open WIL_Frame_4 copy paste as new layer click in frame with magic wand modify expand by 4
Open WIL_Paper_9 copy paste as new layer invert delete on keyboard drag paper under frame select none add drop shadow to frame
Open WIL_Element_55 copy paste as new layer add drop shadow
Open WIL_Element_48 copy paste as new layer add drop shadow
Open WIL_Element_52 copy paste as new layer add drop shadow
Open WIL_Element_11 copy paste as new layer add drop shadow
Open WIL_Element_54 copy paste as new layer resize 70 percent add drop shadow
Open WIL_Element_38 copy paste as new layer 50 percent add drop shadow
Open WIL_Element_17 copy paste as new layer resize 65 percent add drop shadow
Open WIL_Element_12 copy paste as new layer add drop shadow
Add your name Font Valeria Script One forground #af0406 background #f2ecda add drop shadow & add gradient glow
Add your copyright info
resize & save your tag
If you like this Tut check the boxes below Love to see your results please email to me
Thankyou ♥
Written by ©Lyn(akaAngel) 5th Feburary 2014, any similarity to any other tutorial is purely coincidental!
♥ Visions Of Spring ♥

To View Tag In Proper Size Click On The Tag
Supplies Needed
PTU Scrapkit Visions of Spring TS By Creative Scraps by Crys
Mask WSL_Mask84 at weescotslass
Font of choice or the one im using is Before the Rain
Lets Get Started
Open new image 750X700
Open VOS_Paper_7 copy paste as new layer apply mask merge group duplicate image flip mirror
Open VOS_Element_20 copy paste as new layer move down slightly down
Open VOS_Frame_2 copy paste as new layer click in frame with magic wand modify expand by 4
Open VOS_Paper_11 copy paste as new layer invert delete on keyboard drag paper under VOS_Element_20 select none add drop shadow to frame
Open VOS_Element_16 copy paste as new layer duplicate resize 75 percent mirror move back near first one add drop shadow to both
Open VOS_Element_53 copy paste as new layer add drop shadow
Open VOS_Element_51 copy paste as new layer resize 50 percent mirror add drop shadow
Open VOS_Element_58 copy paste as new layer drag under frame add drop shadow
Open VOS_Element_54 copy paste as new layer
Open VOS_Element_32 copy paste as new layer resize 65 percent mirror add drop shadow
Open VOS_Element_60 copy paste as new layer resize 90 percent add drop shadow
Add your name & the words Visions of Spring Font Before the Rain forground #4f9389 background #d7e7e5 add drop shadow & add gradient glow
Add your copyright info
resize & save your tag
If you like this Tut check the boxes below Love to see your results please email to me
Thankyou ♥
Written by ©Lyn(akaAngel) 5th Feburary 2014, any similarity to any other tutorial is purely coincidental!
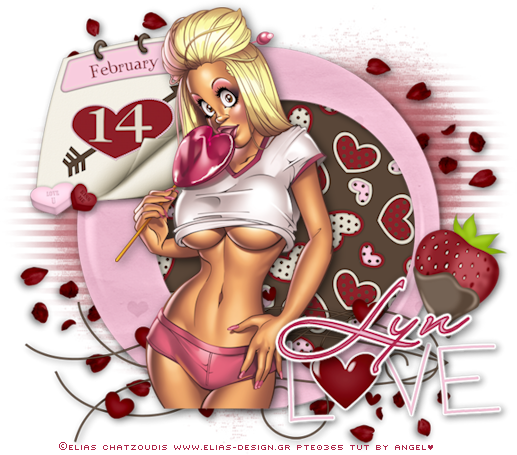
♥ Love ♥
To View Tag In Proper Size Click On The Tag
Supplies Needed
FTU Scrapkit Love Matters By sinfully Creative Dcraps
Tube of choice im using Elias Chatzoudis this is a PTU Tube
Mask WSL_Mask10 at weescotslass
Font of choice or the one im using is LainieDaySH
Lets Get Started
Open new image 750X700
Open LM_Paper_5 copy paste as new layer apply mask merge group duplicate merge down
Open LM_Element_28 copy paste as new layer duplicate image flip mirror add drop shadow to both
Open LM_Frame_4 copy paste as new layer click in frame with magic wand modify expand by 4
Open LM_Paper_1 copy paste as new layer invert delete on keyboard drag paper under frame select none add drop shadow to frame
Open LM_Element_18 copy paste as new layer resize 55 percent mirror add drop shadow
Open LM_Element_8 copy paste as new layer add drop shadow
Open LM_Element_15 copy paste as new layer resize 55 percent add gradient glow & add drop shadow
Open LM_Element_25 copy paste as new layer resize 45 percent add drop shadow
Open tube copy paste as new layer add drop shadow
Add your name Font LainieDaySH forground #af274a background #ecbacf add gradient glow & add drop shadow
Add your copyright info
resize & save your tag
If you like this Tut check the boxes below Love to see your results please email to me
Thankyou ♥
Written by ©Lyn(akaAngel) 1st Feburary 2014, any similarity to any other tutorial is purely coincidental!
this awesome tag is from Dixie Thankyou ♥

this awesome tag is from Dixie Thankyou ♥
♥ True Love ♥

To View Tag In Proper Size Click On The Tag
Supplies Needed
PTU Scrapkit Love so True By Vickie
Tube of choice im using Elias Chatzoudis this is a PTU Tube
Mask WSL_Mask84 at weescotslass
Font of choice or the one im using is Rain
Lets Get Started
Open new image 750X700
Open LST_pp4_VS copy paste as new layer apply mask merge group duplicate merge down
Open LST_EL57_VS copy paste as new layer rotate 80 right percent add drop shadow
Open LST_EL50_VS copy paste as new layer click in frame with magic wand modify expand by 4
Open LST_pp1_VS copy paste as new layer invert delete on keyboard drag paper under frame select none add drop shadow to frame
Go back to LST_EL50_VS select all float defloat Open LST_pp5_VS copy paste as new layer invert select none add drop shadow
Open LST_EL63_VS copy paste as new layer resize 85 percent mirror add drop shadow
Open LST_EL29_VS copy paste as new layer resize 45 percent add drop shadow
Open LST_EL97_VS copy paste as new layer resize 65 percent add drop shadow
Open LST_EL102_VS copy paste as new layer resize 65 percent add drop shadow
Open LST_EL77_VS copy paste as new layer resize 85 percent add drop shadow
Open tube copy paste as new layer drag this under frame duplicate bring to top erase slightly go back to bottom tube add drop shadow
Add your name & the words True Love Font Before the Rain forground #7d4b4f background #af274a add gradient glow & add drop shadow
Add your copyright info
resize & save your tag
If you like this Tut check the boxes below Love to see your results please email to me
Thankyou ♥
Written by ©Lyn(akaAngel) 1st Feburary 2014, any similarity to any other tutorial is purely coincidental!
This Awesome tag is by Deb Thankyou ♥


This Awesome tag is by Deb Thankyou ♥
This Awesome tag is by Dixie Thankyou ♥
Subscribe to:
Posts (Atom)


