♥ Welcome ♥

♥ My Blinkie ♥

♥ Choco Swirl ♥

To View Tag In Proper Size Click On The Tag
Supplies Needed
Scrapkit by Stef's Scrapkits Called Hot Chocolate this is FTU
Here
Tube of choice im using © ©Elias Chatzoudis to purchase tubes go to PTE Here
All my tubes are a guide if the tubes i select are unavailble please use another tube of your liking thankyou
Template12 by Becky this is FTU you can grab it
Here
Mask WSL_Mask178 at weescotslass
Here
Font of choice or the one im using is Boxing Brophius,A&S Snapper Script
Lets Get Started
Open template duplicate close the original canvas size 650 x 600 delete TOU info & white background layer
Open Paper11_HotChocolate_Stef#sScrapkits1 copy paste as new layer apply mask merge group send this to bottom
Open Glitter02_HotChocolate_Stef'sScrapkits copy paste as new layer
Go To Grey Circle select all float defloat Open Paper16_HotChocolate_Stef'sScrapkits copy paste as new layer select invert delete on keyboard select none add drop shadow
Go To large black circle select all float defloat Open Paper12_HotChocolate_Stef'sScrapkits copy paste as new layer select invert delete on keyboard select none
Go to ring with hearts select all float defloat Open Paper10_HotChocolate_Stef'sScrapkits copy paste as new layer select invert delete on keyboard select none add drop shadow
Go to large star select all float defloat Open Paper03_HotChocolate_Stef'sScrapkits copy paste as new layer select invert delete on keyboard select none add drop shadow
Go to sm.gray star2 select all float defloat Open Paper04_HotChocolate_Stef'sScrapkits copy paste as new layer select invert delete on keyboard select none add drop shadow
Go to sm.gray star1 select all float defloat Open Paper04_HotChocolate_Stef'sScrapkits copy paste as new layer select invert delete on keyboard select none add drop shadow
Go to sm. white star select all float defloat Open Paper04_HotChocolate_Stef'sScrapkits copy paste as new layer select invert delete on keyboard select none add drop shadow
Go to heart2 select all float defloat Open Paper13_HotChocolate_Stef'sScrapkits copy paste as new layer select invert delete on keyboard select none add drop shadow
Go to heart1 select all float defloat Open Paper13_HotChocolate_Stef'sScrapkits copy paste as new layer select invert delete on keyboard select none add drop shadow
Go to large white star select all float defloat Open Paper13_HotChocolate_Stef'sScrapkits copy paste as new layer select invert delete on keyboard select none add drop shadow
Open Lollipop02_HotChocolate_Stef'sScrapkits copy paste as new layer resize 20 percent duplicate image rotate 20 right add drop shadow
Open BonBon01_HotChocolate_Stef'sScrapkits copy paste as new layer resize 55 percent image rotate 20 percent mirror duplicate resize 75 percent add drop shadow
Open Chocolate_HotChocolate_Stef'sScrapkits copy paste as new layer resize 15 percent image rotate right 20 percent duplicate mirror resize this one at 75 percent add drop shadow
Open tube copy paste as new layer add drop shadow
Add the words Choco Swirl Font Boxing Brophius forground #4c3e26 background #a7645c
effects 3d effects inner bevel with this setting

effects texture texture effects with this setting

add drop shadow
Add your name Font A&S Snapper Script forground #4c3e26 background #a7645c repeat inner bevel & texture as before add drop shadow
Add your copyright info
resize & save your tag
Love to see your result please email to me
If you like this Tut check the boxes below Love to see your results please email to me
Thankyou ♥
Written by ©Lyn(akaAngel) 30th October 2011, any similarity to any other tutorial is purely coincidental!
This awesome result is from Dixie thankyou ♥


♥ Sweet ♥

To View Tag In Proper Size Click On The Tag
Supplies Needed
Scrapkit by Artmama Called Pour Some Sugar On Me this is FTU Here
Tube of choice im using © ©Elias Chatzoudis to purchase tubes go to PTE Here
All my tubes are a guide if the tubes i select are unavailble please use another tube of your liking thankyou
Template106 by Becky this is FTU you can grab it Here
Mask WSL_Mask137 at weescotslass Here
Font of choice or the one im using is Do I like Stripes?
Lets Get Started
Open template duplicate close the original canvas size 650 x 600 delete raster1 layer & white background layer
Open Artmama-PSSOM 01 copy paste as new layer apply mask merge group duplicate merge down send this to bottom
Go To rectangle scallop select all float defloat Open Artmama-PSSOM 02 copy paste as new layer select invert delete on keyboard select none add drop shadow
Go To rectangle2 select all float defloat Open Artmama-PSSOM 01 copy paste as new layer select invert delete on keyboard select none
Go to rectangle1 background select all float defloat Open Artmama-PSSOM 15 copy paste as new layer select invert delete on keyboard select none add drop shadow
Go to rectangle1 select all float defloat Open Artmama-PSSOM 06 copy paste as new layer select invert delete on keyboard select none add drop shadow
Go to circle scallop select all float defloat Open Artmama-PSSOM 15 copy paste as new layer select invert delete on keyboard select none add drop shadow
Go to circle select all float defloat Open Artmama-PSSOM 01 copy paste as new layer select invert delete on keyboard select none
Go to frame fill select all float defloat Open Artmama-PSSOM 07 copy paste as new layer select invert delete on keyboard Keep selected open tube copy paste as new layer delete on keyboard select none add drop shadow
Go to frame select all float defloat Open Artmama-PSSOM 03 copy paste as new layer select invert delete on keyboard select none add drop shadow
Open Artmama-PSSOM embellie 48 copy paste as new layer add drop shadow
Open Artmama-PSSOM embellie 49 copy paste as new layer resize 55 percent image rotate 20 right add drop shadow
Open Artmama-PSSOM embellie 52 copy paste as new layer resize 65 percent mirror add drop shadow
Open Artmama-PSSOM embellie 72 copy paste as new layer duplicate mirror this one put to top add drop shadow
Add your name & the word Sweet Font Do I like Stripes? forground #9b1745 background #d15e7a add drop shadow
Add your copyright info
resize & save your tag
Love to see your result please email to me
If you like this Tut check the boxes below Love to see your results please email to me
Thankyou ♥
Written by ©Lyn(akaAngel) 29th October 2011, any similarity to any other tutorial is purely coincidental!
♥ Edward ♥

To View Tag In Proper Size Click On The Tag
Supplies Needed
Scrapkit By addictivepleasures called Edward This is FTU
Here
Tube of choice im using ©Zindy Nielson This is FTU TUBE
Here
All my tubes are a guide if the tubes i select are unavailble please use another tube of your liking thankyou
Mask WSL_Mask84 at weescotslass
Here
Font of choice or the one im using is AlicoScriptSSK
Lets Get Started
Open new image 650x550
Open p8 copy paste as new layer apply mask merge group
Open clouds copy paste as new layer resize 95 percent
Open tree2 copy paste as new layer resize 85 percent
Open glitter copy paste as new layer
Open frame2 copy paste as new layer resize 83 percent click in the frames with magic wand modify expand by 10
Open p3 copy paste as new layer invert delete on keyboard drag under frame keep selected Open paperquotes copy paste as new layer delete on keyboard repeat this select none merge down lower opacity 12 blend mode Luminance (L) go back to frame add drop shadow
Open flower copy paste as new layer resize 63 percent add drop shadow
Go back to frame click top frame with magic wand modify expand by 10 open tube copy paste as new layer add drop shadow
Repeat this will other part of tube & frame drag both tubes under frame
Open oldtag copy paste as new layer resize 55 percent image rotate 20 right add drop shadow
Add your name Font AlicoScriptSSK forground #907962 background #977753 add drop shadow
Add your copyright info
resize & save your tag
If you like this Tut check the boxes below Love to see your results please email to me
Thankyou ♥
Written by ©Lyn(akaAngel) 28th October 2011, any similarity to any other tutorial is purely coincidental!
This is an awesome result from Deb thankyou ♥

♥ Our Love ♥

To View Tag In Proper Size Click On The Tag
Supplies Needed
Scrapkit By addictivepleasures called Edward this is FTU
Here
Tube of choice im using ©Zindy Nielson This is FTU TUBE
Here
All my tubes are a guide if the tubes i select are unavailble please use another tube of your liking thankyou
Mask WSL_Mask84 at weescotslass
Here
Font of choice or the one im using is Valeria Script One, Voluta Script Pro
Lets Get Started
Open new image 650x550
Open p8 copy paste as new layer apply mask merge group
Open frame4 copy paste as new layer resize 83 percent with selection tool go around frame
Open p11 copy paste as new layer invert delete on keyboard drag under frame keep selected Open tube copy paste as new layer delete on keyboard drag under frame
Open leaves copy paste as new layer duplicate mirror arrange on tag add drop shadow
Open Ivy copy paste as new layer resize 95 add gradient glow add drop shadow
Open candles copy paste as new layer resize 75 add drop shadow
Open Moon copy paste as new layer resize 44 percent adjust colorize hue 14 saturation 48 add drop shadow
Add your name Font Valeria Script One forground #822f2d background #251d14 add gradient glow & add drop shadow
Add the words Our Love Font Voluta Script Pro One forground #822f2d background #251d14 add drop shadow
Add your copyright info
resize & save your tag
If you like this Tut check the boxes below Love to see your results please email to me
Thankyou ♥
Written by ©Lyn(akaAngel) 28th October 2011, any similarity to any other tutorial is purely coincidental!
♥ Rock N Roll Summer ♥

Supplies Needed
Scrapkit ROCK N ROLL SUMMER By Scraps Dimensions FTU Here
Template 43 By Scraps Dimensions FTU Here
Tube of choice im using ©Popeye Wong this is FTU Here
All my tubes are a guide if the tubes i select are unavailable please use another tube of your liking thankyou
Mask WSL_Mask84 at weescotslass
Here
Font of choice or the one im using is Do I like Stripes?
Lets Get Started
Open Template duplicate close original resize 55 percent then image canvas size 750x550
Open SD RNR PAPER 8 copy paste as new layer apply mask merge group duplicate merge down arrange send to bottom
Go to Raster 4 select all float defloat Open SD RNR PAPER 7 copy paste as new layer invert delete on keyboard select none
Go to raster 7 add gradient glow & add drop shadow
Go to Raster 8 select all float defloat Open SD RNR PAPER 9 copy paste as new layer invert delete on keyboard select none add drop shadow
Go to Raster 5 select all float defloat Open SD RNR PAPER 2 copy paste as new layer invert delete on keyboard select none add drop shadow
Go to Raster 3 select all float defloat Open SD RNR PAPER 2 copy paste as new layer invert delete on keyboard select none add drop shadow
Go to Raster 2 select all float defloat Open SD RNR PAPER 7 copy paste as new layer invert delete on keyboard select none add drop shadow
Go to raster 6 add drop shadow
Open SD RNR SHAKE copy paste as new layer add drop shadow
Open SD RNR BANNER copy paste as new layer resize 70 percent add drop shadow
Open SD RNR DINER SIGN copy paste as new layer resize 35 percent add drop shadow
Open SD RNR GUITAR copy paste as new layer resize 65 percent mirror add drop shadow
Open tube copy paste as new layer add drop shadow
Open SD RNR RADIO copy paste as new layer resize 45 mirror percent add drop shadow
Add your name Font Do I like Stripes? forground #f03bf0 background #eb7cfd add drop shadow & add gradient glow
Add your copyright info
resize & save your tag
If you like this Tut check the boxes below Love to see your results please email to me
Thankyou ♥
Written by ©Lyn(akaAngel) 27th October 2011, any similarity to any other tutorial is purely coincidental!
♥ Hallo Scream ♥

Supplies Needed
Scrapkit By Justine Under HALLOWEEN KITS The Kit is called Hallo Scream
Here
Tube of choice im using ©Bam Bam i brought my Tube & License through MPT you can buy tubes at PTE Here
All my tubes are a guide if the tubes i select are unavailable please use another tube of your liking thankyou
Mask WSL_Mask84 at weescotslass
Here
Font of choice or the one im using is Syphon Spritz
Lets Get Started
Open Paper2 copy paste as new layer apply mask merge group duplicate move this slightly down
Open Sticker copy paste as new layer blend mode Luminace (L) lower opacity 28 add drop shadow
Open Glitter Trail copy paste as new layer add drop shadow
Open Frame copy paste as new layer add drop shadow
Open Bunny copy paste as new layer resize 75 percent add drop shadow
Open Pumpkin copy paste as new layer resize 45 percent add drop shadow
Open Skull2 copy paste as new layer resize 35 percent add drop shadow
Open tube copy paste as new layer add drop shadow
Add your name Font Syphon Spritz forground #b15400 background #dc7b07 add drop shadow & add gradient glow
Add your copyright info
resize & save your tag
If you like this Tut check the boxes below Love to see your results please email to me
Thankyou ♥
Written by ©Lyn(akaAngel) 18th October 2011, any similarity to any other tutorial is purely coincidental!
This is awesome result from Vickie Thankyou ♥

♥ Hope Stength Cure Love ♥

To View Tag In Proper Size Click On The Tag
Supplies Needed
Scrapkit By Shal under BREAST CANCER AWARENESS kit is called Be A Fighter
Here
Template By LadyT
Here
Tube of choice im using ©Viktor Jung i brought my Tube & License through MPT im sorry im not sure where you can buy this tube since MPT closing
All my tubes are a guide if the tubes i select are unavailable please use another tube of your liking thankyou
Mask WSL_Mask10 at weescotslass
Here
Font of choice or the one im using is A&S Black Swan
Lets Get Started
Open Template canvas size 650x550 delete background layer & Vector 1
Open SW_Fighter Papers 8 copy paste as new layer apply mask merge group arrange send to bottom
Go to pinkcircle select all float defloat Open SW_Fighter Papers 10 copy paste as new layer invert delete on keyboard select none add drop shadow
Go to circlewordart add gradient glow & add drop shadow
Go to glitterrectangle select all float defloat Open SW_Fighter Papers 11 copy paste as new layer invert delete on keyboard select none add drop shadow
Go to rectangle select all float defloat Open SW_Fighter Papers 3 copy paste as new layer invert delete on keyboard select none add drop shadow
Go to breastcancer select all float defloat Open SW_Fighter Papers 7 copy paste as new layer invert delete on keyboard select none add gradient glow & add drop shadow
Go to lowerdiamondline add drop shadow
Go to upperdiamondline add drop shadow
Open SW_Fighter Spiral 1 copy paste as new layer
Open SW_Fighter Doodle 2 duplicate image flip mirror merge down add drop shadow arrange send to bottom
Open SW_Fighter Element 4 copy paste as new layer resize 75 percent image rotate 25 percent add drop shadow
Open SW_Fighter Element 10 copy paste as new layer add drop shadow
Open SW_Fighter Element 5 copy paste as new layer resize 55 percent add drop shadow
Open tube copy paste as new layer add drop shadow
Add your name Font A&S Black Swan forground #e74fb9 background #ffffff add drop shadow
Add your copyright info
resize & save your tag
If you like this Tut check the boxes below Love to see your results please email to me
Thankyou ♥
Written by ©Lyn(akaAngel) 18th October 2011, any similarity to any other tutorial is purely coincidental!
these two result are from Vickie these are awesome Thankyou ♥


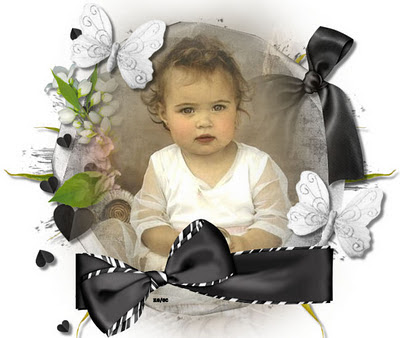
♥ Black and White ♥

To View Tag In Proper Size Click On The Tag
Supplies Needed
Scrapkit Black and White Theme By Mirella
Here
Tube of choice im using ©scarlet Gothic
Here
All my tubes are a guide if the tubes i select are unavailble please use another tube of your liking thankyou
Mask WSL_Mask178 at weescotslass
Here
Font of choice or the one im using is AlicoScriptSSK
Lets Get Started
Open new image 650x550
Open SSAM_BNW_Paper17 copy paste as new layer apply mask merge group
Open SSAM_BNW_Element60 copy paste as new layer resize 85 percent duplicate mirror merge down add drop shadow
Open SSAM_BNW_Paper19 copy paste as new layer invert delete on keyboard select none drag under frame
Open SSAM_BNW_Element40 copy paste as new layer resize 85 percent
Open SSAM_BNW_Element2 copy paste as new layer resize 75 percent add drop shadow
Open SSAM_BNW_Element52 copy paste as new layer resize add drop shadow
Open SSAM_BNW_Element7 copy paste as new layer resize 85 percent add drop shadow
Open SSAM_BNW_Element45 copy paste as new layer resize 36 percent image rotate 20 percent duplicate resize 80 percent add drop shadow
Open tube copy paste as new layer add drop shadow
Add your name Font AlicoScriptSSK forground #000000 background #ffffff add drop shadow
Add your copyright info
resize & save your tag
If you like this Tut check the boxes below Love to see your results please email to me
Thankyou ♥
Written by ©Lyn(akaAngel) 18th October 2011, any similarity to any other tutorial is purely coincidental!
This a lovely result from Kortney Thankyou ♥

♥Spring ♥

To View Tag In Proper Size Click On The Tag
Supplies Needed
Scrapkit By Scraps Dimensions called Spring Hope
Here
Tube of choice i used FTU ©Lia
Here
All my tubes are a guide if the tubes i select are unavailable please use another tube of your liking thankyou
Mask WSL_Mask38 at weescotslass
Here
Font of choice or the one im using is Mr Sheffield
Lets Get Started
Open new image 650x550
Open SH PAPER 6 copy paste as new layer apply mask merge group
Open SH TREE 1 copy paste as new layer resize 65 percent
Open SH DOOR copy paste as new layer resize 54 percent click in the door frame with magic wand modify expand by 3
Open SH PAPER 5 copy paste as new layer invert delete on keyboard select none drag under door
Go back to the door layer click in the frames with magic wand modify expand by 3
Open SH PAPER 7 copy paste as new layer invert delete on keyboard select none drag under door add drop shadow to door
Open SH FLOWERS copy paste as new layer add drop shadow
Go back to the door duplicate go back to flowers erase slightly see my tag for reference
Open SH CALLA LILY 2 copy paste as new layer resize 55 percent add drop shadow
Open SH WA 1 copy paste as new layer resize 45 percent add drop shadow
Open SH DOVE copy paste as new layer resize 20 percent add drop shadow
Open tube copy paste as new layer add drop shadow
Add your name Font Mr Sheffield forground #db6a02 background #ffffff add drop shadow
Add your copyright info
resize & save your tag
If you like this Tut check the boxes below Love to see your results please email to me
Thankyou ♥
Written by ©Lyn(akaAngel) 18th October 2011, any similarity to any other tutorial is purely coincidental!
♥ At The Farm ♥

To View Tag In Proper Size Click On The Tag
Supplies Needed
Scrapkit By Scraps Dimensions Called At The Farm this is FTU Here
Tube of choice im using ©Popeye Wong Here
All my tubes are a guide if the tubes i select are unavailable please use another tube of your liking thankyou
Mask WSL_Mask84 at weescotslass Here
Font of choice or the one im using is Mr Lackboughs
Lets Get Started
Open new image 650x550
Open SD ATF PAPER 8 copy paste as new layer apply mask merge group
Open CreatedbyJill_ThrillerSampler_wire copy paste as new layer resize 120 percent add drop shadow
Open copy paste as new layer resize 75 percent with magic wand click in frame selection modify expand by 5
Open SD ATF PAPER 3 copy paste as new layer invert delete on keyboard drag under frame
open SD ATF FENCE 2 copy paste as new layer drag under frame add drop shadow
Open SD ATF HORSE 1 copy paste as new layer resize 66 percent mirror drag under frame erase horse add drop shadow
Open SD ATF BIRDHOUSE copy paste as new layer resize 75 percent add drop shadow
Open SD ATF GRASS copy paste as new layer resize 65 percent add drop shadow
Open SD ATF FLOWERS 2 copy paste as new layer resize 65 percent add drop shadow
Go back to the grass layer duplicate drag this layer above flowers resize 65 percent add drop shadow
Open SD ATF WATER PUMP copy paste as new layer resize 44 percent add drop shadow
Open SD ATF BIRDBATH copy paste as new layer resize 34 percent add drop shadow
Open SD ATF DOG copy paste as new layer resize 25 percent mirror take back near bird bath add drop shadow
Open SD ATF BIRD copy paste as new layer resize 14 percent duplicate mirror resize 75 percent add drop shadow
open your tube copy paste as new layer add drop shadow
Add your name Font Mr Lackboughs forground #000000 background #8f3c3e add drop shadow
Add your copyright info
resize & save your tag
If you like this Tut check the boxes below Love to see your results please email to me
Thankyou ♥
Written by ©Lyn(akaAngel) 16th October 2011, any similarity to any other tutorial is purely coincidental!
♥ Cool Summer ♥

To View Tag In Proper Size Click On The Tag
Supplies Needed
Scrapkit by Designs By Doris at Scraps Dimensions called Cool Summer this is FTU Here
Tube of choice im using © ©Michael Landefeld I brought my tube & License at CILM which is no longer there to purchase tubes go to CDO Here
All my tubes are a guide if the tubes i select are unavailable please use another tube of your liking thankyou
Font of choice or the one im using is Miss Lankfort
Open 650x550 transparent layer
Go to preset shape eclispe make cirle on layer forground #ffffff background #43a0c2 add drop shadow effects texture effects Blinds 4,10,#000000 both boxes checked
Go to preset shape Rectangle make cirle on layer forground #ffffff background #43a0c2 add drop shadow repeat blinds as above
Open SD CS PALM TREE copy paste as new layer resize 85 percent add drop shadow
Open SD CS SAND copy paste as new layer resize 55 percent
Open SD CS SEA CRITTER 1 copy paste as new layer resize 30 percent duplicate mirror merge down add drop shadow
Open SD CS TIKI BAR copy paste as new layer resize 54 percent add drop shadow
Open SD CS PINEAPPLES copy paste as new layer resize 45 percent add drop shadow
Open SD CS BLIMP copy paste as new layer resize 35 percent add drop shadow
Open SD CS TORCH copy paste as new layer resize 65 percent add drop shadow
Open SD CS PARROT copy paste as new layer resize 24 percent mirror add drop shadow
Open tube copy paste as new layer add drop shadow
Add your name Font Miss Lankfort forground #ffffff Background #43a0c2 add drop shadow
Add your copyright info
resize & save your tag
If you like this Tut check the boxes below Love to see your results please email to me
Thankyou ♥
Written by ©Lyn(akaAngel) 15th October 2011, any similarity to any other tutorial is purely coincidental!
♥ Bad Girl ♥

To View Tag In Proper Size Click On The Tag
Supplies Needed
Scrapkit EMOtionally Misunderstood By Stefs Scrapkits This is a new Collab Kit this is free from 15th October till the 21st October Here
Tube of choice im using © ©Elias Chatzoudis to purchase tubes go to PTE Here
All my tubes are a guide if the tubes i select are unavailable please use another tube of your liking thankyou
Mask WSL_Mask147 at weescotslass Here
Font of choice or the one im using is Valeria Script One
Lets Get Started
Open new image 650x550
Open pap01_EMOtionallyMisunderstood_Stef'sScrapkits copy paste as new layer apply mask merge group
Open ele21_EMOtionallyMisunderstood_Stef'sScrapkits copy paste as new layer resize 75 percent with magic wand click in frames selection modify expand by 4
Open pap05_EMOtionallyMisunderstood_Stef'sScrapkits copy paste as new layer invert delete on keyboard drag under frame keep selected open tube copy paste as new layer delete on keyboard drag under frame select none add drop shadow
Open ele41_EMOtionallyMisunderstood_Stef'sScrapkits copy paste as new layer resize 85 percent add drop shadow
open tube copy paste as new layer add drop shadow
Open ele03_EMOtionallyMisunderstood_Stef'sScrapkits copy paste as new layer resize 35 percent image rotate 20 right add drop shadow
Open ele15_EMOtionallyMisunderstood_Stef'sScrapkits copy paste as new layer resize 35 percent erase see my tag for reference add drop shadow
Open ele34_EMOtionallyMisunderstood_Stef'sScrapkits copy paste as new layer resize 37 percent add drop shadow
Add your name Font Valeria Script One forground #000000 background #a429a4 add gradient glow & add drop shadow
Add your copyright info
resize & save your tag
If you like this Tut check the boxes below Love to see your results please email to me
Thankyou ♥
Written by ©Lyn(akaAngel) 15th October 2011, any similarity to any other tutorial is purely coincidental!
Result by Deb thankyou this is awesome ♥

Result by Vickie thankyou this is awesome ♥

♥ Lurking In The Dark ♥

To View Tag In Proper Size Click On The Tag
Supplies Needed
Scrapkit Creative By Jill "THRILLER" BLOG TRAIN FREEBIE Here
Tube of choice im using © ©Cris Ortega Here
All my tubes are a guide if the tubes i select are unavailable please use another tube of your liking thankyou
Mask WSL_Mask84 at weescotslass Here
Font of choice or the one im using is Do I like Stripes?
Lets Get Started
Open new image 650x550
Open CreatedbyJill_ThrillerSampler_paper03 copy paste as new layer apply mask merge group
Open CreatedbyJill_ThrillerSampler_wire copy paste as new layer resize 120 percent add drop shadow
Open CreatedbyJill_ThrillerSampler_frame1 copy paste as new layer resize 70 percent with magic wand click in frame selection modify expand by 6
Open CreatedbyJill_ThrillerSampler_paper04 copy paste as new layer invert delete on keyboard drag under frame
Open CreatedbyJill_ThrillerSampler_framewrap copy paste as new layer resize 65 percent add drop shadow
open tube copy paste as new layer add drop shadow
Open CreatedbyJill_ThrillerSampler_tree copy paste as new layer resize 75 percent add drop shadow
Open CreatedbyJill_ThrillerSampler_spider copy paste as new layer resize 85 percent add drop shadow
Open CreatedbyJill_ThrillerSampler_bow2 copy paste as new layer resize 70 percent add drop shadow
Open CreatedbyJill_ThrillerSampler_candle copy paste as new layer resize 75 percent add drop shadow
Open CreatedbyJill_ThrillerSampler_wordart copy paste as new layer resize 65 percent add drop shadow
Add your name Font Do I like Stripes? forground #ffffff background #000000 add drop shadow
Add your copyright info
resize & save your tag
If you like this Tut check the boxes below Love to see your results please email to me
Thankyou ♥
Written by ©Lyn(akaAngel) 15th October 2011, any similarity to any other tutorial is purely coincidental!
This an awesome result from Vickie thankyou ♥

This an awesome result from Sue thankyou ♥

This an awesome result from Lynne thankyou ♥

♥ Something Evil ♥


To View Tag In Proper Size Click On The Tag
Supplies Needed
Scrapkit Creative By Jill "THRILLER" BLOG TRAIN FREEBIE Here
Tube of choice im using © ©Elias Chatzoudis to purchase tubes go to PTE Here
All my tubes are a guide if the tubes i select are unavailable please use another tube of your liking thankyou
Font of choice or the one im using is OkrienHmkBold
Lets Get Started
Open a new transparent image 600 x 250
Open CreatedbyJill_ThrillerSampler_paper03 copy paste as new layer
Open CreatedbyJill_ThrillerSampler_paper01 copy paste as new layer lower opacity 55
Open CreatedbyJill_ThrillerSampler_tree copy paste as new layer add drop shadow
Open CreatedbyJill_ThrillerSampler_stitches copy paste as new layer duplicate image flip merge down add drop shadow
Open CreatedbyJill_ThrillerSampler_wordart copy paste as new layer resize 60 percent add drop shadow
Open your 2 tubes copy paste as new layer with one of your tubes blend mode Luminance Legacy add drop shadow
Open CreatedbyJill_ThrillerSampler_spider copy paste as new layer add drop shadow
Add your name Font OkrienHmkBold forground #ffffff background #000000 add drop shadow
Now onto the Avatar
Open a new transparent image 150 x 150
Open CreatedbyJill_ThrillerSampler_paper03 copy paste as new layer
Open CreatedbyJill_ThrillerSampler_paper01 copy paste as new layer lower opacity 55
Open CreatedbyJill_ThrillerSampler_tree copy paste as new layer add drop shadow
Open your tube copy paste as new layer add drop shadow
Add your Initial of your name Font OkrienHmkBold forground #ffffff background #000000 add drop shadow
Add your copyright info on both tags
image add border 7 on all sides #000000 on both tags
resize both your tags & save your tag
If you like this Tut check the boxes below Love to see your results please email to me
Thankyou ♥
Written by ©Lyn(akaAngel) 14th October 2011, any similarity to any other tutorial is purely coincidental!
This result done by Deb its awesome thankyou ♥


♥ Punkky ♥

To View Tag In Proper Size Click On The Tag
Supplies Needed
Scrapkit Punkky Kit By addictivepleasures Here
Templates by Tamie Here & Here
Tube of choice im using ©Lady Mishka i brought my license & tube at PTE you can purchase tubes at picsfordesign Here
All my tubes are a guide if the tubes i select are unavailable please use another tube of your liking thankyou
Mask WSL_Mask 178 at weescotslass Here
Font of choice or the one im using is Neural BRK
Lets Get Started
Open Template duplicate close original delete background layer & raster 15
Go to Raster 5 select all float defloat Open copy p10 paste as new layer invert delete on keyboard select none
Go to Raster 14 select all float defloat Open copy p7 paste as new layer invert delete on keyboard select none add drop shadow
Go to Copy of Raster 14 select all float defloat Open copy p7 paste as new layer invert delete on keyboard select none add drop shadow
Go to Raster 6 add drop shadow
Go to Raster 4 select all float defloat Open copy p8 paste as new layer invert delete on keyboard select none
Go to Copy Raster 4 select all float defloat Open copy p8 paste as new layer invert delete on keyboard select none
Go to Raster 7 add drop shadow
Go to Copy of Raster 7 add drop shadow
Go to Raster 3 select all float defloat Open copy p9 paste as new layer invert delete on keyboard select none add drop shadow
Go to Raster 8 select all float defloat Open copy p10 paste as new layer invert delete on keyboard select none add drop shadow add a gradient glow
Go to Raster 1 select all float defloat Open copy p4 paste as new layer invert delete on keyboard select none add drop shadow
Go to Raster 2 select all float defloat Open copy p6 paste as new layer invert delete on keyboard select none add drop shadow
Go to Raster 10 add gradient glow & add drop shadow
Go to Copy of Raster 10 add gradient glow & add drop shadow
Go to Raster 11 add gradient glow & add drop shadow
Go to Copy of Raster 11 add gradient glow & add drop shadow
Go to Raster 9 select all float defloat Open copy p8 paste as new layer invert delete on keyboard select none add drop shadow & add gradient glow
Go to Raster 12 select all float defloat Open copy p1 paste as new layer invert delete on keyboard select none add gradient glow & add drop shadow
Go to Raster 13 select all float defloat Open copy p1 paste as new layer invert delete on keyboard select none add gradient glow & add drop shadow
Open p7 copy paste as new layer apply mask merge group arrange send to bottom
Open swirldoodle copy paste as new layer duplicate mirror merge down add drop shadow
Open glitter copy paste as new layer duplicate mirror
Open guitarpick copy paste as new layer resize 45 percent add drop shadow
Open lollipop copy paste as new layer resize 75 percent image rotate 20 left add drop shadow
Open keychain copy paste as new layer resize 65 percent add drop shadow
resize all layers 90 percent
Open tube copy paste as new layer add drop shadow
Add your name Font Neural BRK forground #8538de background #ff008f add drop shadow
Add your copyright info
If you like this Tut check the boxes below Love to see your results please email to me
Thankyou ♥
Written by ©Lyn(akaAngel) 14th October 2011, any similarity to any other tutorial is purely coincidental!
♥ Celebrate Life ♥

To View Tag In Proper Size Click On The Tag
Supplies Needed
Scrapkit Breast Cancer Awareness Scrap Kit By Clarey Here
if you get an add up just skip the Add
Tube of choice im using © ©Elias Chatzoudis to purchase tubes go to PTE Here
All my tubes are a guide if the tubes i select are unavailable please use another tube of your liking thankyou
Mask WSL_Mask84 at weescotslass Here
Font of choice or the one im using is Ruth Script
Lets Get Started
Open new image 650x550
Open clarey_awareness_paper5 copy paste as new layer apply mask merge group duplicate move slightly to right merge down
Open clarey_awareness_wordart1 copy paste as new layer resize 110 percent add drop shadow
Open clarey_awareness_notepaper3 copy paste as new layer add drop shadow
Open close up tube copy paste as new layer resize 85 percent mirror lower opacity 51 add drop shadow
Open clarey_awareness_bracelet copy paste as new layer resize 55 percent adjust sharpen image rotate 20 percent add drop shadow
Open clarey_awareness_wordart3 copy paste as new layer add drop shadow
Open clarey_awareness_button5 copy paste as new layer add drop shadow
Open tube copy paste as new layer add drop shadow
Add your name Font PassionsConflictROB forground #ffe9fa background #fe99cbadd drop shadow
Add your copyright info
resize & save your tag
If you like this Tut check the boxes below Love to see your results please email to me
Thankyou ♥
Written by ©Lyn(akaAngel) 14th October 2011, any similarity to any other tutorial is purely coincidental!
♥ Kiss Me ♥

To View Tag In Proper Size Click On The Tag
Supplies Needed
Scrapkit Bee in Love By kookycatdesigns Here
Tube of choice im using © ©Keith Garvey to purchase tubes go to PTE Here
All my tubes are a guide if the tubes i select are unavailable please use another tube of your liking thankyou
Mask WSL_Mask167 at weescotslass Here
Font of choice or the one im using is Ruth Script
Lets Get Started
Open new image 650x550
Open KCD_paperred copy paste as new layer apply mask merge group duplicate move slightly to right merge down
Open KCD_framewhearts copy paste as new layer resize 30 percent click in frame with magic wand selection modify by 6
Open KCD_paperpinkwtext copy paste as new layer resize 35 percent drag under frame open KCD_hearts resize 25 percent delete on keyboard select none add drop shadow to hearts & frame
Open KCD_flower1 copy paste as new layer resize 10 percent add drop shadow
Open KCD_flower2 copy paste as new layer resize 20 percent then again at 85 percent arrange on tag duplicate merge down add drop shadow
Open KCD_beewtrail copy paste as new layer resize 25 percent add drop shadow
Open tube copy paste as new layer add drop shadow
Open KCD_tag3 copy paste as new layer resize 20 percent image rotate 20 percent left add drop shadow
Go back to frame click in middle with magic wand modify expand by 6 Open KCD_hills2 copy paste as new layer resize 15 percent selection invert delete on keyboard drag this under the hearts
Add your name Font Ruth Script forground #ce3132 background #8f0f0e add drop shadow
Add your copyright info
resize & save your tag
If you like this Tut check the boxes below Love to see your results please email to me
Thankyou ♥
Written by ©Lyn(akaAngel) 14th October 2011, any similarity to any other tutorial is purely coincidental!
This is an Awesome result from Marie .. aka Dustyrose Thankyou ♥


♥ Play Now Or Later ♥

To View Tag In Proper Size Click On The Tag
Supplies Needed
Scrapkit You Brighten Up My Life By kookycatdesigns Here
Tube of choice im using © ©Elias Chatzoudis to purchase tubes go to PTE Here
All my tubes are a guide if the tubes i select are unavailable please use another tube of your liking thankyou
Mask WSL_Mask38 at weescotslass Here
Font of choice or the one im using is a_NoterCmDn,Yevida
Lets Get Started
Open new image 650x550
Open KCD_pp9 copy paste as new layer resize 20 percent apply mask merge group duplicate merge down
Open KCD_glitter copy paste as new layer resize 25 percent duplicate mirror flip
Open KCD_framedoodle2 copy paste as new layer resize 25 percent click in frame with magic wand selection modify by 6
Open KCD_pp3 copy paste as new layer resize 15 percent select none drag under frame add drop shadow to frame
Open KCD_pattern copy paste as new layer resize 35 percent drag under frame add drop shadow
Open tube copy paste as new layer add drop shadow
Open KCD_tag2play copy paste as new layer resize 25 percent erase so looks like tag go through the bar add drop shadow
Open KCD_flower8 copy paste as new layer resize 25 percent add drop shadow
Add the words Now Or Later Font a_NoterCmDn forground #b9396f background #f497b4 add drop shadow
Open KCD_flower7 copy paste as new layer resize 20 percent then again at 85 percent arrange on tag duplicate merge down add drop shadow
Add your name Font Yevida forground #b9396f background #f497b4 add drop shadow
Add your copyright info
resize & save your tag
If you like this Tut check the boxes below Love to see your results please email to me
Thankyou ♥
Written by ©Lyn(akaAngel) 13th October 2011, any similarity to any other tutorial is purely coincidental!
♥ You Look Like Lunch ♥

To View Tag In Proper Size Click On The Tag
Supplies Needed
Template By Savage You look like Lunch
Here
Tube of choice im using ©SkyScraps Designs
Here
All my tubes are a guide if the tubes i select are unavailable please use another tube of your liking thankyou
Mask WSL_Mask 178 at weescotslass
Here
Font of choice or the one im using is CRAMPS
Lets Get Started
Open new Template duplicate close original delete credits & Layer 1 canvas size 950 x 850 we will resize later
Go to rectangle back select all float defloat new raster layer flood fill #657288 select none add drop shadow
Go to rectangle select all float defloat new raster layer flood fill #6a0e11 select none effects texture effects Blinds with this setting 4 10 #000000 both boxes checked effects inner bevel with this setting

Go to bars select all float defloat new raster layer flood fill #6a0e11 select none inner bevel same setting as before add drop shadow
Go to circle back select all float defloat new raster layer flood fill #7a090c select none add drop shadow
Go to circle select all float defloat new raster layer flood fill #acc0d6 select none effects texture effects with this setting below

Open the close up tube copy paste erase part of the hair that is overlapping add drop shadow
Go to square 1 back select all float defloat new raster layer flood fill #acc0d6 select none effects blinds same as before add drop shadow
Go to square 1 select all float defloat new raster layer flood fill #6a0e11 select none effects blinds same as before add drop shadow
Go to square 2 back select all float defloat new raster layer flood fill #acc0d6 select none effects blinds same as before add drop shadow
Go to square 2 select all float defloat new raster layer flood fill #6a0e11 select none effects blinds same as before select all float defloat add tube copy paste as new layer invert delete on keyboard
Go to square 3 back select all float defloat new raster layer flood fill #acc0d6 select none effects blinds same as before add drop shadow
Go to square 3 select all float defloat new raster layer flood fill #6a0e11 select none effects blinds same as before add drop shadow
Go to bats add drop shadow
Go to blood add drop shadow
Go to lips with fangs add drop shadow
Go to I Think back add drop shadow
Go to LUNCH back add drop shadow
Go to You Look Like back add drop shadow
Go to Bats duplicate mirror
New raster layer flood fill apply mask merge group arrange send to bottom
Add your name Font CRAMPS forground #6a0e11 background #6a0e11 add gradient glow #ffffff & add drop shadow
Add your copyright info
resize & save your tag
If you like this Tut check the boxes below Love to see your results please email to me
Thankyou ♥
Written by ©Lyn(akaAngel) 13th October 2011, any similarity to any other tutorial is purely coincidental!
This result from Dana J this is awesome thankyou ♥

Melinda made this for her friend this is great Thankyou ♥

This result is from Sue this is Awesome Thankyou ♥

This result is from Kortney this is Awesome Thankyou ♥

This result is from Vickie this is Awesome Thankyou ♥

♥ City Slickers ♥

To View Tag In Proper Size Click On The Tag
Supplies Needed
Scrapkit City Slickers By every day mom ideas
Here
Tube of choice im using © ©Elias Chatzoudis to purchase tubes go to PTE Here
All my tubes are a guide if the tubes i select are unavailable please use another tube of your liking thankyou
Mask WSL_Mask145 at weescotslass
Here
Font of choice or the one im using is Carpenter Script
Lets Get Started
Open new image 650x550
Open city slicker paper 16 copy paste as new layer resize 25percent apply mask merge group
Open city scape copy paste as new layer resize 25 percent with pick tool bring in on both sides
Open chic umbrella copy paste as new layer resize 55 percent image rotate 18 left add drop shadow
Open city camera copy paste as new layer resize 15 percent add drop shadow
Open tube copy paste as new layer add drop shadow
Open city slickers word art copy paste as new layer resize 35 percent add drop shadow
Open trafic sign paper copy paste as new layer resize 25 percent with magic wand click in the frame bits modify by 6 Open tube copy paste as new layer resize 80 percent invert delete on keyboard select none drag under the frame add drop shadow
Open TabCluster-GI_StrawberryWine copy paste as new layer resize 67 percent image rotate 14 right add drop shadow
Add your name Font Carpenter Script forground #000000 background #ffffff add gradient glow #ffffff & add drop shadow
Add the words Do it in Style Font Carpenter Script forground #ffffff background #000000 add gradient glow #000000 & add drop shadow
Add your copyright info
resize & save your tag
If you like this Tut check the boxes below Love to see your results please email to me
Thankyou ♥
Written by ©Lyn(akaAngel) 13th October 2011, any similarity to any other tutorial is purely coincidental!
This is an awesome result from Vickie Thankyou ♥

This is an awesome result from Dixie Thankyou ♥

This is the lovely results from Kaye Thankyou ♥

♥ Sweet ♥

To View Tag In Proper Size Click On The Tag
Supplies Needed
Scrapkit By Gothic Inspirations called Strawberry Wine
Here
Tube of choice im using © ©Elias Chatzoudis to purchase tubes go to PTE
Here
All my tubes are a guide if the tubes i select are unavailable please use another tube of your liking thankyou
Mask WSL_Mask84 at weescotslass
Here
Font of choice or the one im using is Do I like Stripes?
Lets Get Started
Open new image 650x550
Open Paper1-GI_StawberryWine copy paste as new layer apply mask merge group
Open Frame5-GI_StrawberryWine copy paste as new layer resize 75 percent with magic wand click in frame modify expand by 10
Open Paper3-GI_StawberryWine copy paste as new layer invert delete on keyboard drag under frame effects texture effects blinds with this setting 10.24 both boxes checked #000000
Open Strawberries-GI_StrawberryWine copy paste as new layer resize 75 percent add drop shadow
Open Hearts-GI_StrawberryWine copy paste as new layer add drop shadow
Open DoodleBling-GI_StrawberryWine copy paste as new layer drag under frame add drop shadow
Open TabCluster-GI_StrawberryWine copy paste as new layer resize 67 percent image rotate 14 right add drop shadow
Open WordArt2-GI_StrawberryWine copy paste as new layer resize 55 percent image rotate 14 right then resize adain at 80 percent add gradient glow add drop shadow
Open tube copy paste as new layer add drop shadow
Add your name Font Do I like Stripes? forground #ffffff background #ffffff effects blinds same setting as before add gradient glow & add drop shadow
Add your copyright info
resize & save your tag
If you like this Tut check the boxes below Love to see your results please email to me
Thankyou ♥
Written by ©Lyn(akaAngel) 13th October 2011, any similarity to any other tutorial is purely coincidental!
♥ Kindness In Blue ♥

To View Tag In Proper Size Click On The Tag
Supplies Needed
Scrapkit By ladyhawwk Kindness In Blue this is FTU
Here
Tube of choice im using © ©Elias Chatzoudis to purchase tubes go to PTE
Here
All my tubes are a guide if the tubes i select are unavailable please use another tube of your liking thankyou
Mask WSL_Mask84 at weescotslass
Here
Font of choice or the one im using is A&S Snapper Script
Lets Get Started
Open new image 650x550
Open LHDBKkindnesspaper3 copy paste as new layer apply mask merge group
Open LHDBKkindnessblueframe1 copy paste as new layer resize 87 percent with selection tool rectangle go around frame
Open LHDBKkindnesspaper7 copy paste as new layer invert delete on keyboard open tube copy paste as new layer delete on keyboard select none drag under tube & frame add drop shadow to frame & tube
Open LHDBKkindnessbluelement18 copy paste as new layer add drop shadow
Open LHDBKkindnessbluelement33 copy paste as new layer image rotate 5 add drop shadow
Open LHDBKkindnessbluelement7 copy paste as new layer resize 65 percent duplicate resize 75 percent mirror add drop shadow
Open LHDBKkindnessbluelement9 copy paste as new layer resize 65 percent add drop shadow
Open LHDBKkindnessbluelement29 copy paste as new layer resize 70 percent add drop shadow
Add your name Font A&S Snapper Script forground #0c4499 background #8ca5ca add drop shadow
Add your copyright info
resize & save your tag
Love to see your results please email to me
Thankyou ♥
Written by ©Lyn(akaAngel) 10th October 2011, any similarity to any other tutorial is purely coincidental!
this is the result from Dixie this is awesome Thankyou ♥

Subscribe to:
Posts (Atom)


